Now that we have created a new document type, we need to prepare the transformations that will be used for displaying product details in list and in detail view.
In the Computer document type properties dialog, click the Transformations tab:
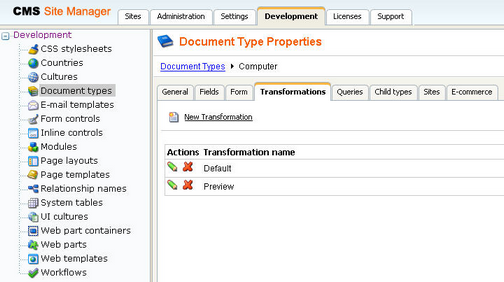
As you can see, the wizard has created some default transformation. We will use it for our detail view. Click Edit and enter the following code:
<h1><%# Eval("ComputerName") %></h1>
<table> <tr> <td> Processor: </td> <td> <%# Eval("ComputerProcessorType") %> </td> </tr>
<tr> <td> RAM (MB): </td> <td> <%# Eval("ComputerRamSize") %> </td> </tr>
<tr> <td> HDD (GB): </td> <td> <%# Eval("ComputerHddSize") %> </td> </tr>
<tr> <td> Image: </td> <td> <%# GetImage("ComputerImage") %> </td> </tr> </table> |
Click OK. As you can see the transformation code is the standard ItemTemplate template that you may already know from ASP.NET 2.0 Repeater and DataList controls. It combines HTML code with ASP.NET commands and data binding expressions. You can use several built-in functions, such as GetImage that simplify some tasks. You can find the list of all functions directly under the transformation code.
We will create transformation for the list of computers. Now go back to the transformation list and click New transformation. Enter the following values:
| • | Transformation name: preview |
| • | Transformation type: ASCX (it's also possible to use XSLT, but we will not use it now) |
Enter the following transformation code:
<div style="text-align:center;border: 1px solid #CCCCCC"> <h2><a href="<%# GetDocumentUrl() %>"><%# Eval("ComputerName") %></a><h2> <img src="<%# GetFileUrl("ComputerImage") %>?maxsidesize=120" /> </div> |
Click OK.
Please note how the link to the document is created:
<a href="<%# GetDocumentUrl() %>"><%# Eval("ComputerName") %></a> |
It consists of standard HTML tags for links and it inserts the URL and link text dynamically.
Similarly, you can create an image tag with parameter that ensures automatic resize of the longest side to 120 pixels on the server side:
<img src="<%# GetFileUrl("ComputerImage") %>?maxsidesize=120" /> |
You have learned how to write transformations for displaying the content of structured documents.
Please note: should you want to use the XSLT transformation, it can be used for the XSLT viewer (CMSViewer) web part. Otherwise it won't work.
|
Transformations for multilingual web sites
In some cases, you may need to display different text in transformations, based on the currently selected language. If you're using the built-in multilingual support, you can achieve this by creating another transformation with name ending with culture code.
Example: English (default language) transformation code name: cms.news.detail French transformation code name: cms.news.detail_fr-fr
When you switch the content language to French, the French transformation will be automatically used in this case. |
