Information about the content of your site are stored in indexes. You need to have the content of your site indexed in order for it to be searchable using the Smart search module. The following example shows how an index can be created and what options you have when creating it.
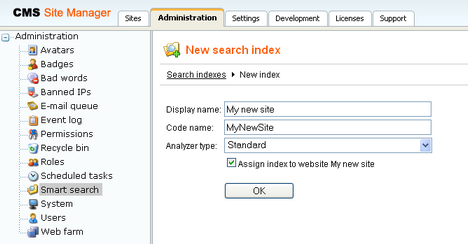
1. Go to Site Manager -> Administration -> Smart search and click the New index (![]() ) link. The New search index dialog will be displayed to you. You will be asked to enter the following details:
) link. The New search index dialog will be displayed to you. You will be asked to enter the following details:
| • | Display name: name of the index displayed in the administration interface |
| • | Code name: name of the index used in web site code |
| • | Analyzer type: type of analyzer that will be used when indexing the content of your site, the following types are available: |
| • | Standard - grammar-based analyzer (stop-words, shortcuts, ...), very efficient for English, but need not produce satisfactory results with other languages |
| • | Simple - divides text at non-letter characters |
| • | Stop - contains a collection of stop-words at which it divides the text |
| • | White space - divides text at whitespaces |
Click OK.
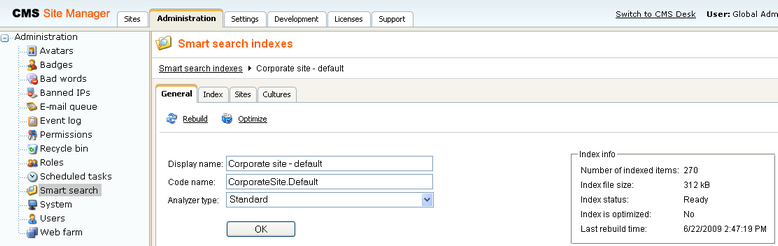
2. You will be redirected to the index's editing interface. The General tab, which you will be redirected to, shows the same details that you just entered. Notice the info box on the right, which shows general information about the index.
The following two action can also be performed on this tab, but it would make no sense to perform them at this stage of creating a new index:
| • | Rebuild ( |
| • | Optimize ( |
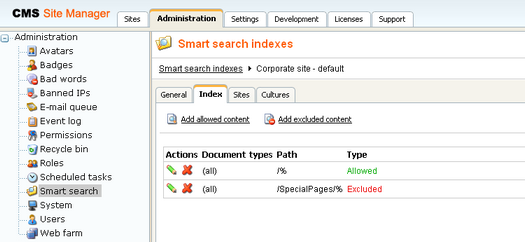
3. Switch to the Index tab. On this tab, you can define which parts of the site will be included in/excluded from the index. This can be defined by Alias path and Document type. You can see the content definitions in the list, while the Type column shows if the defined content is Allowed (included) or Excluded.
Using the Add allowed content (![]() ) and Add excluded content (
) and Add excluded content (![]() ) links, you can access the dialogs for defining new allowed/excluded content. Information on how allowed and excluded content can be defined can be found in this topic.
) links, you can access the dialogs for defining new allowed/excluded content. Information on how allowed and excluded content can be defined can be found in this topic.
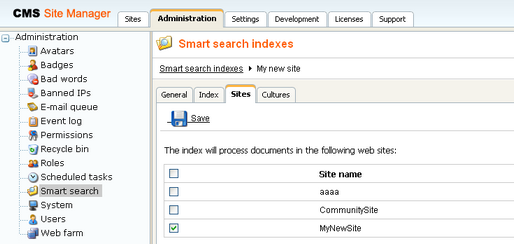
4. Now switch to the Sites tab. Make sure that the index is assigned to the appropriate web site. You may also want to optionally assign the index to some other site in order to have multi-site search results.
Click Save.
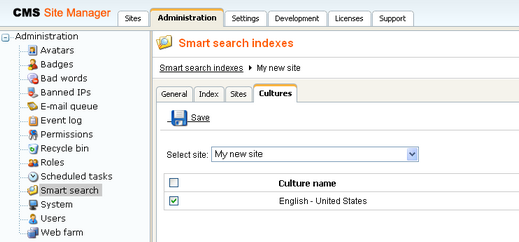
5. Switch to the Cultures tab. This is where you can choose which cultural versions of the site will be indexed by this index. Choose the cultural version(s) that you want to be indexed. If you have a multi-site index, you can select the cultures separately for each site chosen by the Select site drop-down.
Click Save when you have all the cultures selected.
6. Finally, go back to the General tab and choose to Rebuild (![]() ) the index. This needs to be done only for the first time. Any further changes made to the site will be indexed automatically.
) the index. This needs to be done only for the first time. Any further changes made to the site will be indexed automatically.