Kentico CMS allows you to easily create secured web site areas that are accessible only by authenticated users. When an non-authenticated (public) user comes to the secured section, she is redirected to the logon page specified for the site at Site Manager -> Settings -> Security -> Website logon page URL.
You can mark any section of the web site as a secured site area by setting Properties -> Security -> Requires authentication to:
| • | Yes - page is secured, authentication is required to access it |
| • | No - authentication is not required to access the page |
| • | Inherits - value of the setting is required from the parent page |

Configuration of a secured site area
This example explains how to secure the Products section in the sample Corporate Site.
| 1. | Sign in as administrator to CMS Desk. Go to the Content section and click the Products document in the content tree. |
| 2. | Click Properties -> Security. Set the value of the Requires authentication attribute to Yes and click OK. |
| 3. | Go to Site Manager -> Settings -> Security and choose the Corporate Site site in the drop-down list. Make sure the Secured areas logon page is set to ~/logon.aspx. This is the URL of the logon page. You can either use the system logon page ~/cmspages/logon.aspx or you can define your own as it's defined in the Corporate Site sample. |
| 4. | Go to CMS Desk -> Content, click the Log-on Page document and click Design. As you can see, the page is based on page template Log-on page with registration form that contains the Logon form web part and the Registration form web part.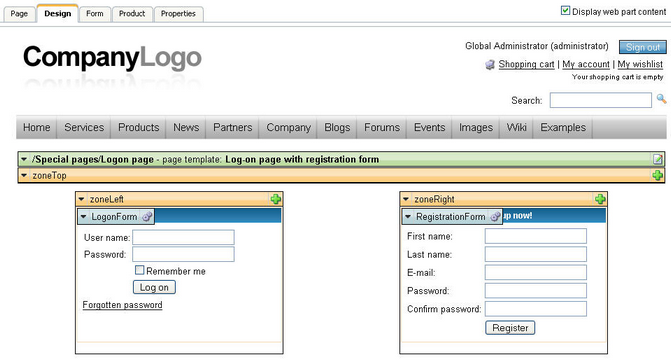 |
| 5. | Sign out and click Products in the main menu. You are redirected to the logon form: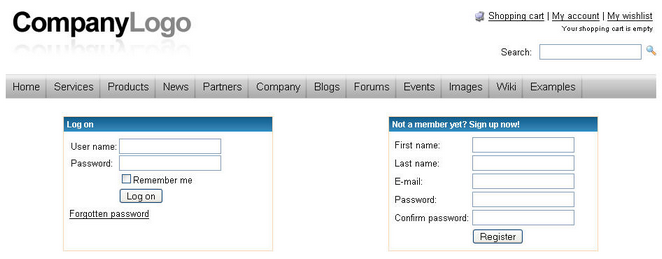 |
| 6. | Sign in as administrator and you will see the Products section. |
|
Checking access to page content
The page content is not secured by default, even if the current user is denied to read the given page. You need to configure this either by setting Check permissions to true in the Editable region web part properties (local configuration) or globally by setting the value in Site Manager -> Settings -> Security -> Check page permissions to one of the following values:
When the user is not authorized to read the page, she is displayed with Access denied page. You can configure custom access denied page URL in the Site Manager -> Settings -> Security -> Access denied page URL property. |
