You need to enter the internal URLs of all your servers into the system so that the web farm synchronization module knows which servers should be synchronized.
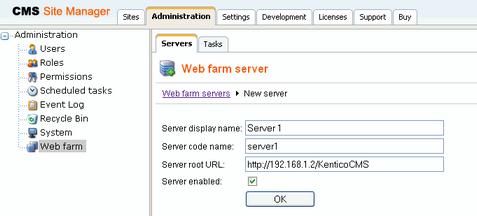
Go to Site Manager -> Administration -> Web farm and click New server, enter the values:
| • | Server display name: some descriptive name displayed to the users |
| • | Server code name: code name of the server that will be used in server configuration file |
| • | Server root URL: the URL of the root of the web site, such as |
Click OK to save and repeat the process for every server in your web farm.
Now you need to update the web.config file on each server and add the following key into the /configuration/appSettings section:
<add key="CMSWebFarmServerName" value="server1"/> <add key="CMSWebFarmEnabled" value="true"/> |
where server1 is the appropriate server code name of the given server. Every server must contain only one such key with its own name.
If the synchronization doesn't work as expected, you can check the failed synchronization tasks on the Tasks tab. The processed tasks are automatically removed from the list, the failed tasks are displayed with error message.
|
License keys
Please be sure to enter an appropriate license key for the internal URL of the server. E.g. if the web farm servers are used for domain name mydomain.com, and you access them internally through URLs like http://192.168.1.2, http://192.168.1.3, etc., you need to enter the license keys for mydomain.com, 192.168.1.2 and 192.168.1.3 in Site Manager -> Licenses dialog (you need to do that on one server only and restart the other instances using Site Manager -> Administration -> System -> Restart application. |
