This chapter describes how you can create a custom module integrated into Kentico CMS administration interface, such as event booking system, CRM system or any other module.
In the following example, you will learn how to create a simple module with a single button that displays the current date and time. You will also learn how to control access to this module.
| 1. | Open Kentico CMS web project in Visual Studio 2005. You can do that either using the WebProject.sln file or using File -> Open -> Web site menu in Visual Studio 2005. |
| 2. | Create a new folder MyModule under the CMSModules folder. |
| 3. | Create a new page default.aspx under the CMSModules/MyModule folder: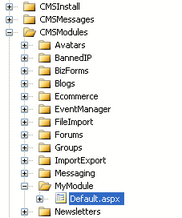 |
| 4. | Switch to code behind of the module and change the following line: |
[C#]
public partial class CMSModules_MyModule_Default : System.Web.UI.Page |
to:
[C#]
public partial class CMSModules_MyModule_Default : CMSDeskPage |
It ensures that the module can be used only by users with access to Kentico CMS Desk.
| 5. | Add the following code at the beginning of the page: |
[C#]
using CMS.CMSHelper; using CMS.UIControls; |
| 6. | Add the following code to the Page_Load method: |
[C#]
if (!CMSContext.CurrentUser.IsAuthorizedPerResource("myprojects.mymodule", "read")) { RedirectToAccessDenied("myprojects.mymodule", "Read"); } |
It checks if the current user has Read permission for module myprojects.mymodule.
| 7. | Switch to the Design tab and add a button control on the page. Set its properties: - ID: btnGetTime - Text: Get time |
| 8. | Add a label control on the page, next to the button. Set its properties: - ID: lblTime - Text: (clear the value) 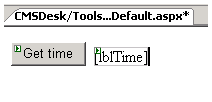 |
| 9. | Double-click the button and add the following code inside the Click event handler: [C#] |
if (CMSContext.CurrentUser.IsAuthorizedPerResource("myprojects.mymodule", "gettime")) { lblTime.Text = DateTime.Now.ToString(); } else { lblTime.Text = "You're not authorized to get the current date and time."; } |
It checks if the current user has gettime permission for module my projects.module and if so, it displays the current date and time.
| 10. | Run the project and sign in to Site Manager. |
| 11. | Go to Development -> Modules and click New module. Enter the following values: - Module display name: My module - Module code name: myprojects.mymodule - Show in tools menu: yes - Resource URL: ~/CMSModules/MyModule/Default.aspx Click OK. |
| 12. | Go to the Permission names tab and click New permission. Enter the following values: - Permission display name: Read - Permission code name: read |
- Display in matrix: enabled
Click OK.
| 13. | Add another permission: |
- Permission display name: Get time
- Permission code name: gettime
- Display in matrix: enabled
Click OK.
| 14. | Go to the Sites tab and enable the new module to appropriate sites. |
| 15. | Go to CMS Desk -> Administration -> Permissions and choose the Module: My module value in the drop-down list. Grant CMS Editors with Read permission and CMS Desk Administrators with Get time and Read permissions: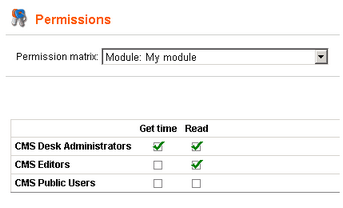 |
| 16. | Go to CMS Desk -> Tools. You can see the My module icon in the list now. Click it and you will see your form. When you click the button, you can see the current date and time on the right: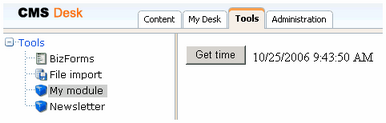 |
You can also try to sign in under a different account with different permissions and test the access control.
|
Exporting custom modules
The following folders will be included in the export package when the custom module is selected for export. It is therefore recommended that your modules data are stored within these folders:
The <module_name> value needs to be the same as the code name of the module in the administration interface, so for example for a module named CMS.Test, the folders would be:
|
