The Custom registration form web part can be used in situations when you want to use a different registration form than the default one provided by the Registration form web part. This is typically when you want users to provide different details or when you want to customize the form's layout.
In the following example, you will learn how to use a custom registration form on your site. You will create an alternative form and use it for registration via the Custom registration form web part. If you are not familiar with the Alternative forms concept, please refer to the Alternative forms chapter first.
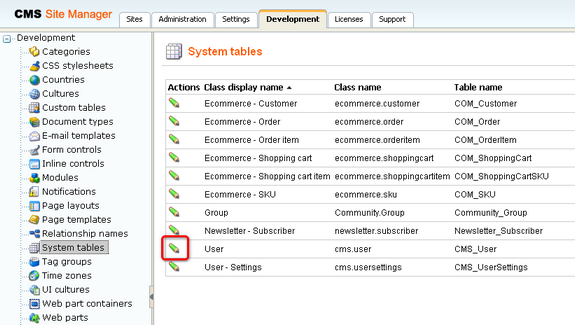
1. Go to Site Manager -> Development -> System tables and choose to Edit (![]() ) the User system table.
) the User system table.
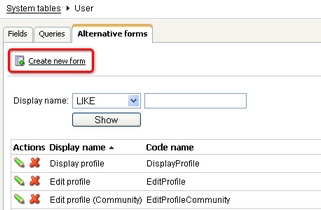
2. Switch to the Alternative forms tab and click the Create new form link above the list.
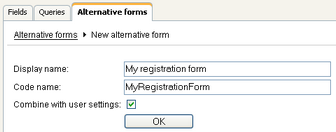
3. Fill in the following details:
| • | Display name - My registration form |
| • | Code name - MyRegistrationForm |
| • | Combine with user settings - make checked; this ensures that all user's fields will be available |
and click OK.
4. Your new form is now created and you are redirected to the editing interface of it. Switch to the Fields tab.
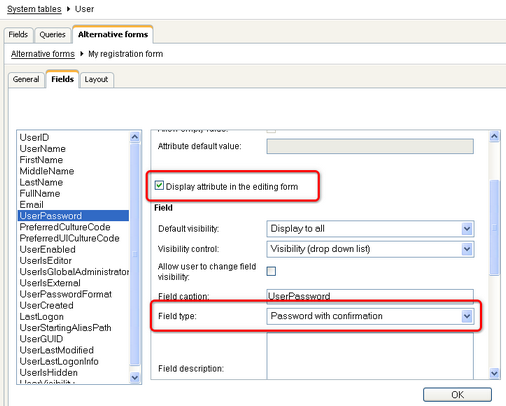
On this tab, you can see the attributes defined in the User system table. You can select an attribute from the list on the left. In the right part, you can modify its properties. We will want our registration form to contain the following fields:
| • | UserName |
| • | FirstName |
| • |
| • | UserPassword |
Go through the attributes and check the Display attribute in the editing form check-box for those mentioned above, which makes them visible on our registration form. Uncheck the check-box for the rest. For the UserPassword attribute, change also the value of the Field type drop-down list to Password with confirmation.
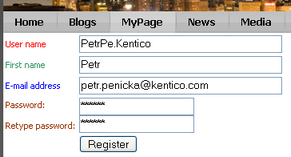
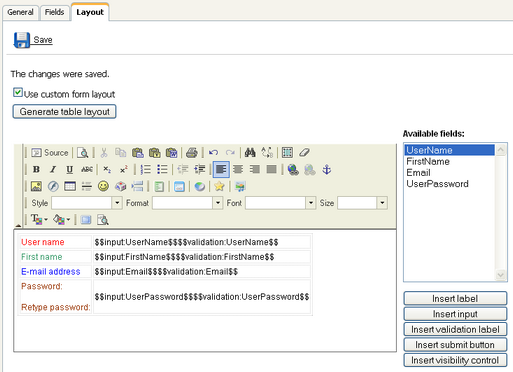
5. You can also switch to the Layout tab and define the registration form's layout using the built-in WYSIWYG editor.
To do it, check the Use custom layout check box and click the Generate table layout button. A default layout will appear in the editor. Try playing around a bit with the layout or just create something similar to what you see in the screenshot below. Click Save when you are finished.
6. Now switch to CMS Desk. Choose or create a page where you want to add the registration form and select it in the content tree. Switch to the Design tab and add (![]() ) the Membership -> Custom registration form web part to the page. Set the following property of the web part:
) the Membership -> Custom registration form web part to the page. Set the following property of the web part:
| • | Alternative form - cms.user.MyRegistrationForm |
7. If you switch to the live site now and go to your page with the Custom registration form web part, you should see the custom registration form that you created. You can now try to register to your web site using the form and verify that the user has been created in Site Manager -> Administration -> Users.