Kentico CMS supports Windows integrated authentication. It means that when a user signs in to a Windows domain, Kentico CMS automatically recognizes her identity without requiring a user name and password.
Moreover, Kentico CMS is able to automatically import the authenticated users from domain (Active Directory) into the user database, including their roles.
Configuration
| 1. | Before you configure the application for Windows authentication, you need to create a user account that will be the same as your current domain name and assign this user account with administrator permissions. This will allow you to access all features as an administrator once you sign in using Windows authentication. |
| 2. | Sign in as an Administrator to the Site Manager and go to Administration -> Users. Create a new user with following values: - User name: your domain user name in format domain\username, example: office\johns - Full name: your full name |
| 3. | Click OK. On the General tab, set the following values: |
- Is global administrator: yes
- Is external user: yes
- Is domain user: yes
Click OK.
| 4. | Now you can switch the application to the Windows authentication mode. Edit the web.config file of the web project and change the following line: |
<authentication mode="Forms"> |
to:
<authentication mode="Windows"> |
When using the Windows authentication, you also need to have the following settings in your web.config file so that the authentication is required for the live site:
<location path=""> <system.web> <authorization> <deny users="?"/> </authorization> </system.web> </location> |
| 5. | Save the modified web.config file. Close all browsers with Kentico CMS and open the web site in a new browser. Try to go to <web project>\cmssitemanager to make sure you are recognized as a global administrator. |
From now on, when an authenticated user comes to the site, her user account is created in Kentico CMS database automatically and her domain groups are imported as roles into Kentico CMS database. It means that the users and roles are not imported on some regular basis, but they are imported when the user comes to Kentico CMS web site.
|
Forbidden characters replacement on AD import
When importing user and role names, forbidden characters in the source names are replaced by the character defined in Site Manager -> Settings -> URLs -> Forbidden characters replacement.
Alternatively, you can override this setting by using the following keys in the AppSettings section of your web.config file. In both cases, the value must be one character that will be used as the replacement character:
|

Securing a web site section using Windows authentication
It is also possible to secure only a certain section of your website using Windows authentication. In the following example, you will learn how to set the Products section of our sample Corporate site to be secured by the Windows authentication:
1. Locate your web project on the disk (typically c:\Inetpub\wwwroot\<web project>). Create a new directory in your web project's folder and give it the same name as the filename in the document's URL. In this case, the filename is Products.aspx, so we will create a folder named Products.
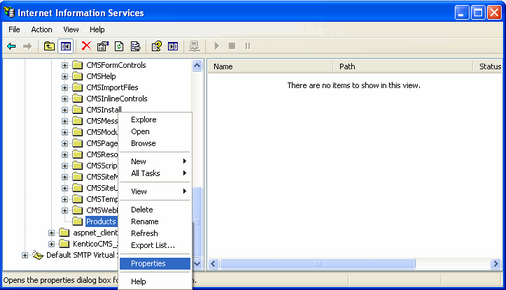
2. Open the IIS and locate the directory in the tree. Right click it and choose Properties.
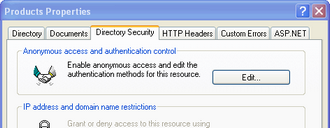
3. Switch to the Directory security tab and click the Edit button placed in the Anonymous access and authentication control section.
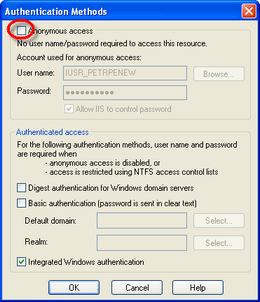
4. Uncheck the Anonymous access check-box and click OK. Check the same setting for the root of the web and make sure that Anonymous access is allowed for it.
5. Open the web.config file of your web project and change value of the mode attribute of the authentication tag to Windows. Also find the section marked with Windows authentication BEGIN and change the path parameter of the location tag to the name of the created directory, which will be Products in our case:
... <authentication mode="Windows">
...
<!-- Windows authentication BEGIN --> <location path="Products"> <system.web> <authorization> <deny users="?"/> <allow users=”*”/> </authorization> </system.web> </location> <!-- Windows authentication END --> |
6. The authentication is now configured. If you try to access any of the menu items placed under the Products section, Windows authentication will be required. However, if you also want the authentication to be required for the Products main page (which is obviously not located under itself, hence requires no authentication now), you will have to use the following workaround.
Create a new page under the Products section, give it the same content as the main page has got and redirect the Products link in the menu to this new page. Because the new page is located under the Products section, windows authentication will be required for it.
