To enable the Banned IPs module, you have to make two security settings:
Go to Site Manager -> Administration -> Permissions.
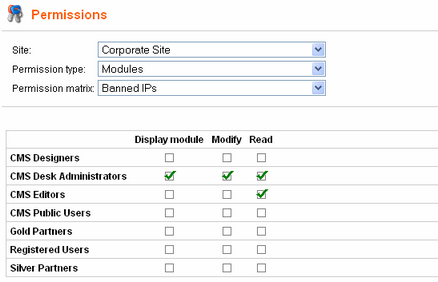
The following table explains the particular permissions:
Display module |
The module is visible in the administration interface. |
Modify |
The user is allowed to create and modify records. |
Read |
The user is allowed to read the records. |
Grant user roles with appropriate permissions according to your needs. After doing so, the module should be displayed and changes could be made to the lists of banned IPs. However, there would still be no effect on the live site.
For the bans to take effect, go to Site Manager -> Settings -> Security, select the appropriate site, check the Banned IP enabled check-box and click Save. The bans should take effect now. Users attempting to do an action from an IP address that is banned should get a page with the following message displayed in their browsers.
![]()
This is the default banned IPs redirect page. You can create your own page and set its URL in Site Manager -> Settings -> Security -> Banned IP redirect URL.