How to Setup Google Maps in Kentico
Sometimes third-party services change, which then causes our documentation to be either incorrect or confusing. Google Maps is one of these examples.
Note: This walkthrough is accurate as of September 4th, 2018. If this is no longer accurate, please inform us.
Sometimes third-party services change, which then causes our documentation to be either incorrect or confusing. Google Maps is one of these examples. Our documentation only points users in the right direction, but you might get lost on the way like I have before. Here are some slightly more detailed steps for setting up Google Maps in Kentico 11.
We’ll use the Dancing Goat sample site for this example:
- Go to console.cloud.google.com and create a new account, or log in to an existing account.
- IMPORTANT: You must have a billing account tied to your application. This includes adding a credit or debit card to the account. However, you will not be charged. Without the billing account, you’ll be limited to one API call per month.
The best way to obtain your API key quckly is to visit this link to get started. Select the “Get Started” button on this page. You’ll be directed to a new Google page to enable Maps API and set up billing.

- Select Maps and click Continue.
- Select an existing project, or enter the name of a new project. Click Next.
- If you created a new project, or the existing project you chose is not linked to a billing account, then you will be prompted to select an existing billing account, or create new one. After you set the account, continue to click Next to enable 7 different Google Maps APIs, and to receive your API Key.
If your project is already linked to a billing account, then continue to click Next to enable 7 different Google Maps APIs, and to receive your API Key.
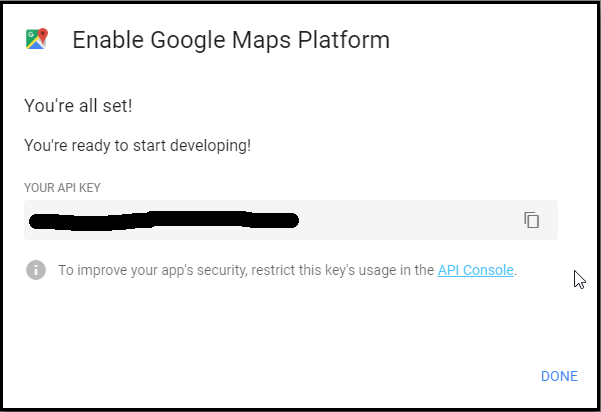
- You may now copy the Key from this point, and move on to step 3.
- Note: This tutorial enabled 7 different Google Maps APIs. For Kentico, at minimum, you only need to have the Geocoding API and the Maps JavaScript API enabled. You are free to disable ones that are not in use.
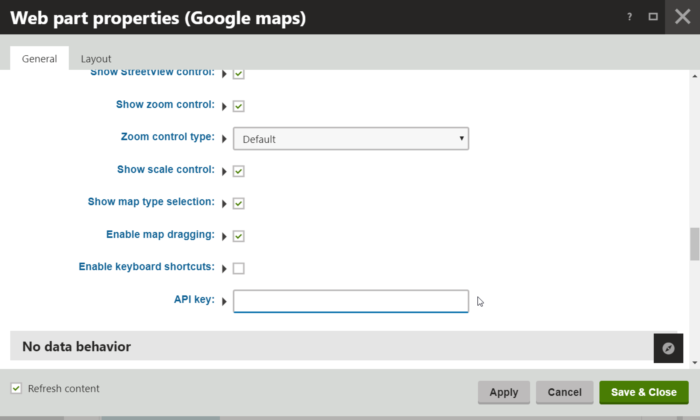
- In your Dancing Goat sample site, go to the Pages application. Select the Cafes page, and switch to the Design tab. Open the Web Part Properties for the GoogleMaps web part. Paste your key into the API Key field.
Now Google Maps should work for the Café pages of Dancing Goat! Go ahead and try for yourself in the Live Site view. Note: This tutorial enabled 7 different Google Maps APIs. For Kentico, at minimum, you only need to have the Geocoding API and the Maps Javascript API enabled. You are free to disable ones that are not in use.
If you need the API key again in the future, access your Google Cloud Platform. Then using the menu top left, navigate to APIs & Services > Credentials.

Under the Credentials tab of this page, you should be able to see all of your API keys created. Your newest one, the one you will need to use, should be listed on top by default.