Google AMPing the Kentico Advantage Site
When it comes to the web, it’s all about speed these days. Sure, flying toasters and embedded videos were all the rage 10 years ago. These days, people want to get to the information they’re looking for quickly, and without the riffraff of extra content. Google figured this out long ago and has steadily been implementing the Accelerated Mobile Pages (AMP) concept into the industry. By limiting what tags and content can be displayed, Google can ensure a speedy delivery of sites in a predictable manner. In this article, I’ll show you how we converted the Kentico Advantage site to use this new technique.
The Kentico Consulting team sees a lot of different projects. From good to bad and everything in between, they have helped many clients and partners architect solutions and produce amazing applications. A big part of that success comes from following some great guidelines and processes when developing with the platform. Our team has compiled those guidelines into a concept called Kentico Advantage. This approach uses proven techniques and skills to ensure successful project development and delivery.
Because educating the community about Kentico Advantage is a key goal for our team, we wanted to make sure we provided the information in the best possible way. Not only does the content need to be clear and concise, it has to be searchable! Google is making no secret how much it’s emphasizing the need to minimize the clutter on the internet and provide people with exactly what they’re looking for. They believe in it so much, that they defined their own standards for mobile sites called Google Accelerated Mobile Pages (AMP).
What is Google AMP?
Released in 2015, Google AMP is all about slimming down what content is delivered and maximizing performance and bandwidth. By eliminating non-essential tags and optimizing content, Google can accurately predict how fast a page will load for a mobile user. By prioritizing this content in their results, Google is effectively changing the way developers are creating their applications.
Our Consulting team recognized that the Kentico Advantage content was well suited for the type of content AMP focuses on and recently updated the site to implement the concept. While making an AMP’ed page isn’t all that hard, there were several steps we had to complete in order to get it running properly. Let me walk you through our process.
You can read about Google Accelerated Mobile Pages here.
Note
Kentico Consultant Tim Fenton and Developer Advocate Petr Švihlík completed most of the migration to Google AMP.
Identify the content
Not all content is destined to be good Google AMP material. Google has some pretty strict guidelines for AMP that ensure every page has the same structure and minimal amount of tags. Because of the rules around what makes up the AMP concept, it’s a bit of a square peg-round hole situation when it comes to complex, heavily customized pages. For this reason, simple content structures like basic pages and blogs make a good choice. Often, these pages have very little in the way of fancy-pants layout and design, but rather offer up a block or two of text and some images.
The first step of our migration process was to identify which pages of the site would be good candidates for AMP-ification. In the case of the Kentico Advantage site, the entire application really only consisted of a handful of content pages, almost all of which can be reduced easily. In general, content-rich pages make good candidates, however, it’s unlikely most companies would migrate their entire site to AMP.
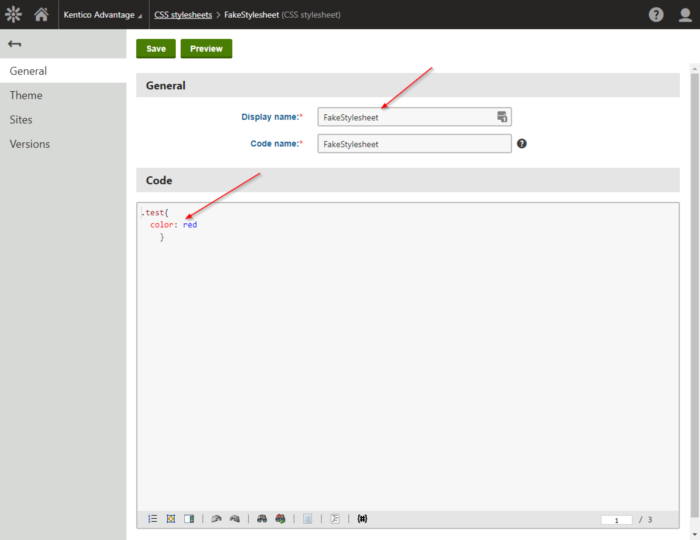
Create a blank CSS
Once we knew what content we wanted to use, we had to get the environment ready. Because Google AMP is so strict on CSS and JS, we decided to create a blank style sheet (Fake stylesheet) to initially apply to our AMP content. This was really a place holder while we configured the rest of the items to ensure we had something to assign in our module.
The Kentico Google AMP Module
We have a lot of smart people at Kentico, and with their Innovation Time have produced some pretty awesome things. (Live Tiles!) Recently, a team of our developers created a new Google AMP Module for Kentico 10. This module is basically a custom output filter that automatically strips out most non-AMP compliant tags before it sends it to the browser. Using that module, we started our AMP transition process with the Advantage site.
In addition to removing tags, the output filter also adds in links to the page. Because of how AMP works, you have to tell Google when the page has an AMP-compliant version by way of a amphtml link that allows for the page discovery. Subsequently, you need tell Google what the “standard” page URL is, if it finds the AMP version, by inserting a canonical link to the original page.
The Kentico Google AMP project gives you all the details on these rules. Check it out on GitHub here.
Adding the module
To add the module to the Kentico Advantage site, we installed the Kentico.AccelerateMobilePages NuGet package. This package contains all the new output filter code, as well as some new settings and options within the site. It also adds a new application under the Custom tab, as well as some new options within the Pages application.
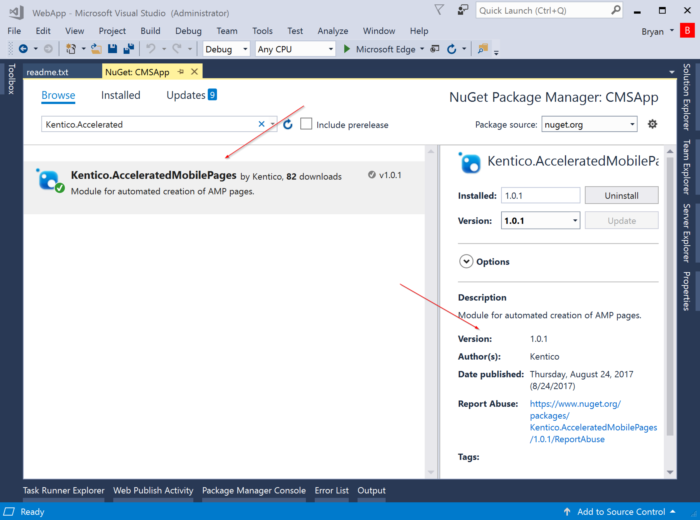
Install Kentico.AcceleratedMobilePages
Configure the module
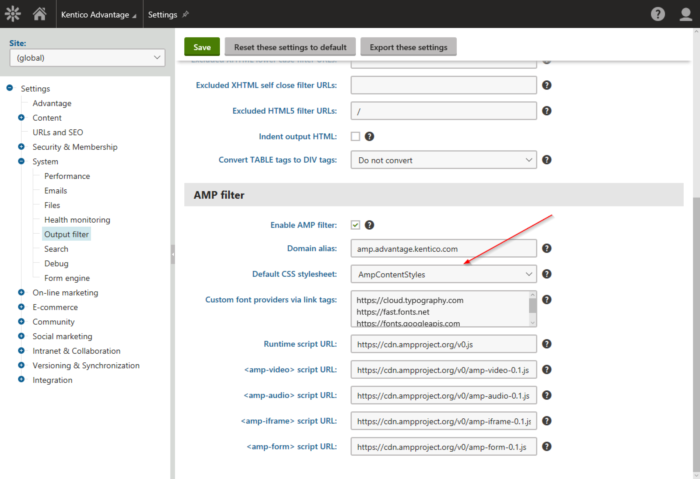
After installing the package, we moved on to configuration. The installation adds some new properties to the Settings / System / Output filter tab in the Administration area. There, we selected Enable AMP filter and updated our domain URLs. In our case, we elected to use a subdomain (amp.advantage.kentico.com) for our AMP content. This is due to a current limitation of the module to only support a separate URL for the AMP content, rather than a subfolder (Ex: xyz.com/amp).
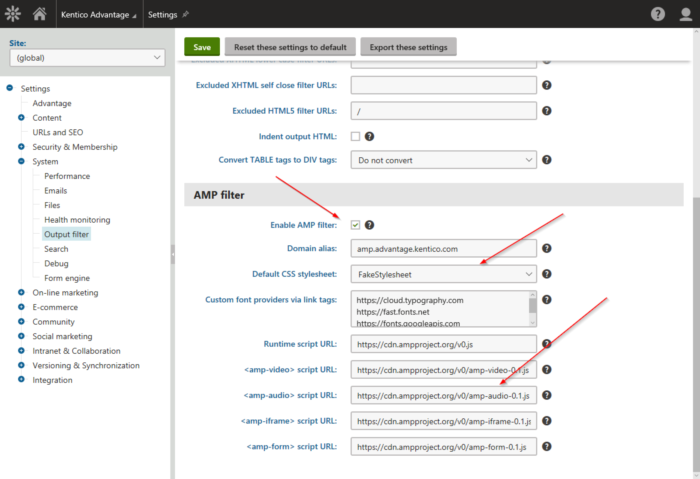
Many of the settings are pre-configured and pull in the Google AMP scripts, by default. We assigned our Fake Stylesheet as the default CSS and updated the domain URL to be specific to our AMP content (amp.advantage.kentico.com). You will want to do something similar so that the output filter knows when to remove the non-AMP compliant content.
Note
If the Domain alias is a subdomain of your standard site, you won’t need a new license for the AMP content.
Configure the AMP pages
After configuring our module, we were ready to add our content pages. Under the Custom menu in the Application list was a new module called Accelerated Mobile Pages. Using this module, we defined all the pages we want to be handled by the AMP output filter.
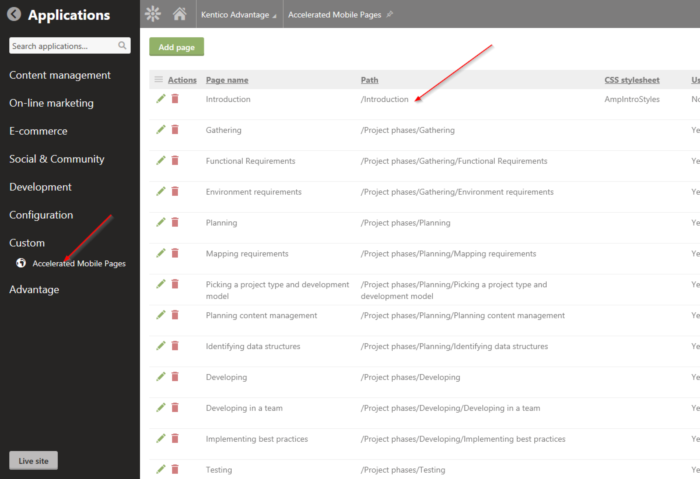
When adding a page, we selected the content item and checked whether the default style sheet should be used. This allowed us to override any page that needed a specific style sheet.
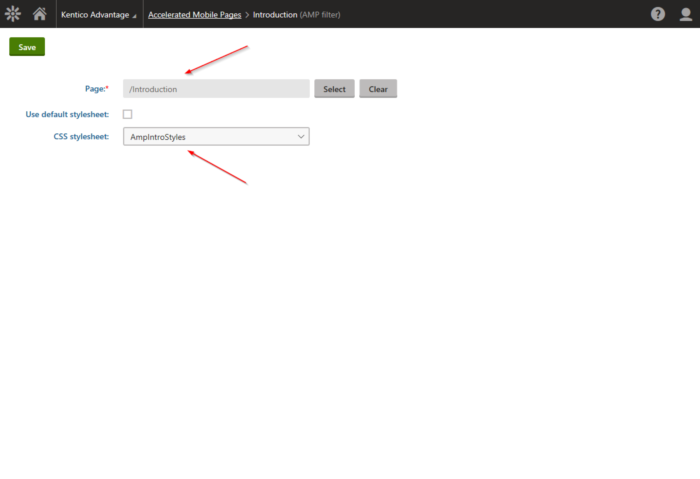
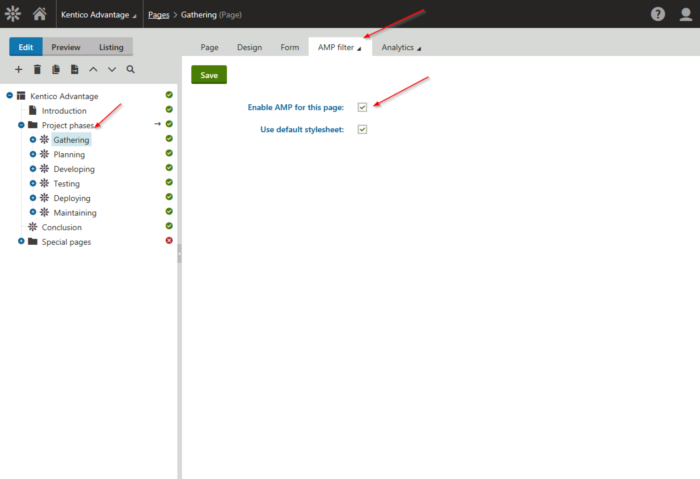
Alternatively, we could configure the pages one by one, by using the new AMP filter option on the Properties tab of the Page.
Stripping down the CSS
At this point, our configuration was nearly complete. We had installed the new module, set the appropriate configurations, and selected our AMP-worthy content. Because nothing can be THAT easy, we had to do a little more to make sure our content was going to display properly. Google is pretty strict when it comes to AMP content, and limits not only the available tags, but also the size. Often, CSS files can be quite large, quickly surpassing the allotted 50KB limit.
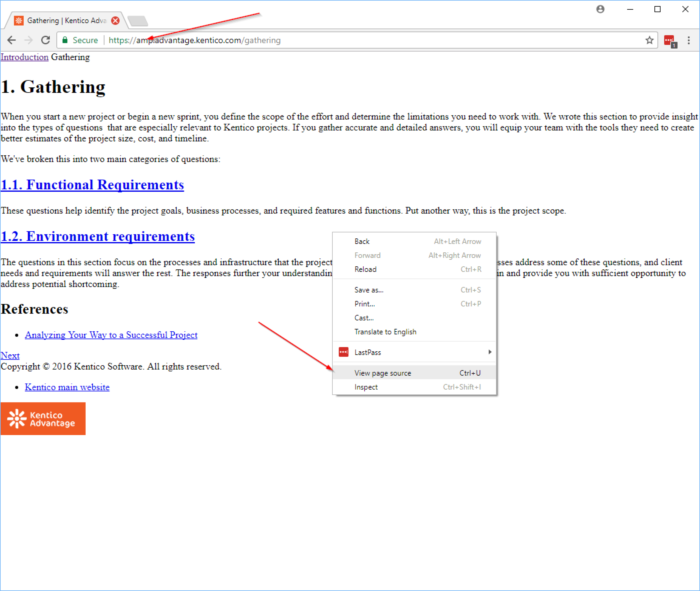
We first accessed one of our designated pages, using the Fake stylesheet. Because the page was run through the new AMP output filter, the non-AMP tags were stripped. This resulted in some plain content, with no styles.
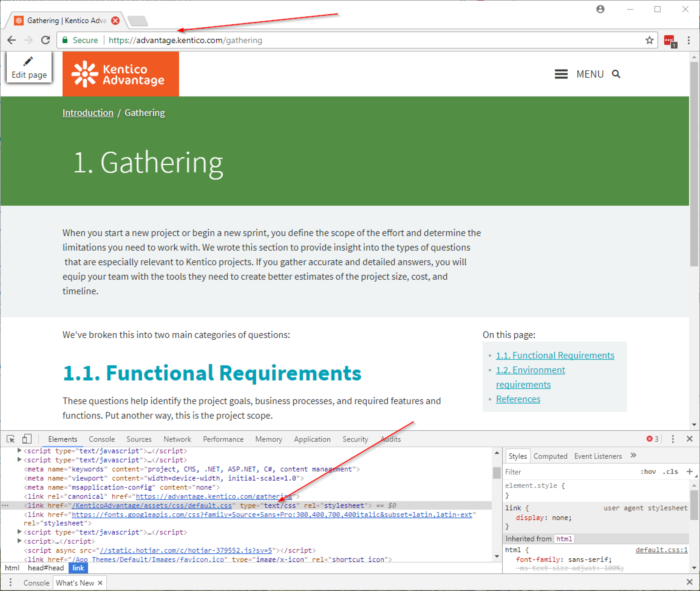
We then accessed the standard version of the page to retrieve the full stylesheet.
We used an online CSS-stripper (http://uncss.org) to remove all the unnecessary CSS. This was done by using the source of the plain page, and our full CSS style sheet code.
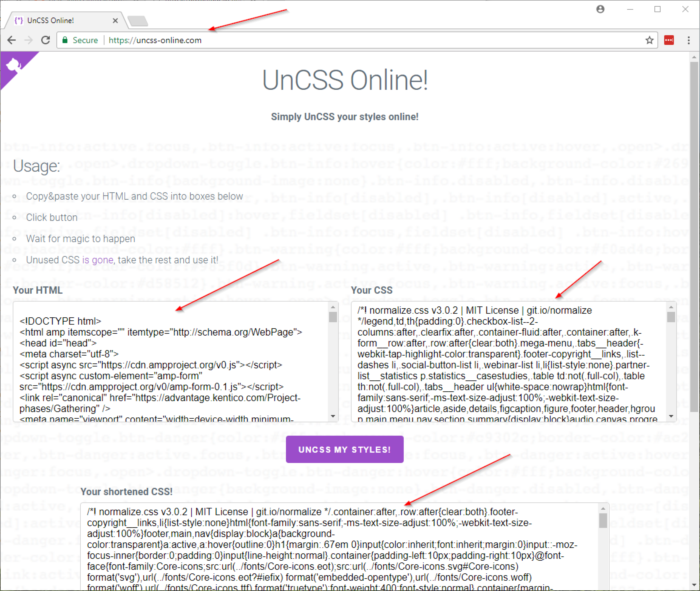
The utility read through our content and determined what CSS was needed. It then stripped down the full CSS to only those styles, resulting in a much smaller style sheet. We created a new style sheet (AmpContentStyles) using the stripped version and assigned it in the AMP Module.
This change reduced our CSS delivered to the pages to ensure we were under the 50KB limit.
AmpFilter.IsAmpPage
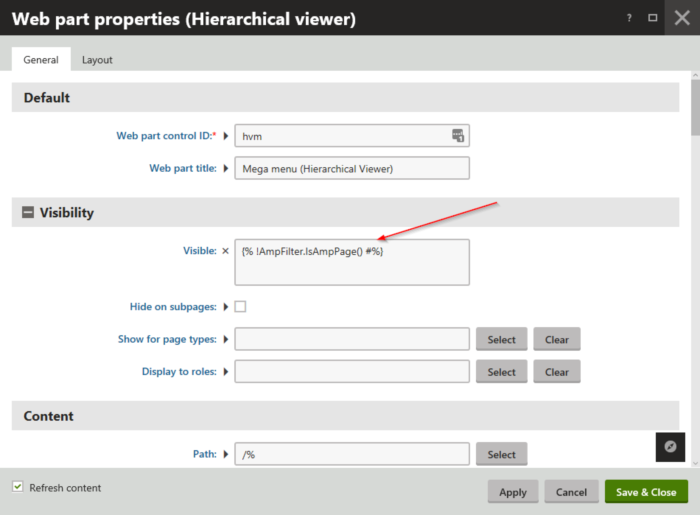
Along with the module, the installation includes a new macro called AmpFilter.IsAmpPage. This macro determines if the current URL is AMP content. This can be especially helpful if you have sections of your content you need to not display for an AMP page. We used this new macro on several webparts’ Visibility setting to hide any areas we knew were not going to be compliant.
Other stuff
In addition to the CSS stripping process, we had to consider a few other things when implementing our solution. Some of these were minor things to get fully AMP-compliant, while others proved a bit more challenging.
- Many AMP sites do not contain navigation when visiting the page. This is mostly because navigations are usually complex and built with JavaScript to make they function and display properly. Because this goes against the concept of AMP, we did not want to use JavaScript in this way so we ended up hiding some of these dynamic elements on the Kentico Advantage site. For these reasons, Navigation, Search and our prompt to resume where you left off all have conditions in the “Enabled” parameter of the web part, (*{% !AmpFilter.IsAmpPage() %}) This ensures that those sections will not be displayed if it is an AMP page being requested.
- Another issue that we ran into is that we had an <area> tag with mappings in it on our home page. We found that this was redundant on mobile as the links exactly mirrored the links on the page. On top of that, the <area> tag is not supported by AMP, so it had to be removed or modified. Again, we decided to add the AmpFilter.IsAmpPage condition to remove this issue.
- In AMP, you must have a hard-coded width and height for <img> tags in your site. This will not actually set your image as a fixed width and height, but rather tells AMP how big the containing element is. Many times div’s and other containers are sized based on the size of their content. In the case of an image, the browser has to download the image and determine the width and height of the file and compute the aspect ratio. With this, the browser can figure out how to size the div and display the page. The idea of providing a width and height is to save the requirement of having to download the image. Instead, Google is able to see the width and height you gave and determine the aspect ratio of the image without accessing the file. This provides much faster loading of the DOM. For this requirement, you could do something similar with a macro and tell it to specify the width and height only when AmpFilter.IsAmpPage() is true. Luckily on our site we only had one image being loaded this way and the rest were loaded by CSS, which is perfectly valid in an AMP scenario.
- Lastly, there was an issue with a type of accordion layout we were using to show / hide our scenarios on our content pages. Since this was using JavaScript, it no longer worked after being processed by the output filter. Luckily, AMP also has an accordion so we were actually able to use the macro condition to tell the page to use AMP syntax in the transformation for the accordion instead of the normal accordion syntax. This was really nice, but did require also minor changes to our styles, but this was easy to implement.
Testing
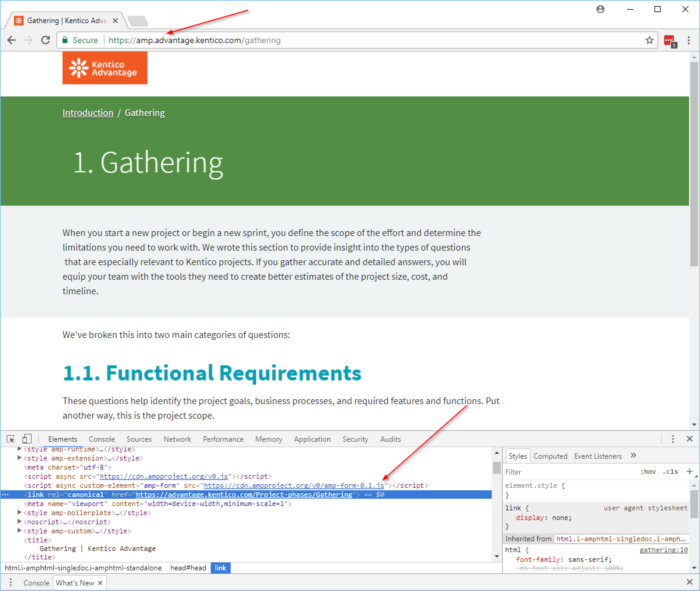
With the configurations and functionality in place, we were ready to test. First, we accessed the site using our standard URL to view the content. We confirmed the amphtml link was properly added to the header of the page.
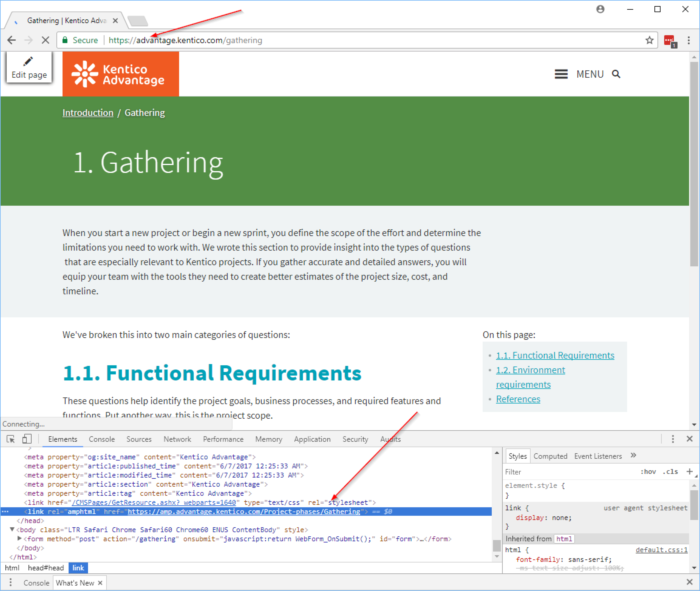
Next, we loaded the AMP version of the page. We confirmed the minimal content was displayed, as well as the canonical link back to the standard version.
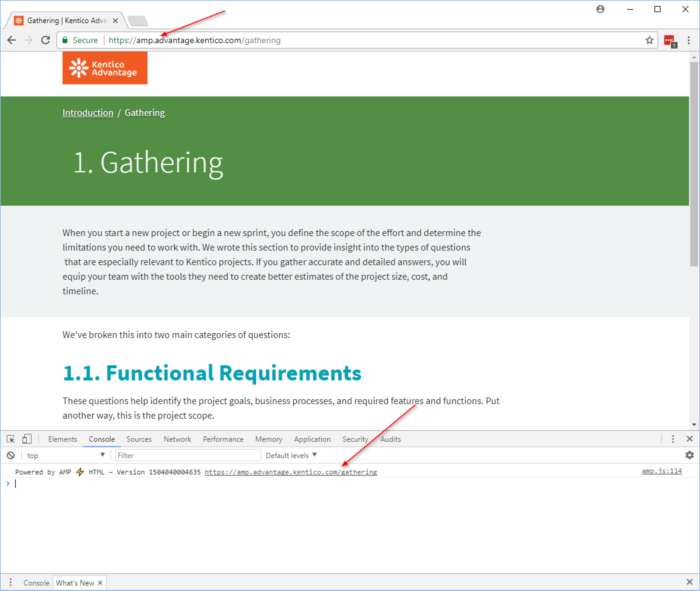
On the console tab, we confirmed the Powered by AMP… message was displayed. This ensured we were properly loading the AMP JS files.
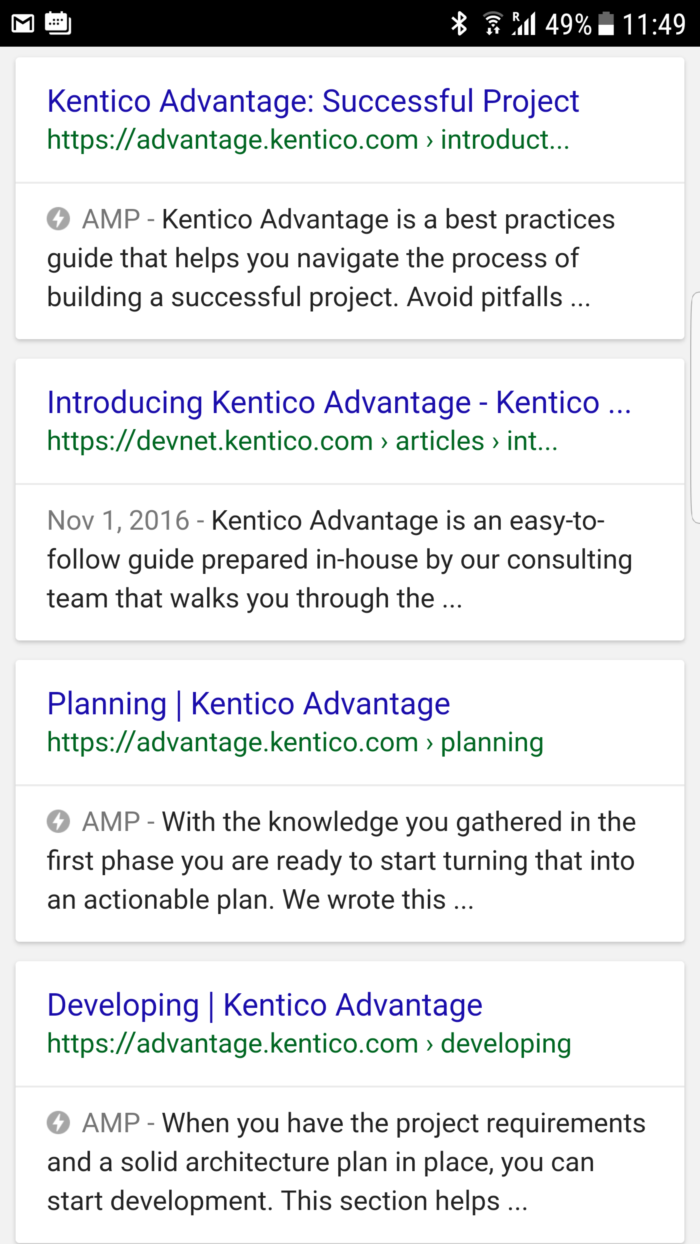
And the most important test, we searched Google for the Kentico Advantage site. We confirmed that the AMP pages were returned in the result.
Moving forward
No matter how much time you spend on a site, it does no good if people can’t find it. For better or worse, it will always benefit you to play by the rules when it comes to search engines and how they index and prioritize results. With implementing Google AMP on the Kentico Advantage site, we can ensure our content will reach the developers that need it most and we will stay high atop the rankings. If you haven’t done so already, I encourage to start considering how you can AMP-up your site to stay on Google’s Page 1. Good luck!