|
|

Adding new departments |

|

|

|

|
|
Adding new departments |
|
|

|
|
|
|
Adding new departments |
|
|
|
|
|
Adding new departments |
|
|
|
|
|
|
||
The following topic provides a step-by-step example of how a new department can be added to the portal.
1. The first step in creation of a department is creation of roles that the members of the department will belong to. This is necessary in order to control access to the department's section, as described in the Departments security topic. Go to CMS Desk -> Administration -> Roles and click the ![]() New role link above the list.
New role link above the list.
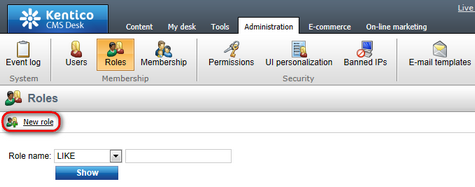
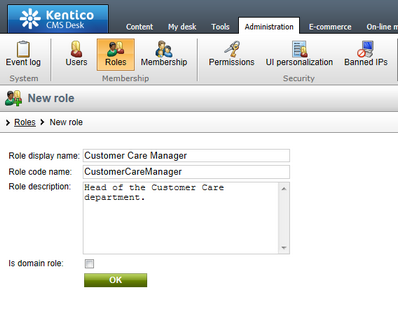
2. In the New role dialog, enter the following details:
•Role display name: Support Engineer; name of the role displayed in the system's administration interface and on the live site.
•Role code name: SupportEngineer; name of the role used in website code.
•Role description: enter some text describing the role.
•Is domain role: disabled; indicates if the role is a domain role from Active Directory.
Click OK. Repeat the procedure and create another role using the following details:
•Role display name: Customer Care Manager
•Role code name: CustomerCareManager
•Role description: enter some text describing the role.
•Is domain role: disabled
Click OK.
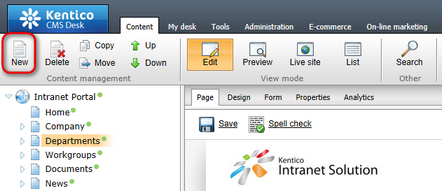
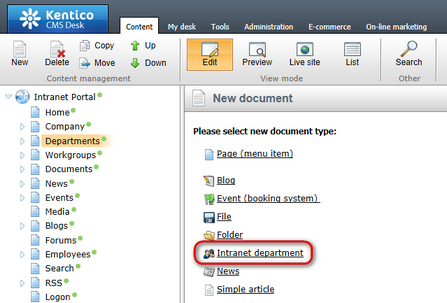
3. With the roles defined, you may proceed with creating the actual department section in the content tree. Go to CMS Desk -> Content and select the Departments node in the content tree. Click the New button above the tree.
4. In the New document dialog which gets displayed, select the ![]() Intranet department document type.
Intranet department document type.
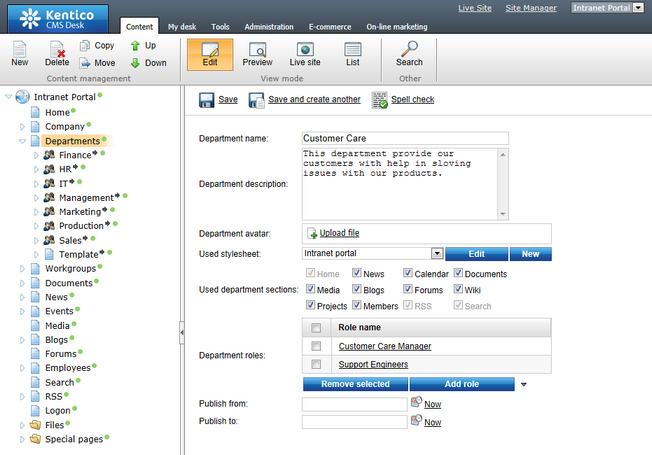
5. On the department creation form, you need to specify the following details. For detailed descriptions of particular fields, please refer to the Departments overview topic.
•Department name: Customer Care
•Department description: enter some text describing the department.
•Department avatar: for the purpose of this example, you may leave the field blank, which assigns the default avatar image to the department. If you wish, you may click the ![]() Upload file link and select an image from your local disk.
Upload file link and select an image from your local disk.
•Used stylesheet: Intranet Portal - Blue
•Used department sections - enable all available check-boxes
•Department roles: add the Customer Care Manager and Support Engineers roles created in step 2.
•Publish from: leave the field blank.
•Publish to: leave the field blank.
Finally, click ![]() Save to create the department with the entered details.
Save to create the department with the entered details.
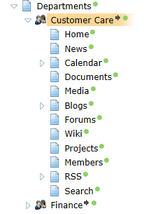
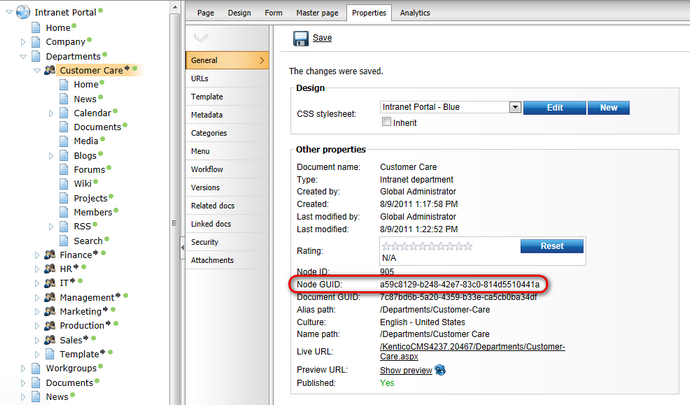
6. Now, the department should be created. You should see it in the content tree, under the Departments node. If you expand the Customer Care node, you should see that all pages from under the Template document were copied under it, as depicted in the screenshot below.
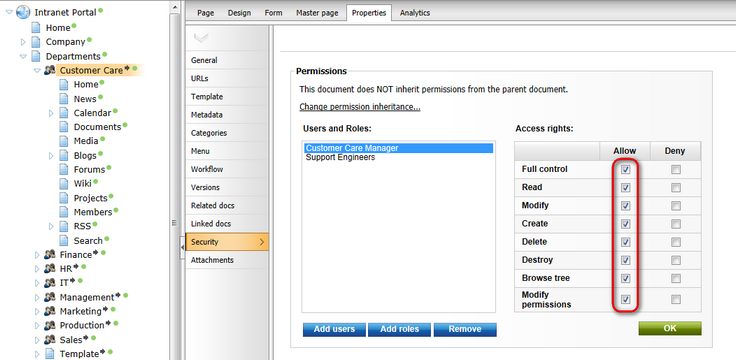
7. The last thing you need to do is configure permissions for access to the new department. With the Customer Care document selected, switch to the Properties -> Security tab. By default, both the Customer Care Manager and the Support Engineer roles have only the Read permission assigned. This only enables them to view the content of the department.
As we want the Customer Care Manager role members to manage the content in all possible ways, let's give them the Full control permission. Enable the Full control check-box in the Allow column, all check-boxes below it will be enabled too. Finally, click OK to save the configuration.
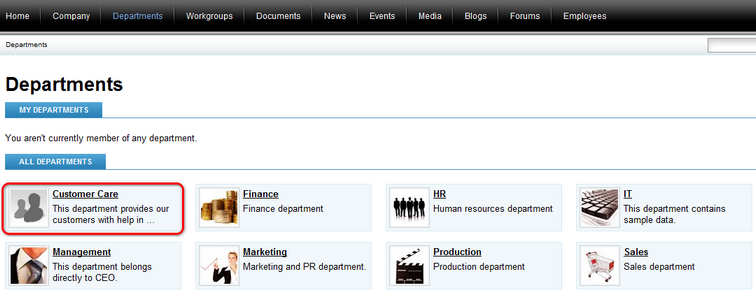
8. Let's see what we have created. If you go to the live site and browse to the title page of the Departments section, you should see the department present in the All departments list.
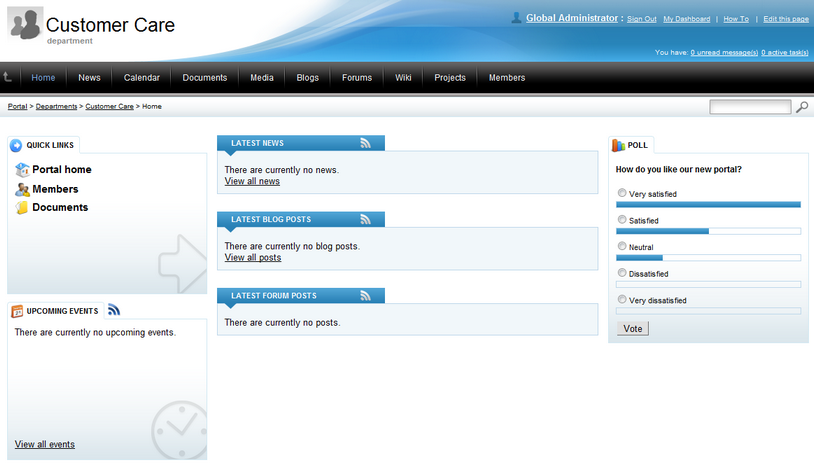
9. Click the department's name or avatar. You will be redirected to the Home page of the department's dedicated website section. As you can see in the following screenshot, the page already contains all web parts that are present on other departments' Home pages, but they have no content yet.
In a real-world scenario, the next logical step would be to assign ordinary members of the department to the Support Engineer role and the department's management to the Customer Care Manager role. The rest of the department's section is pre-configured and ready to be used. Once the department starts being used by its members, web parts on this page will get populated with content from the respective sub-section of the department automatically.
When a new department is created, a number of objects is automatically created within the system's administration interface. These objects are necessary to provide object-based functionality of the department's section. The following text describes which objects are created and what display name and code name they are created with. In the code names, the globally unique identifier (GUID) of the particular department's parent document is always used. This identifier can be found in the Node GUID field on the Properties -> General tab of the parent document's editing interface.
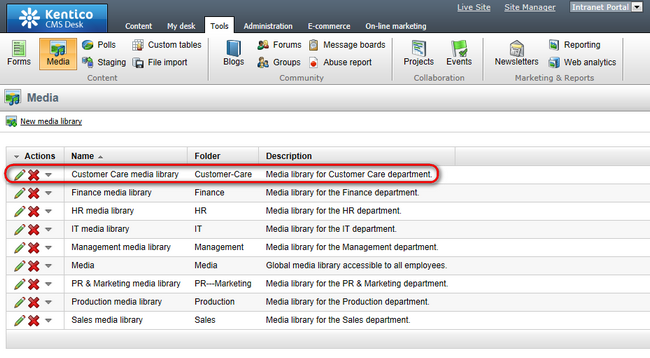
If you choose that the new department should contain the Media sub-section (in step 5 of the example above), a media library is created for the department in CMS Desk -> Tools -> Media libraries. The media library is created with the following names:
•Display name: <display name of the department> media libary
•Code name: Department_<guid of the department's parent document>
If you choose that the new department should contain the Forums section (in step 5 of the example above), a forum group is created for the department in CMS Desk -> Tools -> Forums. The forum group contains a single forum, which is also created automatically. The forum group is created with the following names:
•Display name: <display name of the department> forum group
•Code name: Department_<guid of the department's parent document>
The forum in the forum group is created with the following names:
•Display name: <display name of the department> forum
•Code name: Default_department_<guid of the department's parent document>
Please note that if you wanted to add another forum into the forum group, it would be necessary for its code name to end with the _department_<guid of the department's parent document> suffix. Otherwise, content of the forum would not be indexed by the department's forum smart search index (see below for more details).

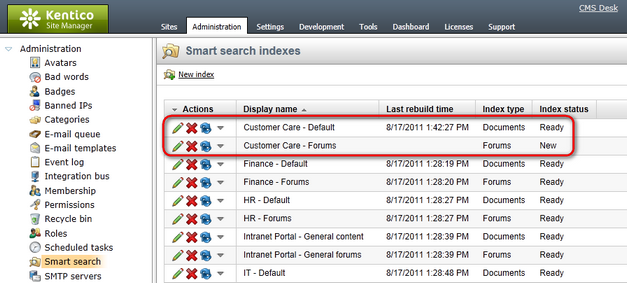
Each newly created department gets a search index for its content created in Site Manager -> Administration -> Smart Search. In addition, if you choose that the new department should contain the Forums section (in step 5 of the example above), another search index gets created for the department's forums. The index for general content of the department is created with the following names:
•Display name: <display name of the department> - Default
•Code name: default_department_<guid of the department's parent document>
The index for department forums is created with the following names:
•Display name: <display name of the department> - Forums
•Code name: forums_department_<guid of the department's parent document>
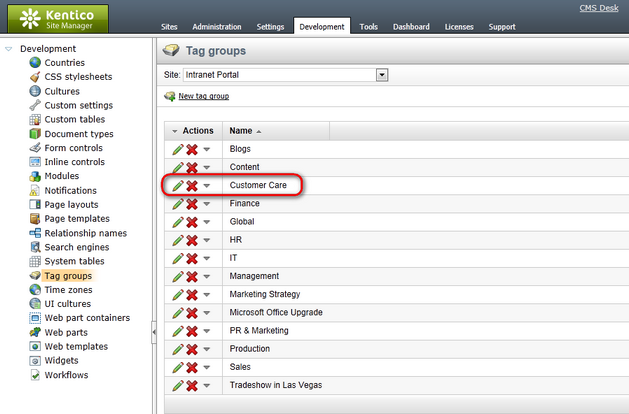
In Site Manager -> Development -> Tag groups, a tag group is created automatically for each newly created department. This tag group is intended for tagging of blog posts in the department's Blogs sub-section, but it is created even if you choose not to include the Blogs sub-section in the department (in step 5 of the example above). The tag group is created with the following names:
•Display name: <display name of the department>
•Code name: <guid of the department's parent document>