After you export some site or objects using the Export site wizard or Export objects wizard, you can import it using the Import site or objects wizard. Before you start the wizard, you need to copy your exported packages into the <web project>\CMSSiteUtils\Import folder under the target web site.
Importing a site
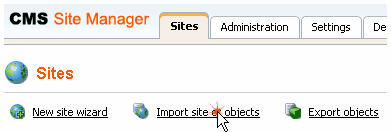
Go to Site Manager -> Sites and click Import site or objects.
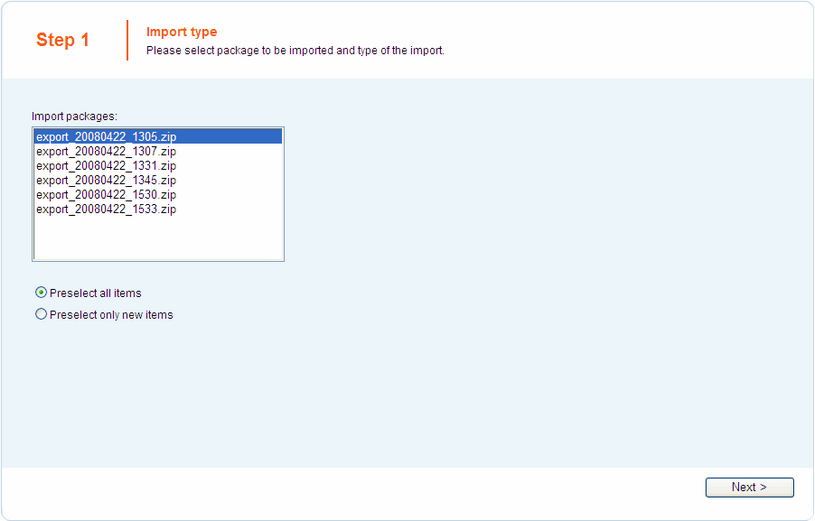
Choose to import the appropriate package and click the Next button. Using the two radio buttons below, you can determine if duplicate items will be preselected or if only new items will be selected for import in the next step.
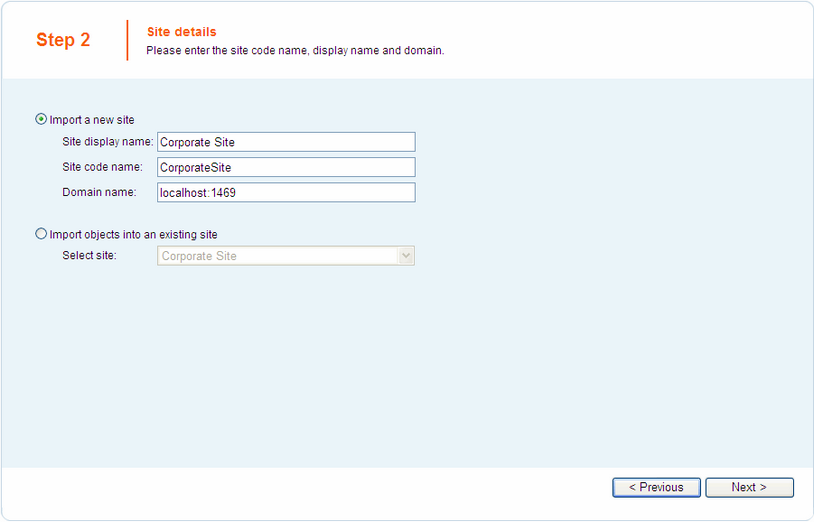
Enter the display name, code name and domain name of the imported web site and click the Next button.
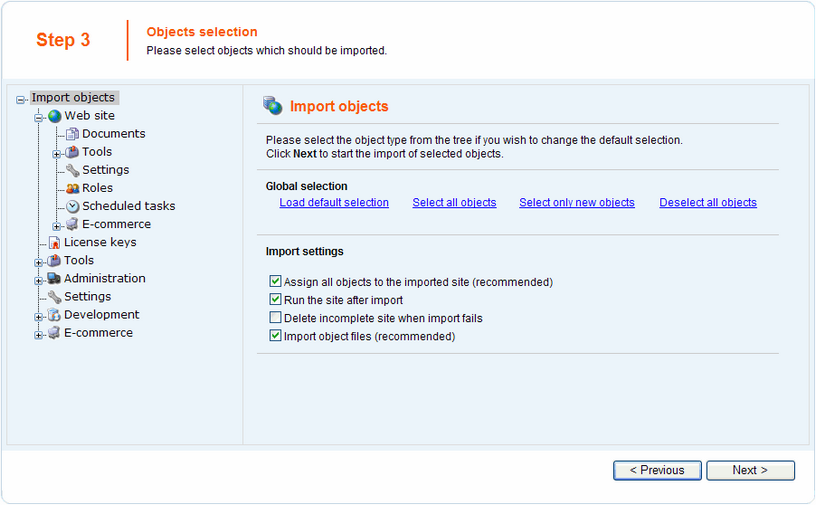
In Step 3, you can select which of the objects from the exported package are to be imported and which are not. You can make this selection by choosing one of the categories displayed in the tree view on the left side of the screen. By selecting a category, a set of check boxes appears in the right part of the screen, letting you select which objects are to be exported and which are not. Objects that already exist on the target server are marked with *. If you leave its check-box checked, this existing object will be overwritten with the newly imported one.
If you have checked the "Log export tasks" check-box in Site Manager -> Settings -> Content Staging, a list of tasks may also be displayed under the objects list. This happens when some global objects were deleted (just as the two Web part containers in the screenshot below). If you leave the check-boxes checked, these objects will be deleted on the target server.
The Web site category contains objects related to the selected web site. The other categories contain global objects that can be used by various web sites. Make the selection and click the Next button.

If you select the root of the tree (Import objects), a number of global choices will be offered to you. The Global selection section allows you to select all, only new or no objects at all. You can also load the default selection, so that all changes you've just made will be annulled. The Import settings section contains other basic import settings - Assign all objects to the imported site, Run the site after import, Delete incomplete site when import fails and Import object files.
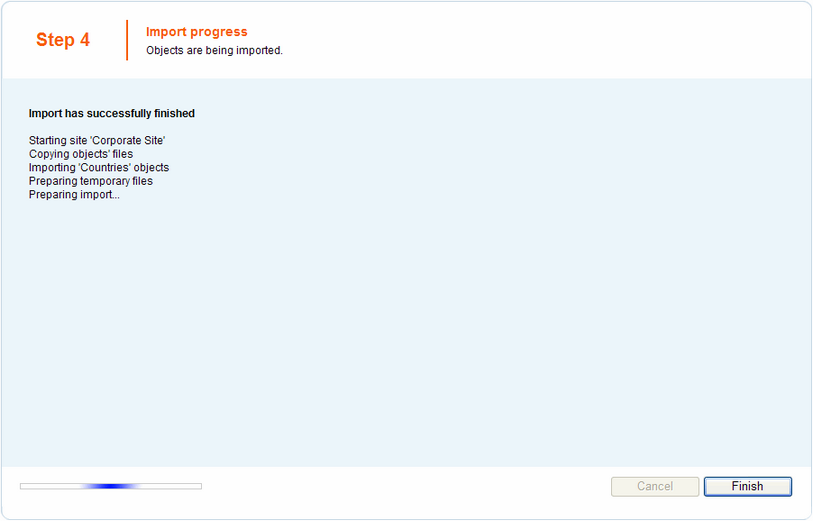
An import log will be displayed, showing the progress of importing (you can abort importing by clicking the Cancel button any time). Click the Finish button. You will be redirected back to Site manager -> Sites, where the newly imported site will be running.
|
Please note
Export packages from version 3.0 are not compatible with versions 3.1 and higher because of their different tree structure. When importing these packages, the structure is automatically converted to the 3.1 format. Please pay special attention when importing Form user control, Inline control and Web part objects from 3.0 packages. If possible, avoid overwriting your current objects of these types with objects from 3.0 packages, as it may cause incompatibility problems. |

Conflicts of running sites
If the imported site uses the same domain name or alias as one of the web sites that already run on your server, you may get an error message at the end of the import:
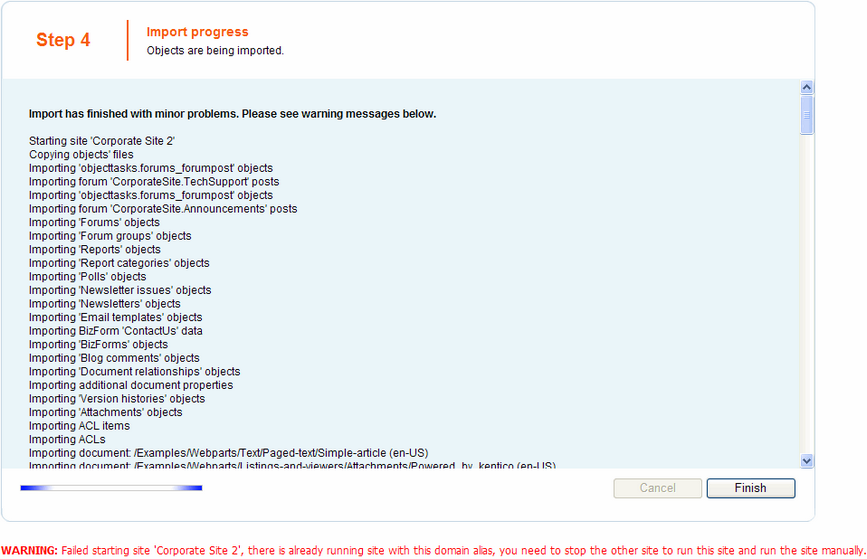
In such case, you need to go to the Sites section, change the domain name or domain alias and start the new web site manually using the Start site button.
|
Application restart At the end of the import process, you may get the following error message:
"Application has been restarted and the logging of the import process has been terminated. Please see context help in this section for more details and how to solve this issue."
If so, you will have to finish the import process manually:
- cms_webpart - cms_cssstylesheet - cms_documenttype - cms_formusercontrol - cms_inlinecontrol - cms_pagetemplate - Global Also extract the <package>\Data\Site folder.
|
