|
|

Making the settings |

|

|

|

|
|
Making the settings |
|
|

|
|
|
|
Making the settings |
|
|
|
|
|
Making the settings |
|
|
|
|
|
|
||
To get the site working, you also have to appropriately configure its settings in the Site manager -> Settings section.
1. First, select the name of your site from the Site drop-down list in the top left corner of the page.
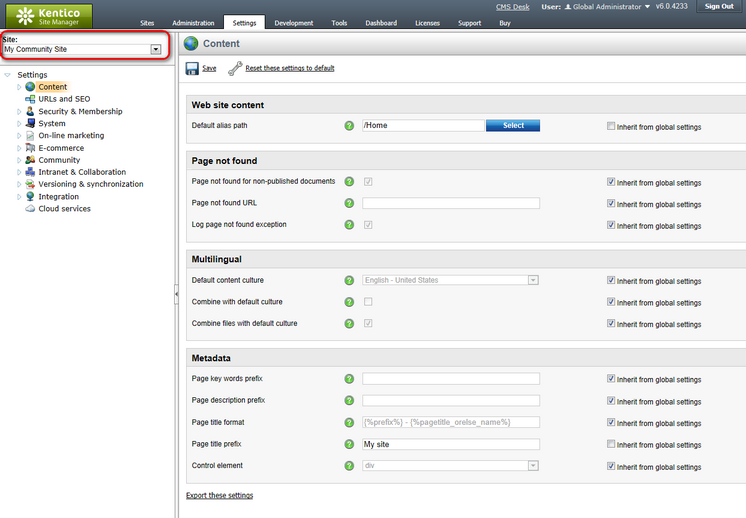
2. In Site Manager -> Settings -> Content, make the following settings. Remember that you need to uncheck the Inherit from global settings check-box in order to be able to enter values into the fields.
•Default alias path: /Home
•Default content culture: English - United States
•Page title prefix: My Community Site
•Exclude documents from search: /Special-Pages/%
Click Save.
3. In Site Manager -> Settings -> Security & Membership, make the following settings:
•Check page permissions: No page
•Website logon page URL: ~/Logon.aspx
Click Save.
4. In Site Manager -> Settings -> Content -> Blogs, set the following value:
•Blog unsubscription URL: ~/Special-Pages/Blog-Unsubscription.aspx
Click Save.
5. In Site Manager -> Settings -> Community, enter the following values:
•Group security access denied path: /Groups/{GroupName}/Access
•Group management path: /Groups/{GroupName}/Management
•Group profile path: /Groups/{GroupName}
•Member management path: /Members/Management
•Member profile path: /Members/{UserName}
•Invitation acceptation path: /Special-Pages/Invitation-Acceptation
•Friend management path: /Special-Pages/Friend-Management
Click Save.
6. In Site Manager -> Settings -> Community -> Forums, enter the following values:
•Forum unsubscription URL: ~/Special-Pages/Forum-Unsubscribe.aspx
•Forum base URL: ~/Forums.aspx
Click Save.
7. In Site Manager -> Settings -> Community -> Message boards, adjust the following property:
•Board unsubscription URL: ~/Special-Pages/Board-Unsubscribe.aspx
Click Save.
8. The settings are done. The whole website should now be fully functional.