|
|

Menu design |

|

|

|

|
|
Menu design |
|
|

|
|
|
|
Menu design |
|
|
|
|
|
Menu design |
|
|
|
|
|
|
||
Now you will learn how to change the design of the main navigation menu. The main menu used on the sample Corporate Site is displayed using the CSS list menu web part which is based on the CMSListMenu server control.
The menu design depends primarily on the applied CSS styles. Here's an example of the CSS styles used for the drop-down menu:
[CSS]
.zoneMenu .CMSListMenuUL { list-style: none; margin: 0px; padding: 0px; position: relative; }
.zoneMenu .CMSListMenuUL li { float: left; padding: 0px 22px 0px 0px; }
.zoneMenu .CMSListMenuUL li a { color: #fff; text-decoration: none; display: block; height: 23px; font-size: 16px; line-height: 23px; padding: 0px 8px; border: 1px solid transparent; font-family: Arial; }
.zoneMenu .CMSListMenuUL .CMSListMenuHighlightedLIfirst a, .zoneMenu .CMSListMenuUL .CMSListMenuLIfirst a { padding-left: 0px; }
... |
As you can see, these are standard CSS styles. The styles can be modified in the global stylesheet of the given site.
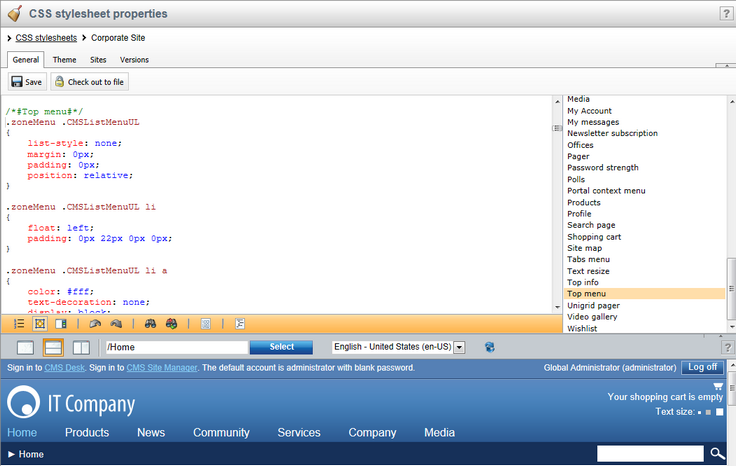
Go to Site Manager -> Development -> CSS stylesheets and edit (![]() ) the Corporate Site stylesheet. Then click the
) the Corporate Site stylesheet. Then click the ![]() Preview button in the header of the General tab, which will allow you to view the site's pages while working with the stylesheet's code. Switch to a
Preview button in the header of the General tab, which will allow you to view the site's pages while working with the stylesheet's code. Switch to a ![]() Horizontal layout using the appropriate button on the preview toolbar. You also need to specify a page for the preview, so for example enter /Home into the path textbox on the toolbar and Refresh (
Horizontal layout using the appropriate button on the preview toolbar. You also need to specify a page for the preview, so for example enter /Home into the path textbox on the toolbar and Refresh (![]() ) the page section.
) the page section.
To allow easy navigation, the CSS code is separated into blocks that can be accessed using the panel on the right side of the editor. Select the Top menu bookmark and the editor will scroll down to the definitions of the CSS classes used to style the menu (starting with those listed above). In the page preview section below, you can see the default appearance of the website's main menu.
Now we will change the background color of highlighted menu items to orange. Scroll down in the CSS code until you find the class definition shown below and insert the highlighted line:
[CSS]
.zoneMenu .CMSListMenuHighlightedLI a, .zoneMenu .CMSListMenuHighlightedLIfirst a { color: #8cd2f8 !important;
text-decoration: none; } |
Click ![]() Save to confirm the change. The page preview section will automatically be refreshed and you will be able to see the modified menu.
Save to confirm the change. The page preview section will automatically be refreshed and you will be able to see the modified menu.
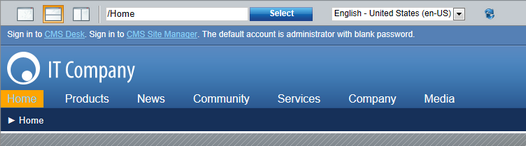
Of course, the new style will also be applied to the live site.
Every document may have its own style that is used when the document is displayed in a menu. We will try to modify the style of the Home menu item. Go to CMS Desk -> Content and select Home from the content tree. Then switch to the Properties -> Navigation tab. Here you can define the following settings:
•Menu caption - the name of the document when it's displayed in a menu.
•Show in navigation - indicates if the document should be displayed by navigation web parts and controls, i.e. included in menus.
•Show in sitemap - indicates if the document should be included in the website's sitemap.
•Menu actions - determines what happens when the document's menu item is clicked by a user. The link can be disabled, a JavaScript command can be executed, or a specified URL can be opened.
•Search & SEO - can be used to exclude the document from searches and set up advanced properties related to the website's Google sitemap.
•Menu design - the fields in this section allow you to set styles applied to the particular document's menu item. The styles can be specified for three different scenarios: standard, when a user hovers over the menu item, and when the given document is currently selected (highlighted).
Enter the following value into the Menu item style value (in the Menu item design section): background-color: red;
Confirm the change by clicking ![]() Save. To view the result, switch to Live site mode and select Products in the website's menu. The Home menu item will now be displayed in red:
Save. To view the result, switch to Live site mode and select Products in the website's menu. The Home menu item will now be displayed in red:
![]()