|
|

Scheduled tasks administration |

|

|

|

|
|
Scheduled tasks administration |
|
|

|
|
|
|
Scheduled tasks administration |
|
|
|
|
|
Scheduled tasks administration |
|
|
|
|
|
|
||
You can configure scheduled tasks in Site Manager -> Administration -> Scheduled tasks. The tasks are divided into two tabs:
•Tasks tab - here, you can manage, configure and add new scheduled tasks.
•System tasks tab - here, you can manage and configure system scheduled tasks. System tasks are temporary tasks created dynamically by the system to ensure its correct internal functionality. You cannot add new tasks under this tab as it contains system tasks only.
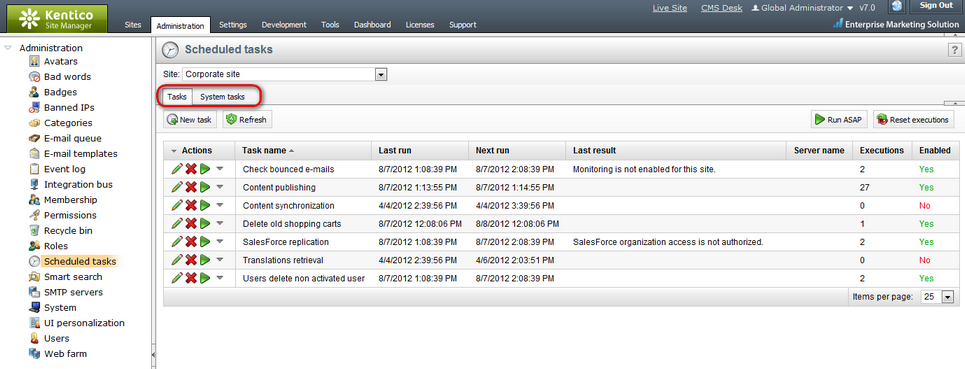
The Site drop-down list at the top is used for selecting a site. If a particular website is chosen, a list of site-specific tasks scheduled for the given site will be displayed in the grid below. Selecting the (Global) option allows you to work with tasks that are not related to a specific site. The tasks of the current site can also be edited in CMS Desk -> Administration -> Scheduled tasks.
Next to the site selection drop-down list, you can find the following two buttons that may be used to manage the selected site's timer:
•Restart timer - restarts the internal scheduling timer. This button is only available when the scheduler is configured to use the internal timer as described in Configuring task execution.
•Run ASAP - immediately executes all tasks that are ready to be executed.
![]() New task, available only in Tasks tab, allows you to schedule new custom tasks. The process of creating a scheduled task is covered in more detail in the Scheduling custom code topic. The
New task, available only in Tasks tab, allows you to schedule new custom tasks. The process of creating a scheduled task is covered in more detail in the Scheduling custom code topic. The ![]() Refresh action updates the information displayed below in the list of tasks. Clicking
Refresh action updates the information displayed below in the list of tasks. Clicking ![]() Reset executions clears the execution counter for all tasks and starts it again from 0.
Reset executions clears the execution counter for all tasks and starts it again from 0.
The three action icons on the left of each task serve the following purpose:
•![]() Edit - allows the properties of the task (e.g. its execution interval) to be modified.
Edit - allows the properties of the task (e.g. its execution interval) to be modified.
•![]() Delete - removes the scheduled task.
Delete - removes the scheduled task.
•![]() Execute - immediately runs the task. When a task is executed manually, the scheduled time of its next execution is automatically moved forward according to the scheduling interval.
Execute - immediately runs the task. When a task is executed manually, the scheduled time of its next execution is automatically moved forward according to the scheduling interval.
If a ![]() icon is displayed in the Actions column, it indicates that the task should be executed by the Windows service, but was not executed for a long period of time. This typically happens when the service is not running and notifies you about the fact that it should be started in order for these task to be executed.
icon is displayed in the Actions column, it indicates that the task should be executed by the Windows service, but was not executed for a long period of time. This typically happens when the service is not running and notifies you about the fact that it should be started in order for these task to be executed.