Localization expressions |

|

|

|

|
|
Localization expressions |

|

|

|

|
|
|
||
If you need to supply a localized value into a field or text area where localization expressions are supported, you can use expressions in the following formats:
Format |
Description |
Sample Value |
Basic format:
{$key$} |
Displays value of the resource string with the specified key. Strings can be viewed and edited in Site Manager -> Development -> UI Cultures or in the .resx files under the CMSResources folder.
|
{$myform.firstname$} |
In-place localization:
{$=default_string|culture_code=translation|culture_code=translation|etc.$} |
Displays the strings defined in the expression.
On the left, you can see an example that displays Hallo for German culture, Ciao for Italian and Hello for all other cultures (default value).
|
{$=Hello|de-de=Hallo|it-it=Ciao$} |
See also: Development -> Macro expressions
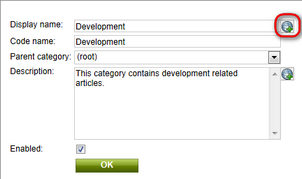
Fields in the Kentico CMS interface that contain the display names or descriptions of objects provide a more user friendly way to handle localization. This is achieved using action buttons and dialogs that allow you to insert resource strings and edit their text and translations directly from the given section of the UI.
To add a resource string to a field where this functionality is supported:
1. Click the Localize (![]() ) button.
) button.

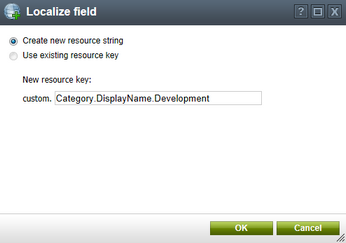
2. A dialog opens where you can create a new string or select an existing one for the field.

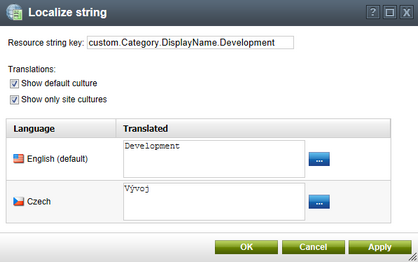
3. Edit the text of the resource string for individual cultures. You can use machine translation services to assist with the translation (if there are any configured for your application).
All cultures specified on the Site Manager -> Development -> UI cultures -> All cultures tab are available. If the Show only site cultures box is checked, only cultures assigned to the currently active site are visible. The Show default culture option can be used to ensure that the default UI culture configured for your installation of Kentico CMS is always displayed.
Please keep in mind that modifying the resource string assigned to a particular field also affects all other occurrences of the same string.

4. Click OK to confirm any changes made to the resource string.

5. Save the form by clicking ![]() Save at the top of the page to confirm that the string should be inserted into the field (some forms may use an OK confirmation button instead).
Save at the top of the page to confirm that the string should be inserted into the field (some forms may use an OK confirmation button instead).
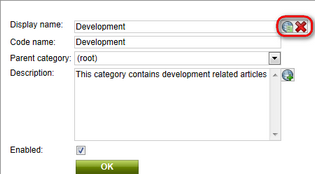
The field is now localized and it displays its value according to the current culture settings. You can edit the text of the resource string at any time by clicking the Localize other languages (![]() ) button. If you wish to remove the localization string from a field, click the Remove localization (
) button. If you wish to remove the localization string from a field, click the Remove localization (![]() ) action.
) action.
|
Please note
Resource strings created using localization dialogs are always stored in the database. The dialogs cannot be used to interact with strings contained in resource files (.resx) under the CMSResources folder. |