|
|

Exporting UI data |

|

|

|

|
|
Exporting UI data |
|
|

|
|
|
|
Exporting UI data |
|
|
|
|
|
Exporting UI data |
|
|
|
|
|
|
||
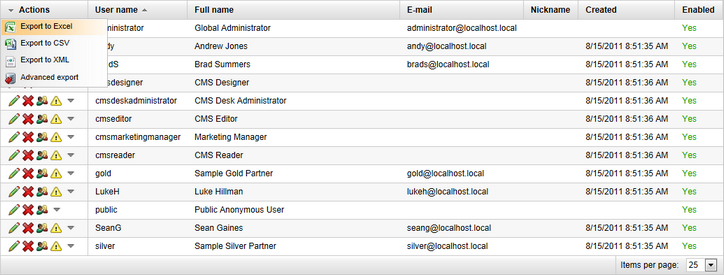
The UI data export functionality allows you to export data shown in various listings throughout the whole UI to XLSX, CSV or XML files. To achieve this, click the ![]() icon in the Actions column header. A drop-down menu will be displayed, offering the following options:
icon in the Actions column header. A drop-down menu will be displayed, offering the following options:
•![]() Export to Excel - exports data shown on the current page of the listing to an XLSX spreadsheet.
Export to Excel - exports data shown on the current page of the listing to an XLSX spreadsheet.
•![]() Export to CSV - exports data shown on the current page of the listing to a CSV file.
Export to CSV - exports data shown on the current page of the listing to a CSV file.
•![]() Export to XML - exports data shown on the current page of the listing to an XML file.
Export to XML - exports data shown on the current page of the listing to an XML file.
•![]() Advanced export - opens a dialog where export to the three formats mentioned above can be performed based on detailed settings. For more details, please refer to the Advanced export topic.
Advanced export - opens a dialog where export to the three formats mentioned above can be performed based on detailed settings. For more details, please refer to the Advanced export topic.
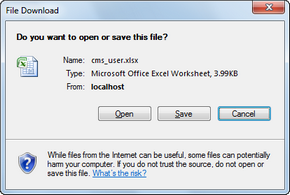
After executing an action from the drop-down menu, your browser's standard file download dialog pops-up, letting you open or save the file with exported data just as if you were downloading any other file.
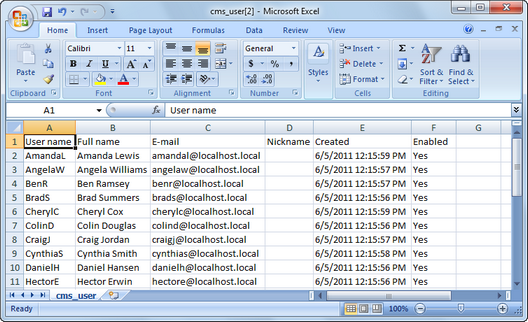
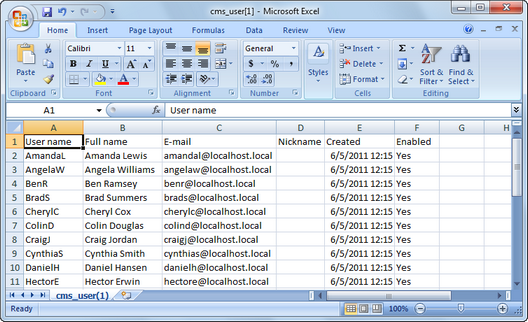
Data exported to an XLSX spreadsheet are displayed just as in the listing. Spreadsheet columns represent the columns of the listing, while rows represent particular records shown in the rows of the listing.
|
Maximal exported string length
Please note that maximal length of text exported into a single cell of an Excel spreadsheet is 32767 (2^15 - 1) characters. Longer strings are trimmed to match this length.
|
In the screenshot below, you can see the default appearance of an exported XLSX file. However, it is also possible to use customized templates for Excel export so that you can for example add graphics to the header of the spreadsheet. More details on this option can be found in the Excel export templates topic.
CSV is an abbreviation for Comma-separated values. It is a file format that stores tabular data in text form — each line represents one row of data, while particular values (columns) in each row are separated by a comma (,) or a semicolon (;). If a column value contains the delimiter, the whole value is wrapped in double quotation marks in CSV (e.g. the value one,two is exported as "one,two"). If a column value contains double quotation marks, they are backslashed in CSV (e.g. the value "one is exported as \"one).
A comma is used as a column delimiter by default if you select the ![]() Export to CSV action, while you can choose between the comma and the semicolon in the
Export to CSV action, while you can choose between the comma and the semicolon in the ![]() Advanced export dialog. See the CSV delimiters topic for more information.
Advanced export dialog. See the CSV delimiters topic for more information.
The plain text form of exported data stored in a CSV file looks as follows:
User name,Full name,E-mail,Nickname,Created,Enabled AmandaL,Amanda Lewis,amandal@localhost.local,,5/6/2011 12:43:26 PM,Yes AngelaW,Angela Williams,angelaw@localhost.local,,5/6/2011 12:43:25 PM,Yes BenR,Ben Ramsey,benr@localhost.local,,5/6/2011 12:43:24 PM,Yes BradS,Brad Summers,brads@localhost.local,,5/6/2011 12:43:24 PM,Yes CherylC,Cheryl Cox,cherylc@localhost.local,,5/6/2011 12:43:26 PM,Yes ... |
If the correct delimiter is used, the file can also be opened in a spreadsheet editor such as Microsoft Excel.
The code sample below illustrates how exported data are stored in XML files. There is always the NewDataSet root element, which contains a number of Table elements. Each of the Table elements represents a single data record. Its sub-elements represent particular columns of the table, have names identical to the physical database column names and contain the respective values.
<?xml version="1.0" encoding="windows-1250"?> <NewDataSet> <cms_user> <UserName>AmandaL</UserName> <FullName>Amanda Lewis</FullName> <Email>amandal@localhost.local</Email> <Nickname /> <Created>5/6/2011 12:43:26 PM</Created> <Enabled>Yes</Enabled> </cms_user> <cms_user> <UserName>AngelaW</UserName> <FullName>Angela Williams</FullName> <Email>angelaw@localhost.local</Email> <Nickname /> <Created>5/6/2011 12:43:25 PM</Created> <Enabled>Yes</Enabled> </cms_user> ... </NewDataSet> |
