Custom E-mail provider |

|

|

|

|
|
Custom E-mail provider |

|

|

|

|
|
|
||
Customizing the e-mail provider allows you to:
•Execute custom actions when sending e-mails (for example logging the sent e‑mails for auditing purposes)
•Use third‑party components for sending e‑mails
Once you create and register your custom e-mail provider, it is used to process all e-mails sent out by Kentico CMS and its modules.
The following example demonstrates how to define a custom e‑mail provider. This sample provider supports all of the default e‑mail functionality, but additionally creates an entry in the Event log whenever the system sends an e‑mail.
1. Open your web project in Visual Studio and create a new class in the App_Code folder (or Old_App_Code if the project is installed as a web application). For example, name the class CustomEmailProvider.cs.
2. Edit the class and add the following references:
[C#]
using System.ComponentModel; |
3. Modify the class's declaration to make it inherit from the CMS.EmailEngine.EmailProvider class:
[C#]
/// <summary> |
Custom e-mail providers must always inherit from the default EmailProvider class. This allows you to call the base methods before adding your own custom functionality.
4. Add the following method overrides into the class:
[C#]
/// <summary> |
The provider uses these methods to send out e‑mails. Each method calls the base from the parent provider class and then logs an information event into the system's event log. You can use the same approach to add any type of custom functionality.
This example uses the web.config approach for registering the custom e-mail provider:
1. Open your application's web.config file and add the following section into the configSections element (if it is not already present):
<?xml version="1.0"?>
|
This defines the cms.extensibility web.config section where you can register custom providers, helpers and managers.
2. Create the actual cms.extensibility section directly under the root level of the web.config and add the e‑mail provider:
...
... </configuration> |
Because the custom provider is defined in App_Code, you also need to ensure that the system can load the class.
3. Extend the CMSModuleLoader partial class. You can either create a new class file for this purpose or add the partial class declaration directly into the file containing your custom provider (CustomEmailProvider.cs in this case).
[C#]
public partial class CMSModuleLoader |
4. Create a new attribute class inside the CMSModuleLoader that inherits from CMSLoaderAttribute. Add the attribute to the CMSModuleLoader partial class:
[C#]
using CMS.SettingsProvider; |
5. Add the following code into the attribute class:
[C#]
/// <summary> |
Note: The string used to identify the custom e-mail provider class must match the value of the type attribute set for the corresponding add element in the web.config extensibility section (EmailProviderWithEventLog in this example).
The system now uses the custom e-mail provider (defined in the CustomEmailProvider class) when sending e-mails.
To try out the functionality:
1. Send some e‑mails using Kentico CMS.
oFor example, you can use the Site Manager -> Administration -> System -> E-mail interface to send a test e-mail (synchronously).
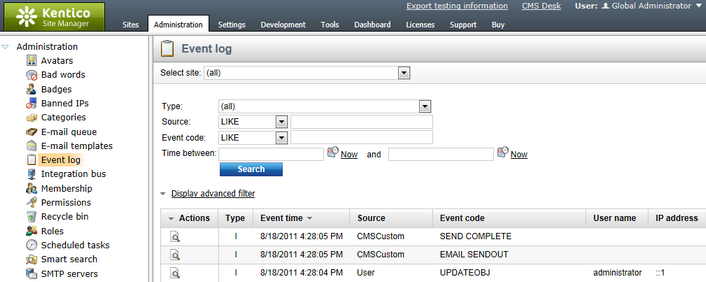
2. Check the log in Site Manager -> Administration -> Event log.

Every successfully sent e-mail should have its own entry identified by the CMSCustom Source value (two entries for e-mails sent asynchronously).