|
|

Creating an alternative form |

|

|

|

|
|
Creating an alternative form |
|
|

|
|
|
|
Creating an alternative form |
|
|
|
|
|
Creating an alternative form |
|
|
|
|
|
|
||
This example shows how to create an alternative form of the existing Contact us form on the sample Corporate Site.
Alternative forms of document types, system tables and custom tables can be created exactly the same way as described in this example. You only need to access the Alternative forms tab in the appropriate sections of the UI:
•Site manager -> Development -> Custom tables
•Site manager -> Development -> Document types
•Site manager -> Development -> System tables
There, Edit (![]() ) the particular item, switch to its Alternative forms tab and follow the instructions below, starting from the second step.
) the particular item, switch to its Alternative forms tab and follow the instructions below, starting from the second step.
1. Go to CMS Desk -> Tools -> Forms and Edit (![]() ) the Contact us form. The Form Properties dialog opens.
) the Contact us form. The Form Properties dialog opens.
2. Switch to the Alternative forms tab and click the ![]() Create new form button.
Create new form button.
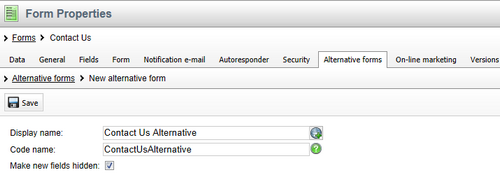
3. Enter the following details and click ![]() Save.
Save.
•Display name: Contact Us Alternative
•Code name: ContactUsAlternative
•Make new fields hidden: yes (this ensures that any new fields added to the main form are not displayed in the alternative form by default)
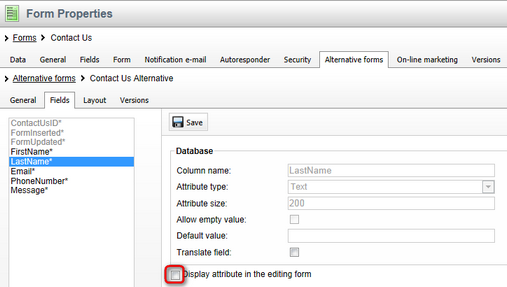
4. Switch to the Fields tab. All fields present in the original form are also available here and you can modify their configuration. For example, disable the LastName field. Select the field in the list on the left and uncheck Display attribute in the editing form. Confirm this change by clicking ![]() Save. Using the same approach, you can modify any field in the form according to your needs.
Save. Using the same approach, you can modify any field in the form according to your needs.
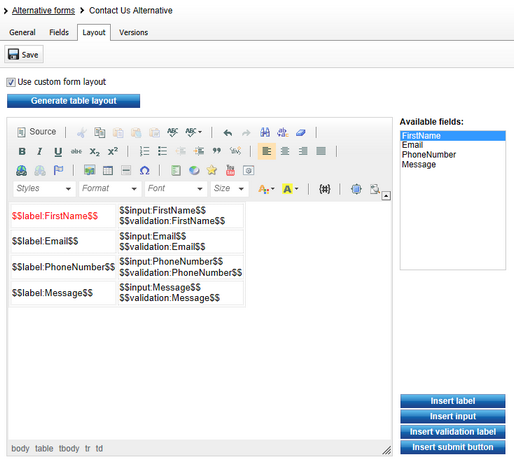
5. You can also modify the layout of the form. Switch to the Layout tab and check the Use custom layout checkbox. The layout editor appears. Notice that the LastName field that we disabled in the previous step is not offered in the Available fields listbox. Click the Generate table layout button. The system generates a default table layout in the editing area below. Highlight the $$label:FirstName$$ text in the first row and change its color to red using the WYSIWYG editor.
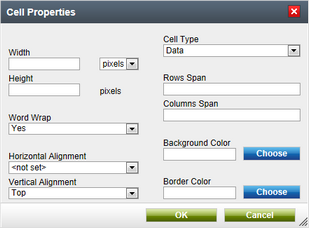
Then select the rows of the table's first column, right-click and choose Cell -> Cell properties from the context menu. In the displayed dialog, choose Vertical alignment: Top and click OK. This aligns the labels with their fields. Click ![]() Save.
Save.
6. Let's take a look at what we've created. Switch to CMS Desk -> Content. From the content tree, select Examples -> Web parts -> Forms -> On-line form. As you can see, the original version of the Contact Us form is present on the page. We will edit the web part's properties so that the alternative from is used instead.
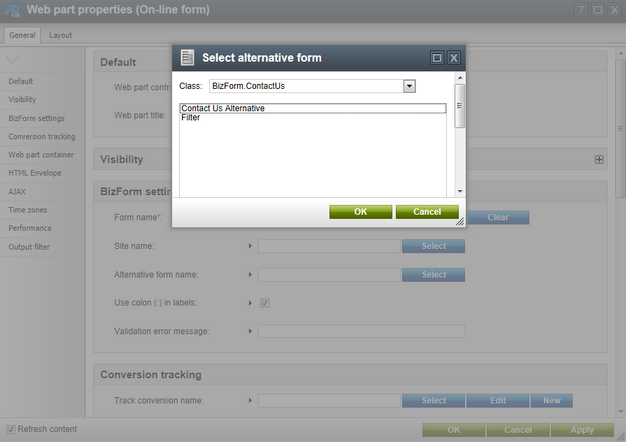
7. In Edit mode, switch to the page's Design tab and configure (![]() ) the On-line form web part's properties. Click the Select button next to the Alternative form name property. In the next dialog, choose the BizForm.ContactUs class and select the Contact Us Alternative option. Click OK in both dialogs to close them and confirm the changes.
) the On-line form web part's properties. Click the Select button next to the Alternative form name property. In the next dialog, choose the BizForm.ContactUs class and select the Contact Us Alternative option. Click OK in both dialogs to close them and confirm the changes.
8. Now when you switch to the Live site mode, you should see the modified version as in the following screenshot:
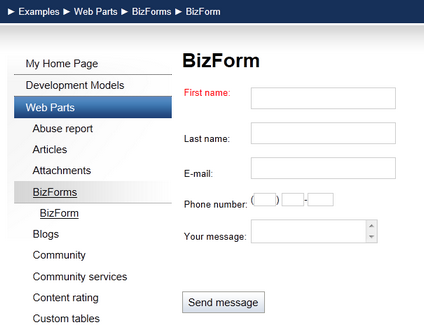
You have learned how to create an alternative form to an existing form and use it on your website.