Authoring static newsletter issues |

|

|

|

|
|
Authoring static newsletter issues |

|

|

|

|
|
|
||
Now that you have created a static newsletter with a subscriber as described in the Creating a static newsletter topic, it is possible to write and send individual issues. The following steps describe how this can be done:
1. Go to the Newsletters tab in the left menu and edit (![]() ) My newsletter. Click
) My newsletter. Click ![]() Create new issue on the Issues tab. A wizard will guide you through the process of creating a new newsletter issue.
Create new issue on the Issues tab. A wizard will guide you through the process of creating a new newsletter issue.
2. In Step 1, start by entering the following Subject: Welcome to issue #1 of My newsletter
3. Then copy the following text into the content editable region:
Dear , |
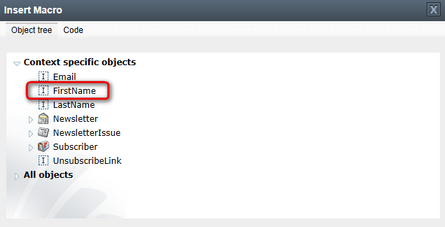
Place the cursor after the word Dear and click the Insert macro (![]() ) button on the toolbar of the WYSIWYG editor. In the displayed dialog, choose the FirstName option under the Context specific objects section.
) button on the toolbar of the WYSIWYG editor. In the displayed dialog, choose the FirstName option under the Context specific objects section.

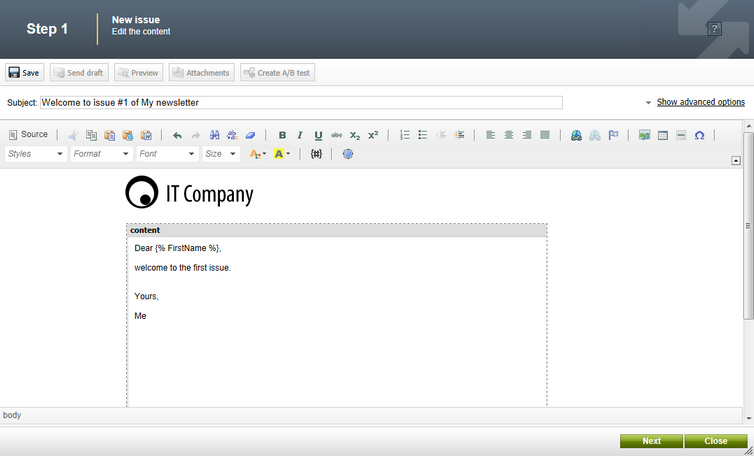
The {% FirstName %} macro expression will be placed into the text. This macro will automatically be replaced by the e-mail recipient's first name during the mail merge. The issue should now look like this:

|
Newsletter templates
The overall structure of this issue is defined by the Newsletter issue template, which can be edited under the Templates section of the left menu. Templates are described in the Newsletter templates topic.
Some newsletters may have multiple issue templates assigned. In this case, there will be an additional step in the wizard where you can choose the template that you wish to use for the new issue.
It is also possible to change the template by clicking Show advanced properties next to the Subject field and selecting a different option through the Template selector. |
4. Click the ![]() Save button at the top. Once the issue is saved, you can manage it using the actions described below:
Save button at the top. Once the issue is saved, you can manage it using the actions described below:
•![]() Send draft - allows you to send a test draft of the newsletter issue to any e-mail address. Draft e-mails do not correctly resolve newsletter macros (such as unsubscription links), since the recipients are not linked to subscribers in the system.
Send draft - allows you to send a test draft of the newsletter issue to any e-mail address. Draft e-mails do not correctly resolve newsletter macros (such as unsubscription links), since the recipients are not linked to subscribers in the system.
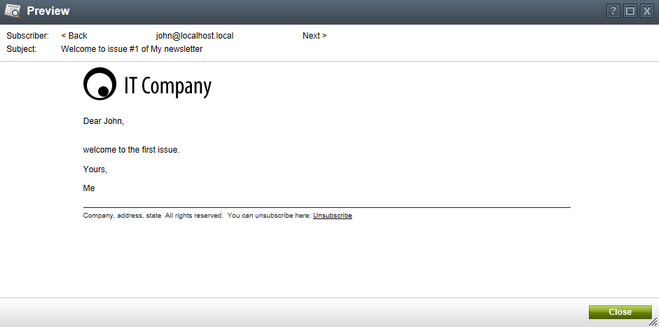
•![]() Preview - opens a dialog window where you can view how the issue will appear to specific subscribers.
Preview - opens a dialog window where you can view how the issue will appear to specific subscribers.
•![]() Attachments - allows you to attach files to the issue, such as images, an event agenda, white papers, etc. The attachments will be included in the issue e‑mails when they are sent out. Please note that other attachments may already be included in the newsletter template on which the issue is based.
Attachments - allows you to attach files to the issue, such as images, an event agenda, white papers, etc. The attachments will be included in the issue e‑mails when they are sent out. Please note that other attachments may already be included in the newsletter template on which the issue is based.
•![]() Create A/B test - may be used to prepare an A/B test for the issue. This allows you to create several different versions of the issue, evaluate them on a test group of subscribers and then send out the most successful one. Clicking this button adds the first testing variant of the issue. Please see the On-line marketing -> A/B testing topic to learn more.
Create A/B test - may be used to prepare an A/B test for the issue. This allows you to create several different versions of the issue, evaluate them on a test group of subscribers and then send out the most successful one. Clicking this button adds the first testing variant of the issue. Please see the On-line marketing -> A/B testing topic to learn more.
Try clicking the ![]() Preview button. This will open a dialog where you can see how the content of the issue will appear for each subscriber.
Preview button. This will open a dialog where you can see how the content of the issue will appear for each subscriber.

Close the preview dialog.
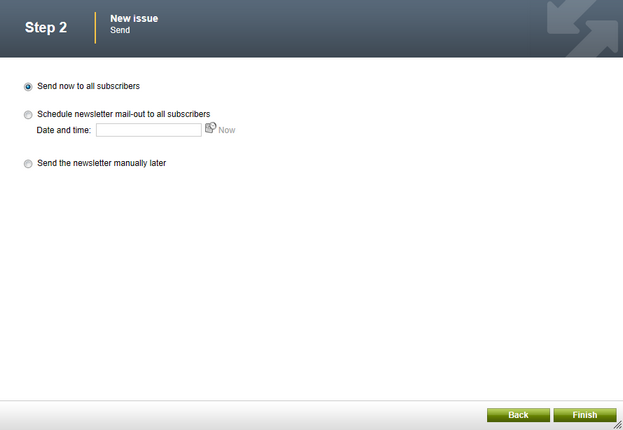
5. Now click Next. This automatically saves the content of the issue and moves you to the final step of the wizard. Here you can choose when the newsletter issue should be sent out:
•Send now to all subscribers - the newsletter issue is sent out immediately to all subscribers.
•Schedule newsletter mail-out - the issue will be sent out on the specified date and time.
•Send the newsletter manually later - the issue will not be sent for now and you can decide on the mail-out time later.

Select Send now to all subscribers and click Finish. On the Issues tab, you can review the statistics and details of the newsletter's issues.

Issues that are scheduled to be sent out in the future can be modified by clicking the Edit (![]() ) action. This allows you to work with their content and other settings.
) action. This allows you to work with their content and other settings.
6. If you experience problems receiving the newsletter issue e-mail, please follow the instructions in the Troubleshooting topic.