Creating a notification message template |

|

|

|

|
|
Creating a notification message template |

|

|

|

|
|
|
||
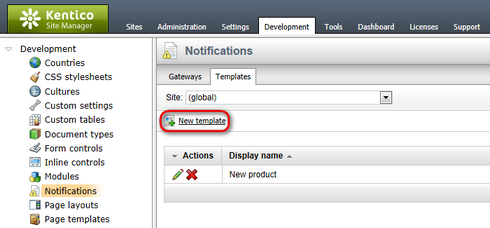
1. Go to Site Manager -> Development -> Notifications and switch to the Templates tab. Using the Sites drop-down list, you can select which site will be the template used by. If you choose (global), the template will be available for all sites. When selected, click ![]() New template. You will be redirected to the New template form.
New template. You will be redirected to the New template form.

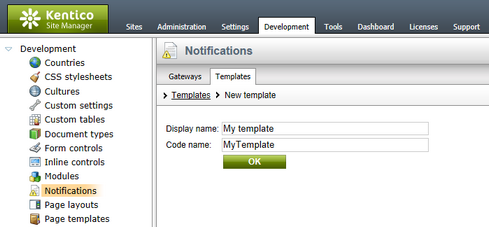
2. On the New template form, enter the following details:
•Display name - display name of the template
•Code name - code name of the template
Click OK. The template will be created.

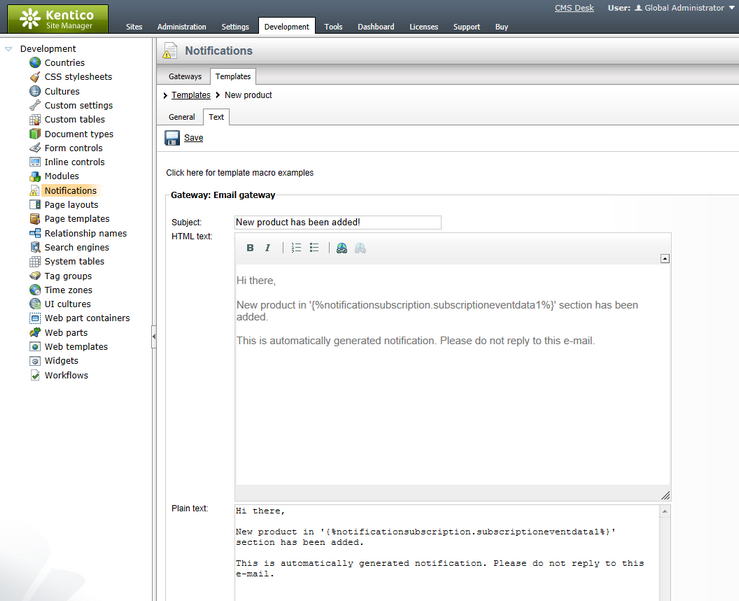
3. Now you should see the same form that you've just filled, but in the General tab, while another tab called Text is also available. Switch to the Text tab.
On this tab, the text of the notification message can be defined. You should see sections for each of the defined gateways. Texts can be set separately for each gateway, so that for one event, you can have different texts sent via e-mail and via SMS. Each of the sections contains the gateway name and some of the following three fields, depending on the gateway settings:
•Subject - message subject text
•HTML text - text of the message in HTML format
•Plain text - text of the message in plain text format
The following macros can be used in your notification templates:
•{%notificationsubscription.SubscriptionID%} - displays the value of specified data column from the Notification_Subscription table; this represents subscription information
•{%notificationgateway.GatewayID%} - displays the value of the specified data column from the Notification_Gateway table; this represents the notification gateway which performs the sending of the notification message
•{%notificationuser.UserID%} - displays the value of the specified user data column from the CMS_Usertable table; this represents the user the notification message is being sent to
•{%notificationcustomdata.XXX%} - displays the value of the specified data column from a custom data source. You can use the Document, Tree and SKU columns from View_CMS_Tree_Joined and also the document type's table (e.g. CONTENT_article for CMS.article document type).
•{%documentlink%} - displays the link to the document (for content event notifications only)

When you have entered appropriate text for each available gateway, click ![]() Save.
Save.