|
|

Modifying the group public profile |

|

|

|

|
|
Modifying the group public profile |
|
|

|
|
|
|
Modifying the group public profile |
|
|
|
|
|
Modifying the group public profile |
|
|
|
|
|
|
||
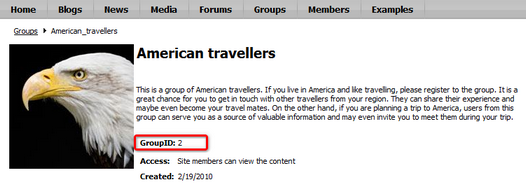
You can define which details will be displayed on group public profiles. The process is quite similar to modifying user public profiles described here. In the following example, you will learn how to add the Group ID field to the group public profiles.
Group public profiles display information from the Community_Group system table using an alternative form. In our case, it is the Display profile alternative form. We will have to modify the alternative form to achieve the required functionality. For more information about the Alternative forms concept, please refer to the Module Alternative forms chapter of the Kentico CMS Developer's Guide.
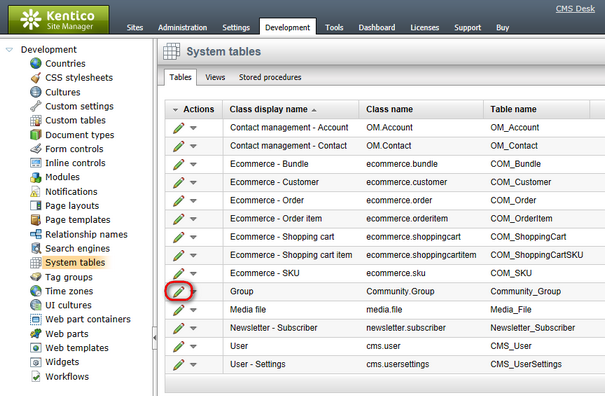
1. Sign in to Site Manager (login administrator with blank password by default). Go to Development -> System tables and choose to Edit (![]() ) the Group (Community_Group) system table.
) the Group (Community_Group) system table.
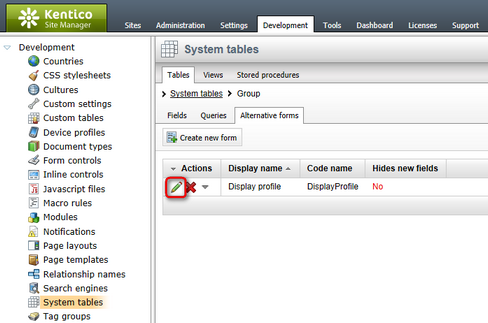
2. Switch to the Alternative forms tab and choose to Edit (![]() ) the Display profile alternative form.
) the Display profile alternative form.
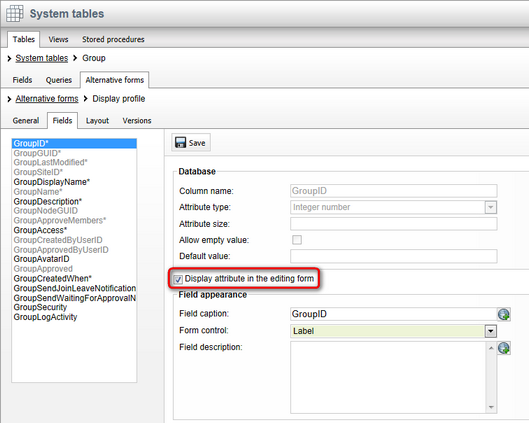
3. Switch to the Fields tab, select GroupID from the list of available fields and check the Display attribute in the editing form checkbox. Click ![]() Save.
Save.
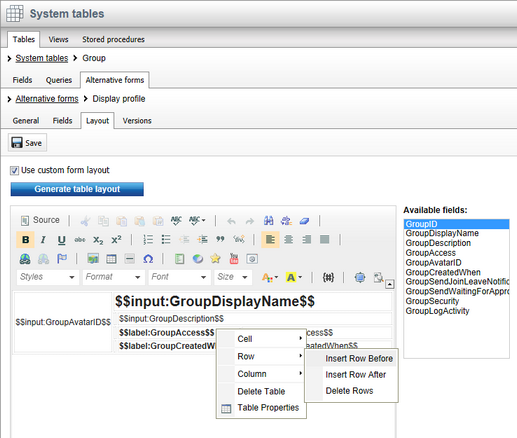
4. Switch to the Layout tab. We will place the GroupID field above the GroupAccess field. Place the cursor into the row containing the GroupAccess controls, right click and choose Row -> Insert Row Before from the context menu.
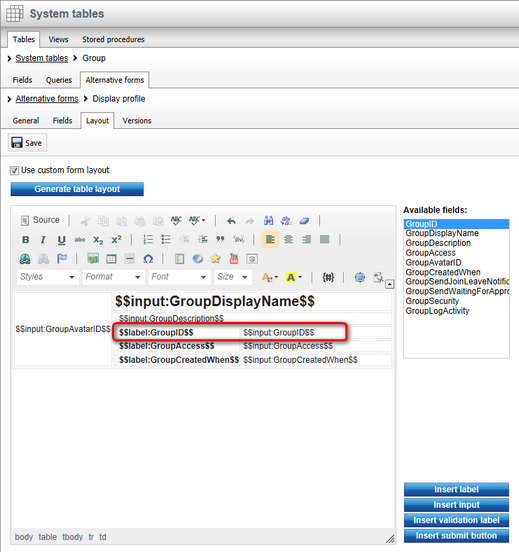
5. Now we have the layout as we want it, so we can proceed by adding the required controls. Select GroupID from the Available fields list, place the cursor in the first empty cell and click Insert label. Highlight the entered text and make it bold, so that it looks the same as the other two labels. Place the cursor in the second empty cell and click Insert input. The result should look as in the screenshot below. Click ![]() Save to save the changes.
Save to save the changes.
6. Go to the live site now and view some group's profile. You should see the GroupID field as highlighted in the screenshot below.