Modifying the forums structure |

|

|

|

|
|
Modifying the forums structure |

|

|

|

|
|
|
||
When developing your community site from the Community Starter site template, you will probably want to modify the forums structure so that it matches the needs of your community. In the following example, you will learn how to create a new forum group and replace the Back-packer forums with it.
1. Go to CMS Desk -> Tools -> Forums and click ![]() New forum group at the top of the page.
New forum group at the top of the page.
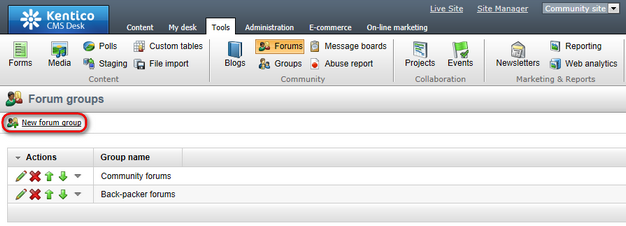
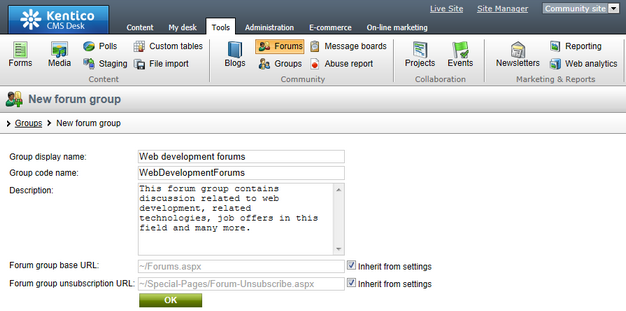
2. On the New forum group page, enter the following details:
•Group display name - name of the forum group displayed on the live site and in the administration interface
•Group code name - name of the forum group used in website code
•Description - text describing the forum group, displayed above the list of forums in the group on the live site
•Forum group base URL - URL of the page where the Forum group web part displaying this forum group resides; leave the Inherit from settings check-box checked
•Forum group unsubscription URL - URL of the page where the Forum unsubscription web part resides; leave the Inherit from settings check-box checked
Click OK.
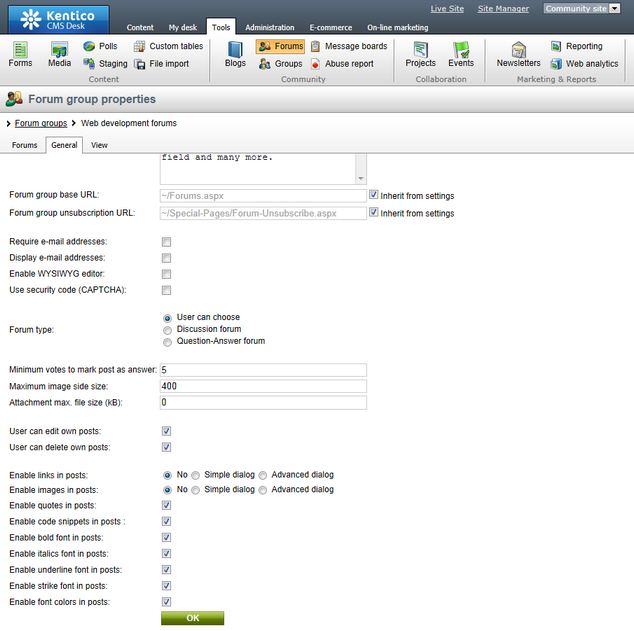
3. The Forum group properties page will be displayed. Let's make some additional settings which you may find useful before we start defining the forums within this forum group. Switch to the General tab and set the following properties:
•Forum type - User can choose; this option enables users to choose from classical or Question-Answer type when creating a new thread
•User can edit own posts - enable this option so that users can edit their own posts
•User can delete own posts - enable this option so that users can delete their own posts
•Enable * in posts - enable all the check-boxes so that users can use all BBcode macros in their posts; for more details on supported BBcode macros, please refer to Kentico CMS Developer's Guide -> Module Forums -> BBcode support
Leave the rest of the properties at their default values and click OK.
4. Now we will define the forum group structure - the particular forums. Switch to the Forums tab and click ![]() Add forum.
Add forum.

5. Enter the following details:
•Forum display name - name of the forum displayed on the live site and in the administration interface
•Forum code name - name of the forum used in website code
•Description - text describing the content of the forum, displayed in the list of forums in the group on the live site
You can set the rest of the properties to inherit the settings from the parent forum group and click OK to save the forum.
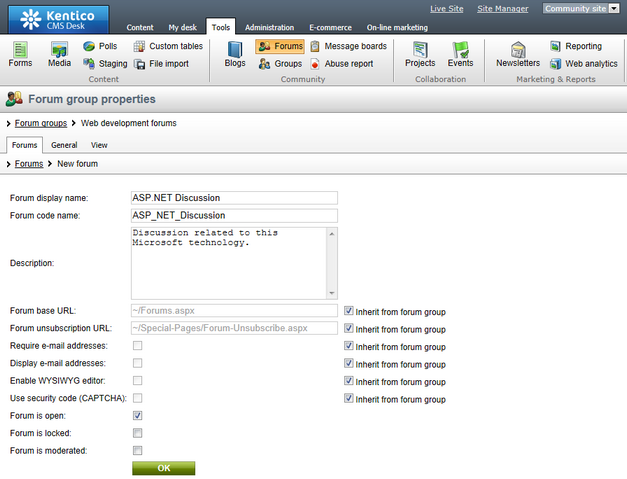
6. You are redirected to the forum editing section. If you switch to the Forums tab again, you should see the newly created forum in the list. Repeat the procedure and define some other forums in this forum group. When you are finished, you should see all the forums in the list on the Forums tab like in the screenshot below.

7. Now when the forum group is created and the forums in it defined, we can publish the forum group on the live site. We will place it instead of the original Back-packer forums.
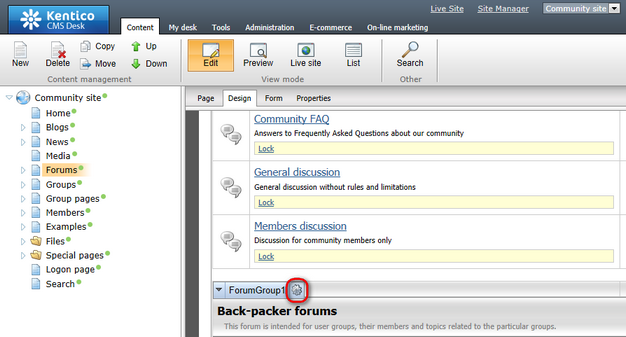
Go to CMS Desk -> Content -> Edit. Select the Forums document from the content tree and switch to the Design tab. Scroll down the page and choose to Configure (![]() ) the ForumGroup1 web part.
) the ForumGroup1 web part.
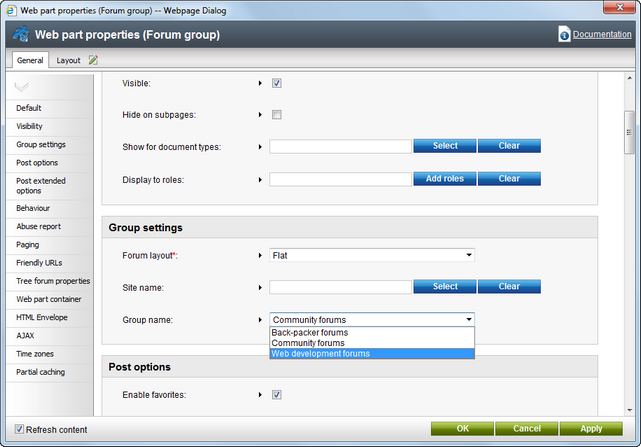
8. In the web part properties window, change the value of the Group name property to the name of the new forum group created above, which is Web development forums in our case. Click OK.
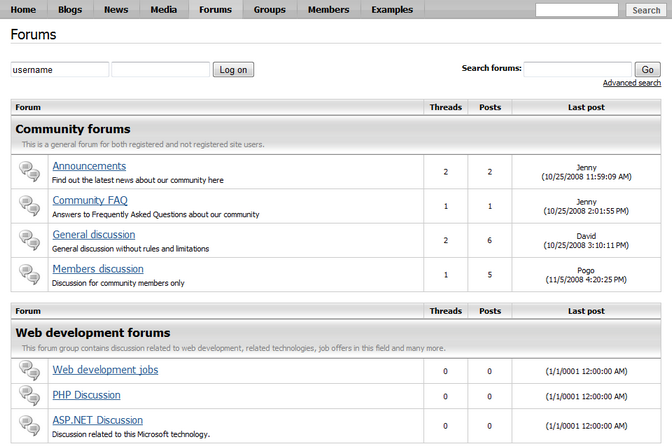
9. If you switch to the live site now, you should see that the Back-packer forums have been replaced by the Web development forums defined earlier in this example. The forum group is fully functional and the discussion may begin.
Further steps: You have learnt how to define a new forum group and publish it on the live site. Like this, you can define another forum group and publish it instead of the Community forums forum group. In case that you wanted to have more than two forum groups published, you only need to place another Forum group web part on the page and define its Group name property. You may also want to have only one forum group published, in which case you only need to remove one of the Forum Group web parts.