Home page |

|

|

|

|
|
Home page |

|

|

|

|
|
|
||
Now we will create the home page template for our website. Right-click the CMSTemplates/MySite folder in the Solution Explorer and click Add new item... Choose to create a new Web Form called Home.aspx and check the Select master page box:
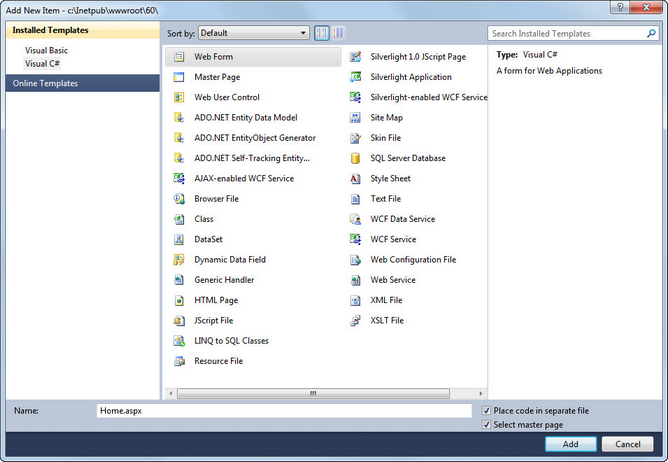
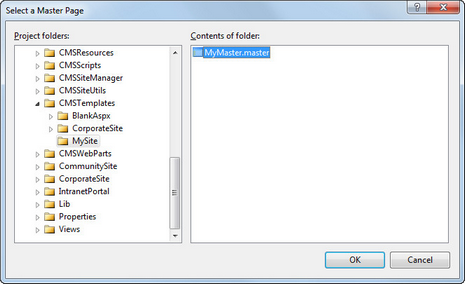
Click Add and choose the MyMaster.master page from the CMSTemplates/MySite folder in the next dialog:
Copy the whole <!-- main content --> section from the home.htm file inside the <asp:Content> element. Now we will replace the static content with editable regions so that the page can be managed by content editors:
•Remove the whole "Welcome to Our Business, Inc. website..." text section.
•Remove the whole "Our Business, Inc. ..." content of the right box.
The complete code will look like the following:
Please note: If you installed the Kentico CMS project as a web application, you need to rename the CodeFile attribute in the Page directive on the first line to Codebehind for the code example to be functional.
<%@ Page Title="" Language="C#" MasterPageFile="~/CMSTemplates/MySite/MyMaster.master" AutoEventWireup="true" CodeFile="Home.aspx.cs" Inherits="CMSTemplates_MySite_Home" %> |
Modify the code of the table in the <!-- center box --> section according to the following:
<!-- center box --> |
As you can see, a CMSPagePlaceholder control was added to the center cell of the middle row, which defines an area of the page that will be editable through the browser. This area will later be configured to allow content editors to easily customize the design of the Home page.
Switch to the Design tab and drag and drop a CMSEditableRegion control into the bottom cell of the table on the right of the page:
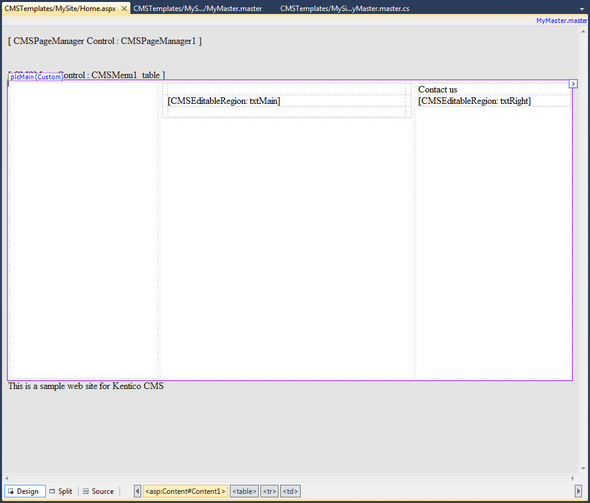
Set the following properties of the CMSEditableRegion control:
•ID: txtRight
•DialogHeight: 280
•RegionType: HtmlEditor
•RegionTitle: Right content
Switch to the code behind and add a reference to the CMS.UIControls namespace:
[C#]
using CMS.UIControls; |
[VB.NET]
Imports CMS.UIControls |
You also need to change the class definition so that it inherits from the TemplatePage class:
[C#]
public partial class CMSTemplates_MySite_Home : TemplatePage |
[VB.NET]
Partial Class CMSTemplates_MySite_Home Inherits TemplatePage |
Save the changes.
Our master page and page template for the home page are ready. Now we need to register the home page template in Kentico CMS. Open Kentico CMS in a web browser and go to Site Manager -> Development -> Page templates.
Click the ![]() New category button and set the following properties:
New category button and set the following properties:
•Category display name: My website
•Category name: mysite
Click ![]() New template and enter the following values:
New template and enter the following values:
•Template display name: Home page
•Template code name: HomePage
Click OK and set the following values on the General tab:
•Template type: ASPX + Portal page
•File name: ~/CMSTemplates/MySite/Home.aspx
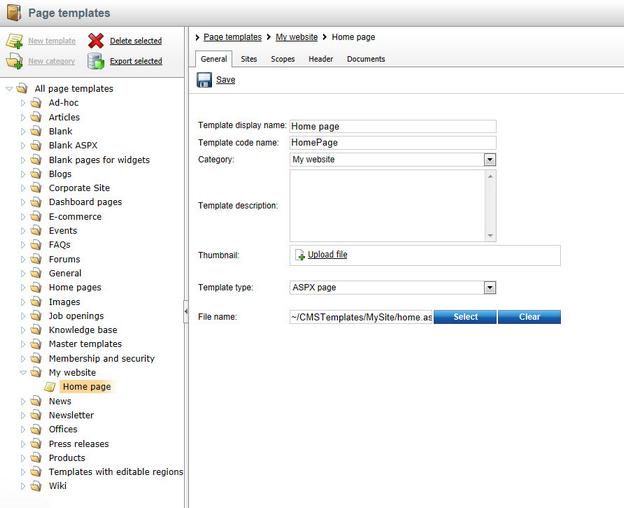
Click ![]() Save and switch to the Sites tab. Assign the new page template to your website.
Save and switch to the Sites tab. Assign the new page template to your website.
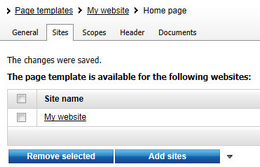
Go to CMS Desk -> Content. Select the root of the content tree and click New. Choose to create a Page (menu item) and use the following values:
•Page name: Home
•Use existing page template: My website/Home page
Click ![]() Save to create the page. Switch to the page's Design tab. You will see the editable area that was defined in the code of the page template. Expand the menu (
Save to create the page. Switch to the page's Design tab. You will see the editable area that was defined in the code of the page template. Expand the menu (![]() ) of the zoneMain zone and select
) of the zoneMain zone and select ![]() Properties to open its configuration dialog.
Properties to open its configuration dialog.
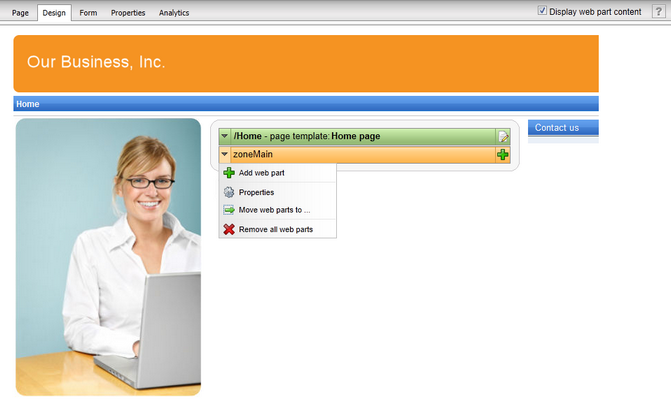
Change the Widget zone type property from None to Customization by page editor and click OK.
Open the Page tab and use the Add widget (![]() ) button to place the General -> Text widget onto the page. Set its Text property to Welcome to our website! and click OK. As you can see, the design of the page can quickly be modified directly through the browser using widgets. This approach can be useful once the website has some more content or features to be displayed.
) button to place the General -> Text widget onto the page. Set its Text property to Welcome to our website! and click OK. As you can see, the design of the page can quickly be modified directly through the browser using widgets. This approach can be useful once the website has some more content or features to be displayed.
Next, enter the following text into the Right content editable region: Call 800 111 2222
Click ![]() Save.
Save.
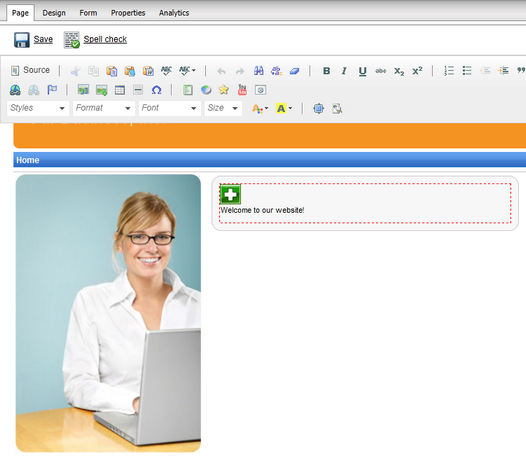
You can view the page in Live site mode to see how the home page of your website will appear to visitors.
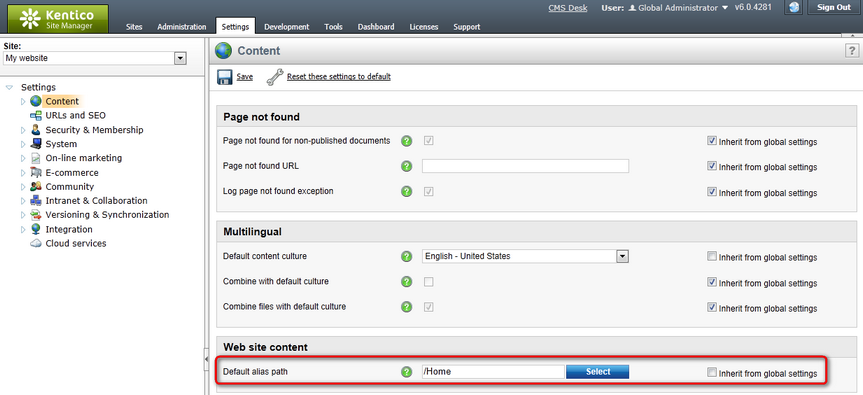
When a site visitor comes to the root of your website (e.g. to http://www.example.com), the system needs to know which page should be displayed by default as the home page. Go to Site Manager -> Settings, select My website in the Site drop-down menu, click the Content setting category and make sure the value of Default alias path is set to /Home, which is the alias path of our new home page. If not, please uncheck the Inherit from global settings box, enter the value and click ![]() Save.
Save.
