Adding portal engine functionality to ASPX templates
Creating pages using ASPX templates:
Adding portal engine functionality to ASPX templates
Adding portal engine functionality to ASPX templates
When developing or maintaining a website using ASPX page templates, one of the drawbacks is that the code of a page must be modified manually every time you wish to change its design. It is possible to add flexibility to ASPX templates by defining areas that may be edited directly through the browser in the Kentico CMS administration interface. The techniques used to manage these areas are the same as those used to design portal engine page templates. To learn more about portal engine features, please read the version of this tutorial dedicated to the portal engine.
Example
In this example, you will learn how to create a simple ASPX page template with areas that can be designed via the portal engine.
1. Open the web project in Visual Studio again (using either the WebProject.sln file or File -> Open -> Web site in the menu), right‑click the CMSTemplates -> CorporateSite folder in the Solution Explorer and select Add new item.
2. Choose to create a new Web form and call it TwoZones.aspx, check the Select master page box and click Add. In the master page selection dialog, choose the Root.master page from the CMSTemplates/CorporateSite folder and click OK.
3. Open the Source view of the newly created ASPX page and place the following code inside the <asp:Content> control:
The CMSPagePlaceholder control creates an area on the page that will behave in a way similar to a portal engine page template.
The <LayoutTemplate> element is used to define the graphical layout of the area. This example uses a basic two column table structure, but setting a CSS‑based layout applied through HTML elements (e.g. <div>, <span>, etc.) is also a valid option.
The table contains two CMSWebPartZone controls, which represent fully functional portal engine zones. These zones may be managed when editing a page based on the page template on the Edit -> Design tab of CMS Desk. When some content is defined for a zone, information about it is stored in the database along with the respective page template object, not in the actual code of the ASPX page. Communication with the database is ensured by the CMSPortalManager control, which is located on the Root.master page.
4. Now switch to the code behind file and add the following namespace:
[C#]
using CMS.UIControls;
5. Next, modify the class definition to inherit from the TemplatePage class as shown below:
Save the changes made to both the ASPX page and its code behind file. Now the page can be used as a page template in Kentico CMS.
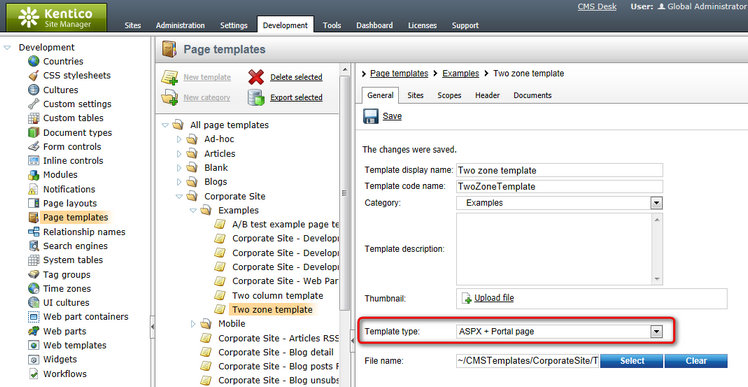
6. Sign in to Site Manager, go to Development -> Page templates and register the created page as a template. To do this, select the Corporate Site -> Examples folder and click New template. Enter the following values:
•Template display name: Two zone template
•Template code name: TwoZoneTemplate
Click OK.
7. Next, select the ASPX + Portal page option for the Template type property. This is necessary in order for the Design tab of CMS Desk to be available when editing pages using the template. Enter the following path into the File name field: ~/CMSTemplates/CorporateSite/TwoZones.aspx
Save the changes.
8. Switch to the Sites tab and use the Add sites button to assign the page template to the site that you are using (Corporate Site).
9. Now go to CMS Desk -> Content. We will modify the About Us page created in the previous example to use our new template. Select the page and switch to its Properties -> Template tab. Click the Select button and choose the Corporate Site/Examples/Two zone template page template from the catalog. Click Save to confirm the change of page template.
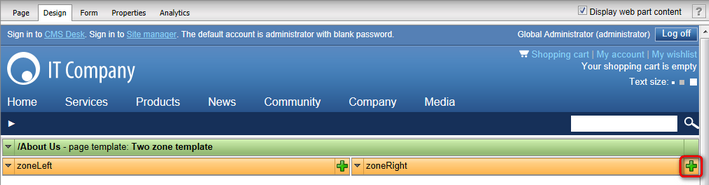
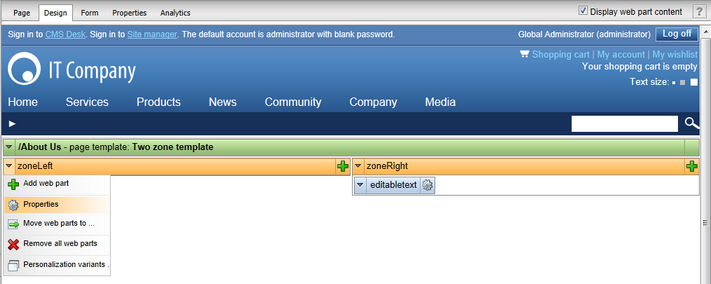
10. Refresh your browser and switch to the Design tab, which is now available for the About Us page. You will see two empty zones on the page as defined in the ASPX code of the template. The content of standard zones are components called web parts. Add a web part to the zoneRight zone by clicking the Add web part () icon in the top right corner.
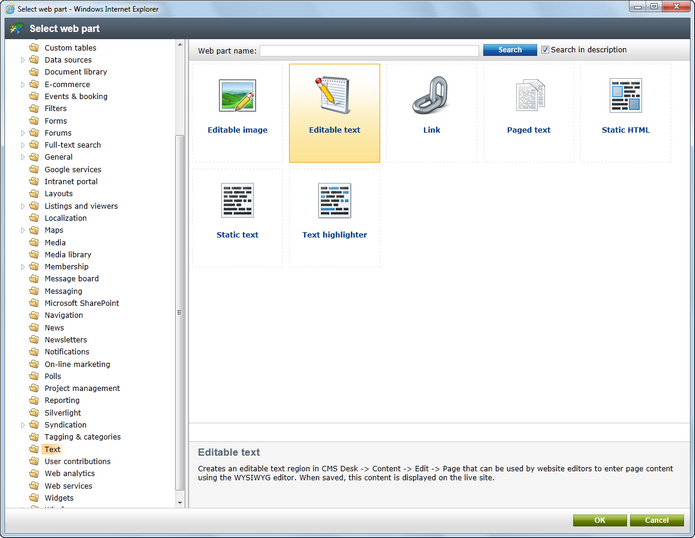
The Select web part dialog will be opened. Choose the Text -> Editable text web part and click OK.
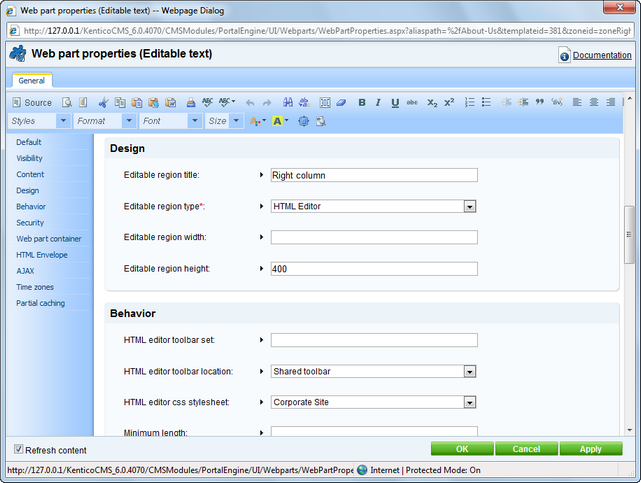
The Web part properties dialog will be opened and the web part can be configured. Enter the following values:
•Design -> Editable region title: Right column
•Design -> Editable region height: 400
Click OK to save the web part and add it to the zone. This web part provides a text area on the page that can be edited on the Page tab of CMS Desk, just like the editable regions in the previous example. As you can see, the design of the page can be built using a simple browser‑based interface. A web part zone may contain multiple web parts.
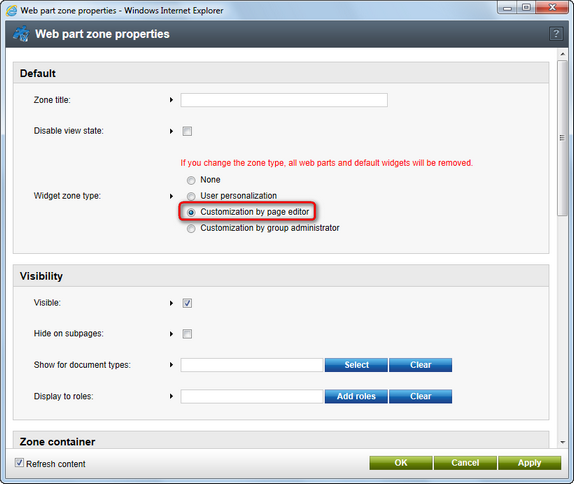
11. Zones may also be configured to use various types of widgets, which are objects similar to web parts, but they allow page customization by different kinds of website users, not just the administrators or designers. Expand the menu () of the zoneLeft zone and select Properties to configure the zone.
Change the Widget zone type property from None to Customization by page editor.
Click OK. This zone will now serve as a widget zone for page editors.
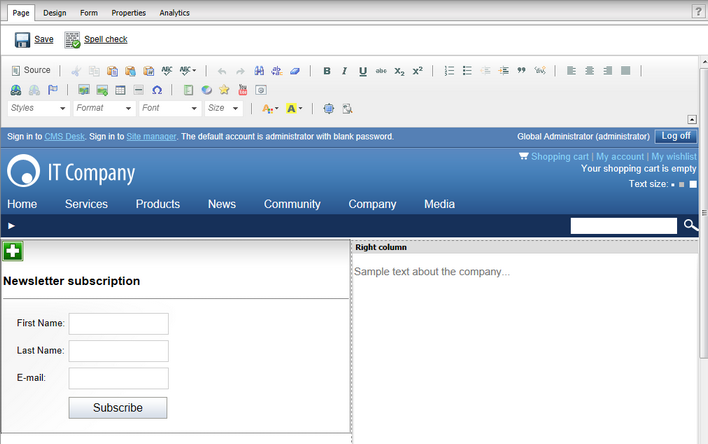
12. Switch to the Page tab, enter some content into the editable text region displayed by the web part on the right and click Save. You will also be able to manage the editor widget zone on the left. Click the Add widget () button in the top left corner of the widget zone to place a widget onto the page. Select the Newsletters -> Newsletter subscription widget from the catalog and set the following values for its properties:
•Newsletter name: Corporate Newsletter
•Allow user subscribers: disabled (unchecked)
•Widget container: Corporate site - Light gradient box
•Widget container title: Newsletter subscription
Click OK to add the widget to the page. It provides a form which users may use to subscribe to the site's newsletter.
As shown in this example, it is possible to use web parts or widgets to build the design of pages based on ASPX page templates. This approach combines the standard architecture and development process of ASPX templates with the flexibility and user‑friendliness of the portal engine.