|
|

Modifying a workgroup home page |

|

|

|

|
|
Modifying a workgroup home page |
|
|

|
|
|
|
Modifying a workgroup home page |
|
|
|
|
|
Modifying a workgroup home page |
|
|
|
|
|
|
||
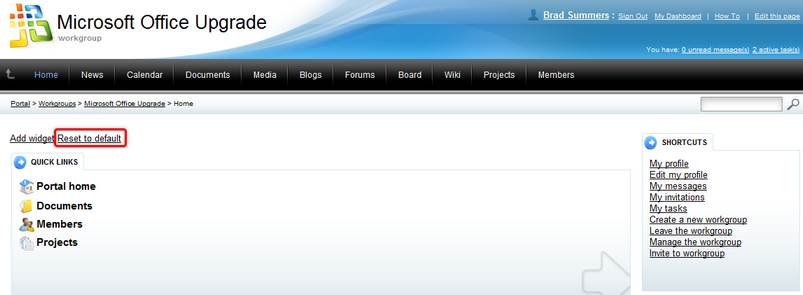
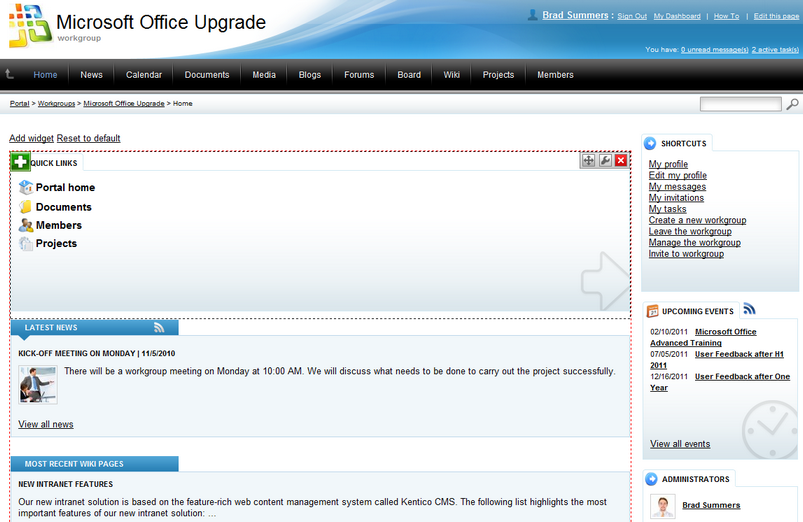
The Home page of a workgroup contains special areas called widget zones that can be customized directly on the website by administrators of the given workgroup. The following examples will demonstrate what kind of modifications are possible:
1. Access the portal and sign in as Brad Summers (user name BradS with a blank password). Navigate to the Workgroups section and click on the Microsoft Office upgrade workgroup, which will bring you directly to its home page.
2. The BradS user account that you are using is set as the administrator of this workgroup, so it is possible to start modifying the widget zones. Hover your mouse cursor over the section of the page that is displaying news (around the LATEST NEWS header) and you will notice that a section of the page is now surrounded by a red dotted outline, which represents a widget zone.
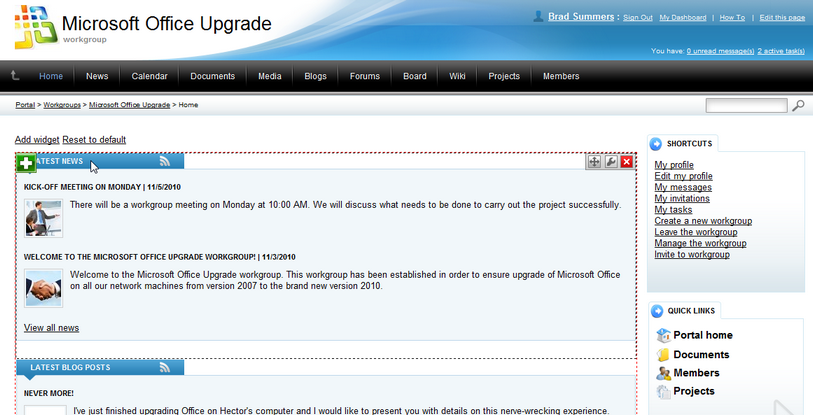
The building blocks that are used to display content within these zones are called widgets and each one is designated by a black dotted outline.
3. You may have also noticed that there are buttons displayed in the corners of these zones. These can be used to administer the widgets on the page to form the design that you require for the Home section of your workgroup.
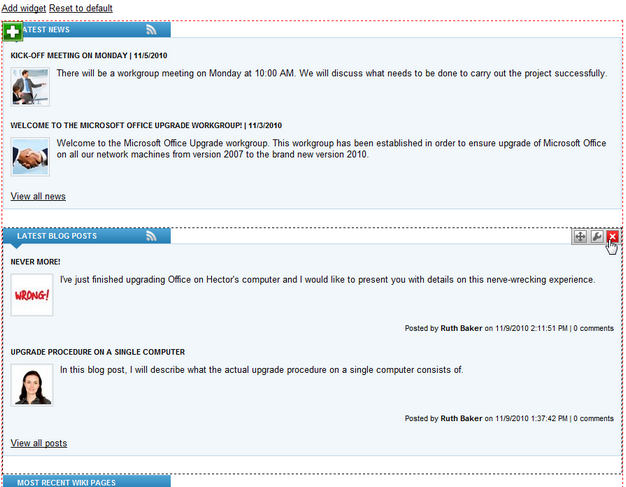
4. By default, the Home section displays quite a lot of content from the other sections of the workgroup, so start by removing the widget displaying the latest blog posts (the second one from the top in the widget zone shown in the image above), which can be done by hovering over it and clicking the Remove widget (![]() ) button in the top right corner of the widget outline.
) button in the top right corner of the widget outline.
Click OK in the confirmation dialog and the widget will be deleted from the page.
5. Next, return to the first widget in the zone that is displaying news and click its Configure widget (![]() ) button. This opens the Widget properties dialog, where functionality and appearance can be modified. Every widget has its own set of properties depending on its function. The following are available for the Workgroup latest news widget that you are now configuring:
) button. This opens the Widget properties dialog, where functionality and appearance can be modified. Every widget has its own set of properties depending on its function. The following are available for the Workgroup latest news widget that you are now configuring:
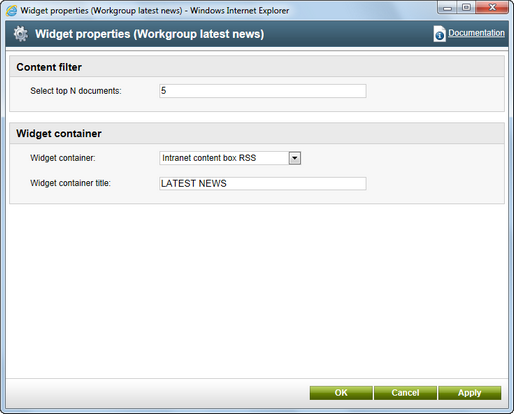
Change the value of the Select top N documents property, which determines the maximum amount of displayed news items, to 1. This will cause the widget to show only the most recent news. Also notice the Widget container properties, which are available for most widgets and allow the selection of a predefined graphical envelope that will be displayed around the widget. You can experiment with different containers and see what kind of appearance you prefer. Confirm the configuration by clicking OK.
6. The location of widgets can easily be changed by using their drag‑and‑drop functionality. This works both for modifying the order of widgets in a zone and moving a widget to a different zone. There is a second widget zone below the Shortcuts menu on the right side of the workgroup home page. Hover over the Quick links widget at the top of this zone, click its Drag widget (![]() ) button, hold down the mouse button and drag the widget to the top of the larger widget zone on the left. The resulting page should be similar to the following image:
) button, hold down the mouse button and drag the widget to the top of the larger widget zone on the left. The resulting page should be similar to the following image:
7. To add a new widget to a zone, click the Add widget (![]() ) button in its top left corner. This opens the Select widget catalog, where you can choose from available widgets.
) button in its top left corner. This opens the Select widget catalog, where you can choose from available widgets.

More information about the widgets that are by default available on the portal can be found in the Intranet widgets chapter of this guide.
Click the General category in the tree on the left of the catalog, select the Text widget and click OK. The Widget properties dialog will be opened, where you can configure the properties of the new widget.
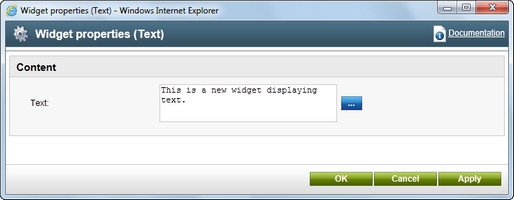
Type something into the Text field and click OK. The widget will now be added to the end of the zone, but you can move it to any other location as described in the previous step.
An alternative way of adding a new widget is by using the Add widget link at the top left of the home page.
8. If required, the entire page can be returned to its default state simply by clicking the Reset to default link.