|
|

Enabling the sample integration connector |

|

|

|

|
|
Enabling the sample integration connector |
|
|

|
|
|
|
Enabling the sample integration connector |
|
|
|
|
|
Enabling the sample integration connector |
|
|
|
|
|
|
||
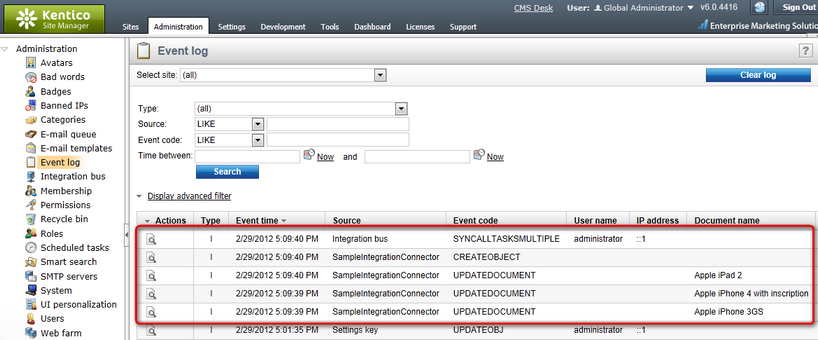
The default installation of Kentico CMS contains a sample integration connector. Two subscriptions for outgoing tasks are implemented in this connector — one for synchronization of all user objects, the second one for synchronization of all documents on all websites in the system. The connector's purpose is only demonstrational - it does nothing more than that it logs an event in Site Manger -> Administration -> Event log for each creation, modification or deletion of a user or document.
The following points summarize what needs to be done in order for the connector to be functional. Most of the steps have already been performed, so they are only described so that you can follow them when registering your own integration connectors.
1. The connector itself is implemented by the SampleIntegrationConnector.cs class located in ~/App_Code/Samples/Classes (or Old_App_Code if you installed the project as a web application). Open the file for editing in Visual Studio. To make it work, you need to ensure that the ConnectorName property initialized in the Init() method has the same value as the code name of the connector registered in the UI (see step 4 below for more details). For the purpose of this example, change the value of the property to "SampleIntegrationConnector".
public class SampleIntegrationConnector : BaseIntegrationConnector { #region "Initialization (subscribing)"
/// <summary> /// Initialize connector name and register subscriptions. /// </summary> public override void Init() {
// Create subscription for all user objects ObjectIntegrationSubscription objSubscription = new ObjectIntegrationSubscription(ConnectorName, TaskProcessTypeEnum.AsyncSnapshot, TaskTypeEnum.All, null, PredefinedObjectType.USER, null);
// Create subscription for all documents (on all sites) DocumentIntegrationSubscription docSubscription = new DocumentIntegrationSubscription(ConnectorName, TaskProcessTypeEnum.AsyncSimpleSnapshot, TaskTypeEnum.All, null, null, null, null);
// Register earlier created subscriptions for current connector SubscribeTo(objSubscription); SubscribeTo(docSubscription);
// Please see implementation of ProcessInternalTaskAsync overloads (and eventually comments for the rest of the methods) }
... |
2. A connector can either be implemented in a standard assembly, or in App_Code (or Old_App_Code if you installed the project as a web application), just as the sample connector. When it is stored in App_Code, you need to implement a module class with code that will ensure dynamic loading of the connector. See Customizing providers from App_Code in Kentico CMS Developer's Guide for more details.
In ~/App_Code/Samples/Modules (or ~/Old_App_Code/Samples/Modules), you can find the SampleIntegrationModule.cs class, which ensures dynamic loading of the sample integration connector. You can see its code below.
using CMS.SettingsProvider;
[SampleIntegrationConnectorLoader] public partial class CMSModuleLoader { public class SampleIntegrationConnectorLoaderAttribute : CMSLoaderAttribute { /// <summary> /// Initializes the module /// </summary> public override void Init() { ClassHelper.OnGetCustomClass += GetCustomClass; }
/// <summary> /// Gets the custom class object based on the given class name. This handler is called when the assembly name is App_Code. /// </summary> private static void GetCustomClass(object sender, ClassEventArgs e) { if (e.Object == null) { switch (e.ClassName) { // Load SampleIntegrationConnector case "SampleIntegrationConnector": e.Object = new SampleIntegrationConnector(); break; } } } } } |
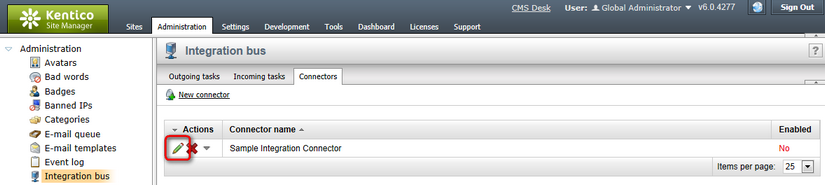
3. In Kentico CMS user interface, integration connectors need to be registered on the Connectors tab in Site Manager -> Administration -> Integration bus. New connectors can be registered by clicking the ![]() New connector link above the grid.
New connector link above the grid.
The Sample Integration Connector is already registered in the default installation and just not enabled, so let's inspect its properties by clicking the Edit (![]() ) icon.
) icon.
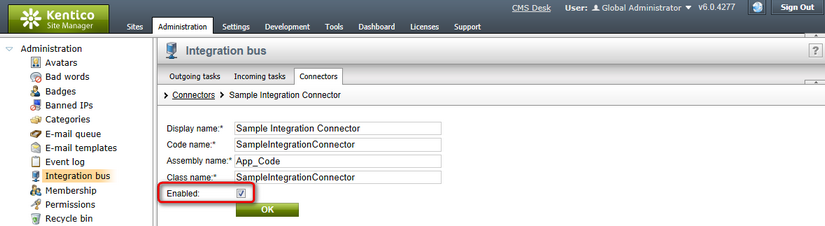
4. When editing an integration connector (as well as when registering a new one), the following properties need to be specified:
•Display name - name of the connector used in the system's administration interface.
•Code name - name of the connector used in website code. This name must match the value of the ConnectorName property declared in the connector class (see step 1 above).
•Assembly name - name of the assembly within the web project in which the connector class resides.
•Class name - name of the class which implements the connector. If the class is located in a dedicated assembly (not in App_Code), the name should be entered including the namespace.
•Enabled - indicates if logging and processing of tasks by this connector is enabled. Logging and processing of tasks needs to be enabled in Site Manger -> Settings -> Integration -> Integration bus as well in order for the connector to be functional.
As the sample integration connector is not enabled by default, check the Enabled check-box and click OK to save the changes.
5. Now that the the connector is registered and enabled, you only need to adjust settings of the module. Go to Site Manger -> Settings -> Integration -> Integration bus and adjust the settings as follows:
•Enable system integration bus: enabled
•Enable logging of incoming tasks: disabled
•Enable processing on incoming tasks: disabled
•Enable logging of outgoing tasks: enabled
•Enable processing of outgoing tasks: disabled
The sample connector only handles outgoing tasks, so all incoming task settings may stay disabled. The reason why you should also leave processing of outgoing tasks disabled is only demonstrational — it will allow you to see the logged tasks in the UI in the following step. If you enabled them, the tasks would be processed right off and you would only see the logged events in the event log.
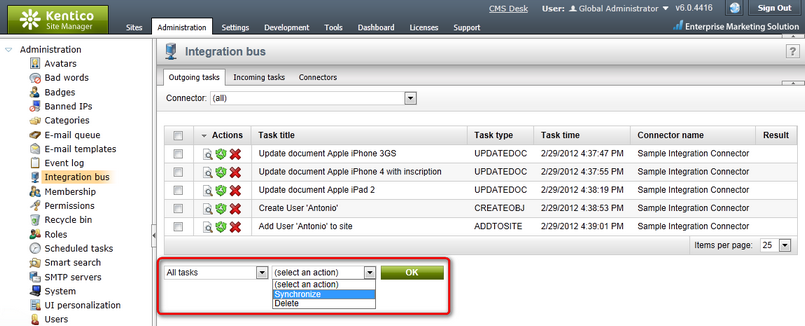
6. With the settings adjusted, try creating and modifying some documents and users. After doing so, go to Site Manager -> Administration -> Integration bus. You should see tasks for the respective actions logged on the Outgoing tasks tab. As processing of the tasks is disabled by settings, the Synchronize (![]() ) action is grayed out and can not be performed at the moment.
) action is grayed out and can not be performed at the moment.
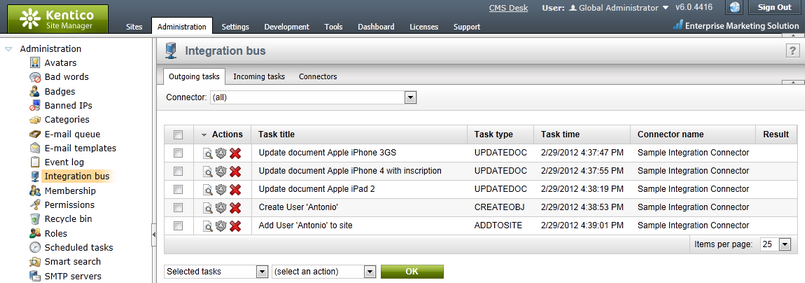
7. Now go back to Site Manger -> Settings -> Integration -> Integration bus and enable the Enable processing of outgoing tasks setting. Then, go back to Site Manager -> Administration -> Integration bus -> Outgoing tasks. The Synchronize (![]() ) action should now be enabled. Instead of clicking the icon for each logged task, you can simply choose All tasks from the first drop-down list below the grid, choose Synchronize from the second one and click OK.
) action should now be enabled. Instead of clicking the icon for each logged task, you can simply choose All tasks from the first drop-down list below the grid, choose Synchronize from the second one and click OK.
8. Once all tasks are performed, you can go to Site Manger -> Administration -> Event log and see the events logged by performing the tasks.