|
|

Website template |

|

|

|

|
|
Website template |
|
|

|
|
|
|
Website template |
|
|
|
|
|
Website template |
|
|
|
|
|
|
||
This topic describes creation of a new website using the New site wizard when the Use website template is chosen in the first step of the wizard.
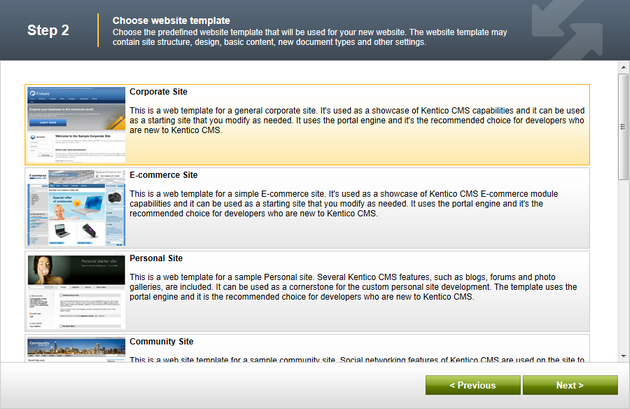
1. In Step 2, you can choose from a number of website templates:
•Corporate site is a typical web presentation of a company.
•E-commerce site is a typical e-shop showing the possibilities of the E-commerce module.
•Community site is a sample community website demonstrating social networking capabilities of Kentico CMS.
•Blank site is a blank template used for creating websites from scratch.
•and others.
Some of the templates are available in two versions, one using the portal engine and the other using ASPX page templates. Choose one of the listed website templates and click the Next button.
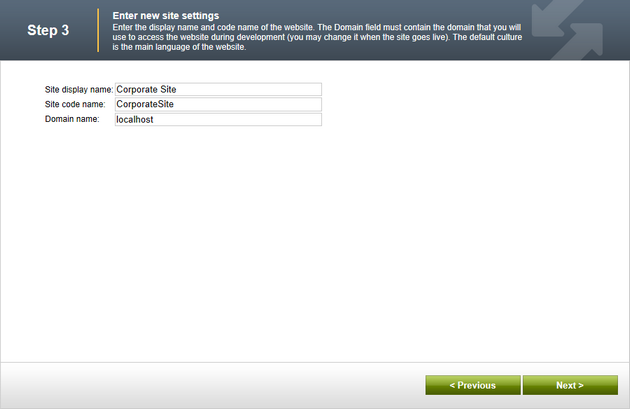
2. In this step, enter the following basic site properties:
•Site display name - display name of the new site.
•Site code name - code name of the new site.
•Domain name - domain name on that the new site will be running. The domain must be unique for each website running in the system. If you enter the same domain for two websites, they can't be running at the same time.
Click Next to continue.
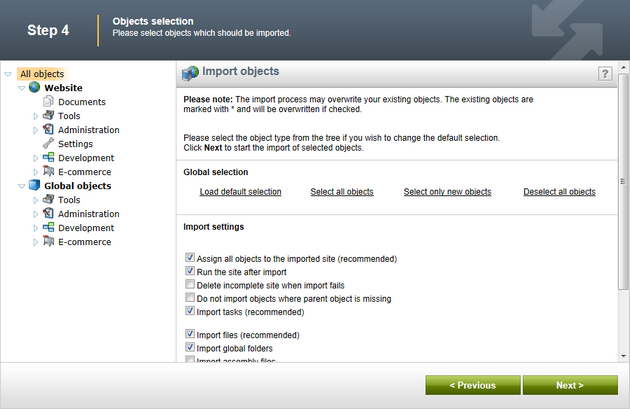
3. In Step 4, you can select which of the objects from the site package will be imported. You can make this selection by choosing one of the categories displayed in the tree on the left side of the screen. By selecting a category, a set of check boxes appears in the right part of the screen, letting you select which objects will to be imported.
If you select the root of the tree, you will be offered with the following options:
Global selection
•Load default selection - if clicked, object preselection will be done based on choice in Step 1.
•Select all objects - if clicked, all objects will be preselected.
•Select only new objects - if clicked, only objects not existing in the database will be preselected.
•Deselect all objects - if clicked, all objects will be deselected.
Import settings
•Assign all objects to the imported site (recommended) - if checked, all imported site related objects will be assigned to the imported site.
•Run the site after import - if checked, the updated site will be run after the import is finished.
•Delete incomplete site when import fails - if checked, incomplete site will be deleted when import fails.
•Import files (recommended) - if checked, files will be imported.
•Do not import objects where parent object is missing - if checked, objects that are in the package but whose parent object is not present in the target instance will not be imported
•Import tasks (recommended) - if checked, delete tasks (incremental deployment) included in the package will be imported
Click Next to continue.
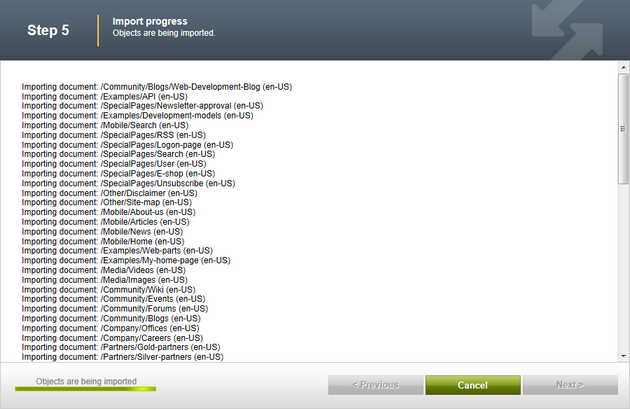
4. A log will be displayed, showing you the progress of website import. When the export process finishes, click the Next button.
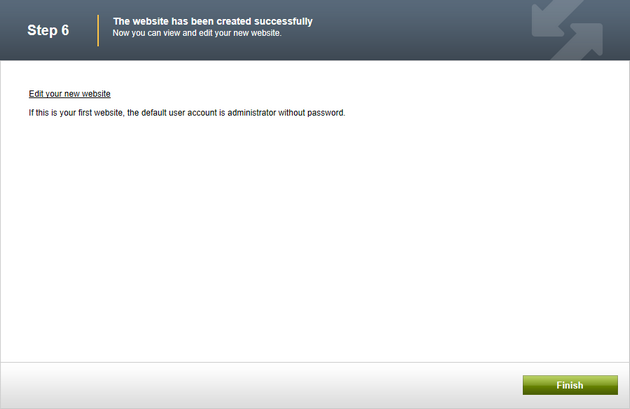
5. If you have reached Step 6, you have successfully created the new website. Click the Edit your new website link to switch to CMSDesk and start editing the site immediately. Alternatively, click the Finish button to get back to Site manager -> Sites.