|
|

Web part binding (obsolete) |

|

|

|

|
|
Web part binding (obsolete) |
|
|

|
|
|
|
Web part binding (obsolete) |
|
|
|
|
|
Web part binding (obsolete) |
|
|
|
|
|
|
||
|
Obsolete feature
This feature is now obsolete. If you need to bind the behavior of some web part to another web part value, please use URL parameters or create a user control that contains both web parts and write custom code that will ensure the communication between the web parts.
If you need to use this feature for backward compatibility, you need to add the following parameter to your web.config file, to the appSettings section:
|
Web part binding allows you to connect two web parts. For example: you can have a web part containing a drop-down list with countries. When some value is selected, it is provided to another web part that displays a list of company offices in the selected country. You can manage web part binding on the Binding tab:

|
Alternative option
If binding doesn't work as expected, you can alternatively create your own user control, place the required web parts on it and manage their interactions using your own code. You can find more details on creating your own user control in the Adding custom code to the page topic. |
In this example, we will create two web parts - selector and viewer and bind their properties so that the product viewer reflects the product selector status.
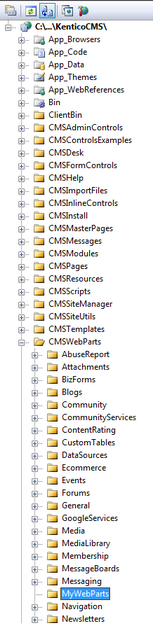
1. Open the CMS project in Visual Studio and create a new folder MyWebParts under the CMSWebParts folder in the Solution Explorer:
2. Create a new user control (ASCX) under MyWebParts folder and call it ProductSelector.ascx. Switch to its HTML source and paste the following code:
<asp:DropDownList ID="DropDownList1" runat="server" OnSelectedIndexChanged="DropDownList1_SelectedIndexChanged" AutoPostBack="true"> <asp:ListItem Value="Under">Under 500</asp:ListItem> <asp:ListItem Value="Over">Over 500</asp:ListItem> </asp:DropDownList> |
Switch to the code behind and add the following code to the beginning of the code:
[C#]
using System; using CMS.PortalControls; using CMS.GlobalHelper; using CMS.TreeEngine; using CMS.CMSHelper; using CMS.ExtendedControls; |
Change the class inheritance like this:
[C#]
public partial class CMSWebParts_MyWebParts_ProductSelector : CMSAbstractWebPart |
Add the following code inside the page class:
[C#]
protected void DropDownList1_SelectedIndexChanged(object sender, EventArgs e) { this.SetValue("PriceRange", this.DropDownList1.SelectedValue.ToString()); this.ReloadConsumers(); } |
Please note that you need to set the new value of the web part property PriceRange and call the ReloadConsumers method.
3. Create a new user control (ASCX) under MyWebParts folder and call it ProductViewer.ascx. Switch to its HTML source and paste the following code:
<%@ Register Assembly="CMS.Controls" Namespace="CMS.Controls" TagPrefix="cc1" %> <cc1:CMSRepeater ID="CMSRepeater1" runat="server" EnableViewState="true" TransformationName="CorporateSite.Transformations.ProductList" SelectedItemTransformationName="CMS.Smartphone.Default" Path="/%" ClassNames="CMS.Smartphone"> </cc1:CMSRepeater> |
The CMSRepeater control will display the product list.
Switch to the code behind and add the following code to the beginning of the code:
[C#]
using System; using CMS.PortalControls; using CMS.GlobalHelper; using CMS.TreeEngine; using CMS.CMSHelper; using CMS.ExtendedControls; |
Change the class inheritance like this:
[C#]
public partial class CMSWebParts_MyWebParts_ProductViewer : CMSAbstractWebPart |
Add the following code inside the page class:
[C#]
public override void OnContentLoaded() { base.OnContentLoaded(); SetupControl(); } /// <summary> /// Reloads data on request /// </summary>
public override void ReloadData() { base.ReloadData(); this.SetupControl(); this.CMSRepeater1.ReloadData(true); }
/// <summary> /// Initializes the control properties /// </summary>
protected void SetupControl() { if ((this.PagePlaceholder.ViewMode == CMS.PortalEngine.ViewModeEnum.Design) || (this.HideOnCurrentPage) || (!this.IsVisible)) { // Stop processing in Design mode and if the control is invisible this.CMSRepeater1.StopProcessing = true; }
else { // set CMSRepeater properties according to the selected value (price range) string priceRange = ValidationHelper.GetString(this.GetValue("PriceRange"), "Under"); if (priceRange == "Over") { this.CMSRepeater1.WhereCondition = "SKUPrice > 500"; }
else { this.CMSRepeater1.WhereCondition = "SKUPrice <= 500"; }
} } |
4. Save the changes and go to Site Manager -> Development -> Web parts. Create a new category called My Web Parts and add a new web part:
•Web part display name: Product selector
•Web part code name: ProductSelector
•Web part file name: MyWebParts/ProductSelector.ascx
5. Create another new web part:
•Web part display name: Product viewer
•Web part code name: ProductViewer
•Web part file name: MyWebParts/ProductViewer.ascx
... and then switch to the Properties tab and create a new property:
•Attribute name: PriceRange
•Attribute type: Text
•Attribute size: 100
•Allow empty value: yes
•Display attribute in the editing form: no
6. Go to CMS Desk, create a new blank page and call it Product list.
7. Switch to the Design tab and add the Product selector web part to the page. Leave all its properties at the default values.
8. Next, add the Product viewer web part, set the following properties on the General tab:
•Content before: <div class="Product list">
•Content after: </div>
and on the Binding tab, add a new web part binding using the following values:
•Local property: PriceRange
•Source web part ID: ProductSelector
•Source property: PriceRange
9. Go to the Live site mode and see the page. It should look like this:
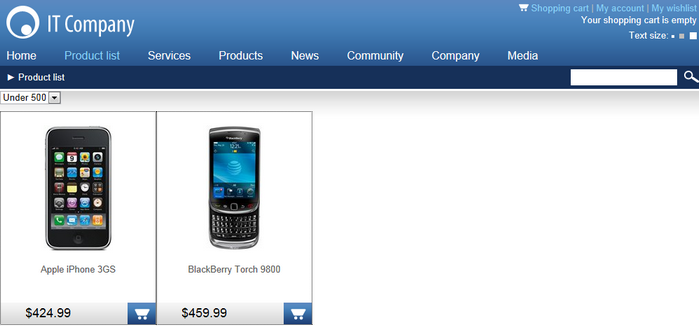
When you change the drop-down list value, the product list below is automatically updated.

