|
|

Existing installation |

|

|

|

|
|
Existing installation |
|
|

|
|
|
|
Existing installation |
|
|
|
|
|
Existing installation |
|
|
|
|
|
|
||
The I want to modify existing Kentico CMS installation option in Step 2 of the Web installer enables you to add or remove components in an existing Kentico CMS web project.
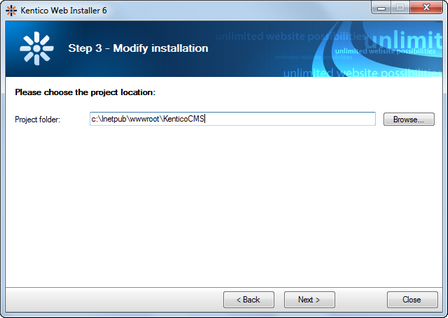
1. In Step 3, you need to specify the root folder of the project that you want to modify. Enter the path to the project folder and click Next.
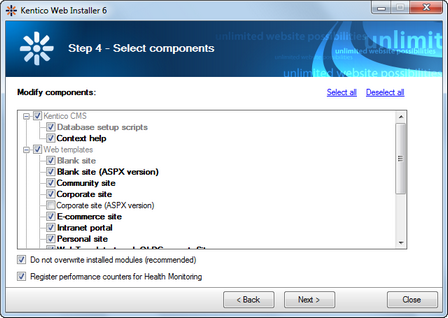
2. The following step displays the component tree. Gray components are a native part of the installation and cannot be removed. Black components are optional. The check-boxes indicate which components are currently installed and you can modify the installation by selecting or unselecting them.
If you enable the Do not overwrite installed modules (recommended), only unselected components will be removed and additionally selected components will be added. If the option is disabled, all enabled components (including web.config) will be overwritten by the installation, which means that your modifications to these components may get lost!
Enabling the Register performance counters for Health Monitoring option registers performance counters for the currently installed instance of Kentico CMS in Windows. The counters can be used for monitoring of system load and performance in an external application. Please refer to Modules -> Health monitoring for more details on this feature.
Click Next.
3. When you reach the following screen, it indicates that your project has been successfully modified.
