|
|

Registering blog account |

|

|

|

|
|
Registering blog account |
|
|

|
|
|
|
Registering blog account |
|
|
|
|
|
Registering blog account |
|
|
|
|
|
|
||
When you run Windows Live Writer for the first time, a wizard will appear, letting you configure connection to your on-line web service. After the initial setup, the wizard is still accessible under the Tools -> Accounts -> Add or Blogs -> Add blog account menu options.
The following text describes how to connect Windows Live Writer to a blog in a Kentico CMS instance.
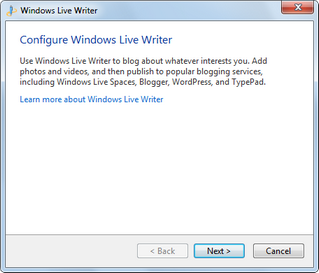
1. The first step of the wizard is just informational. Besides some very basic info, it offers you the Learn more about Windows Live Writer link, which redirects you to some in-depth info about the program. Follow it if you wish and click Next to proceed further.
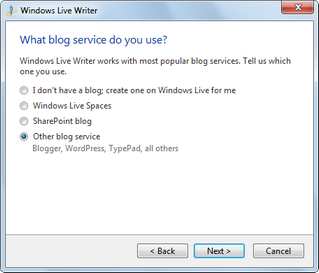
2. This step requires you to select the type of blog service. Select Other blog service and click Next.
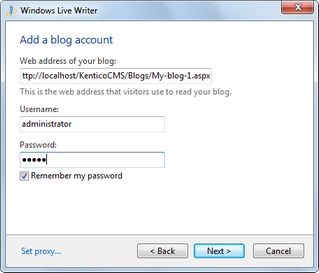
3. Now you need to enter the URL of the blog and the logon credentials of the blog owner. Enter the following details:
•Web address of your blog: full Live URL of the blog's title page, e.g. http://localhost/KenticoCMS_0322/Blogs/My-blog-1.aspx
•Username: user name of the blog owner, e.g. administrator
•Password: blog owner's password (blank passwords are not supported), e.g. 12345
•Remember my password: enable this option if you don't want to enter the password each time you use the application
Click Next to proceed.
4. In the fourth step, you need to select the type of the blog and the posting URL of the blog. Enter the following details:
•Type of blog that you are using: Community Server or MetaWeblog API (the first one provides some extra functionality in WLW)
•Remote posting URL for your blog: URL of the MetaWeblog API handler, which is always in format http://<application path>/CMSModules/Blogs/CMSPages/MetaWeblog.ashx (e.g. http://localhost/KenticoCMS/CMSModules/Blogs/CMSPages/MetaWeblog.ashx)
Click Next.

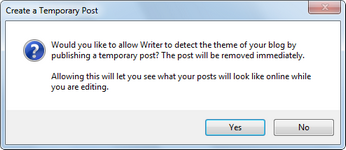
5. Now a dialog pops up, asking you if you want to detect the theme used for the blog so that you can see how the blog post will look like live when you are editing it. Click Yes to perform this action. If you click No, you can still do it later manually by choosing the View -> Refresh theme option from Windows Live Writer menu.
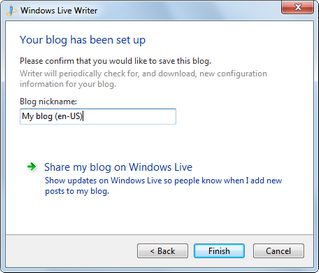
6. In the final step, you just need to enter the Blog nickname, which is just a name under which the blog will appear in WLW user interface. Enter whatever you wish and click Finish. You blog is now registered and you can start blogging from within Windows Live Writer.