|
|

Using nested controls |

|

|

|

|
|
Using nested controls |
|
|

|
|
|
|
Using nested controls |
|
|
|
|
|
Using nested controls |
|
|
|
|
|
|
||
A nested control is one that is defined within a transformation or template used by another control. When utilized with listing controls, this can be employed to display hierarchical data. The following controls may contain other nested controls:
|
Please note
The CMSUniView control provides a way to display hierarchical data without the need for nested controls and using it instead is recommended, as it offers superior performance.
|
These controls have the NestedControlsID property, which ensures that the correct content Path is dynamically provided to nested controls.
The controls can be combined as required. Other controls, such as the CMSDataGrid for example, may be nested into one of the controls above, but cannot contain nested controls themselves.
If you need to dynamically set the properties of a nested control, it is necessary to set its DelayedLoading property to True.
The same approach can also be used for listing web parts when using the portal engine.
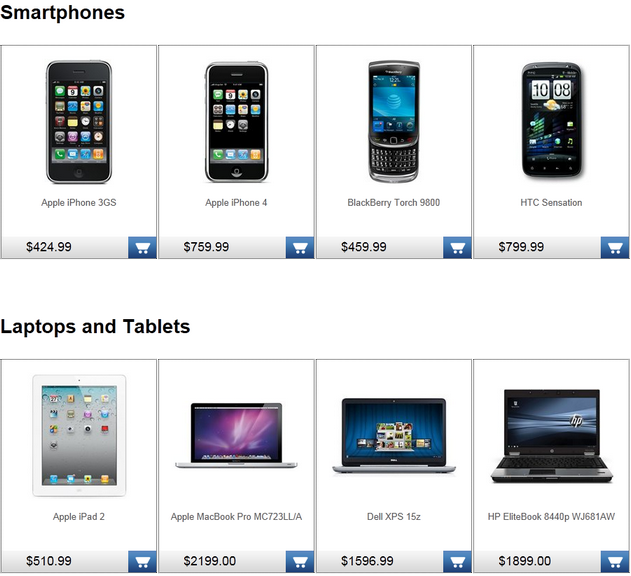
This tutorial shows how you can use a hierarchical CMSRepeater/CMSDatalist combination to display a list of product categories and a preview of products in each category from the products section of the sample Corporate Site:
1. Create a new Web form somewhere in your website installation directory.
2. Switch to its Design tab, drag and drop a CMSRepeater control from the toolbox onto the form and set its following properties:
•Path: /products/%
•ClassNames: cms.menuitem
•NestedControlsID: CMSDataListNested
•OrderBy: NodeOrder
This specifies the Path to the products section, tells the control to read pages (menu item documents) and specifies the ID of the nested control that will be used in the next step. It also orders the retrieved pages according to the order that they have in the CMS Desk content tree.
3. Switch to the Source tab and add the code marked by the CMSRepeater template comments between the <cms:CMSRepeater> tags. The overall code of the CMSRepeater control should look like this:
<ajaxToolkit:ToolkitScriptManager ID="manScript" runat="server" EnableViewState="false" /> NestedControlsID="CMSDataListNested" OrderBy="NodeOrder" >
<%-- CMSRepeater template ----------------------------------------------------------- --%> <ItemTemplate> <h1><%# Eval("DocumentName") %></h1> <p>
<%-- Nested DataList ---------------------------------------------------------------- --%> <%-- Nested DataList ---------------------------------------------------------------- --%>
</p> </ItemTemplate>
<%-- CMSRepeater template ----------------------------------------------------------- --%>
</cms:CMSRepeater> |
This defines the template used by the CMSRepeater to display items. As you can see, it contains a nested CMSDataList control that is configured to display all product types in two columns using the specified transformation and its ID is the same as the value that was entered into the NestedControlsID property of the main CMSRepeater. Please note that its Path property is not specified, as it is dynamically supplied by the main CMSRepeater control.
The same result could also be achieved by placing the CMSDataList into the code of a transformation, and assigning that transformation to the CMSRepeater through its TransformationName property.
The ToolkitScriptManager control included at the top is required by the transformation used to display the product documents. It is only there to ensure that this example is functional by itself and will usually be included on your website's master page.
4. Save the changes to the web form. Now right-click it in the Solution explorer and select View in Browser. The resulting page should display a hierarchical list as shown below (the image is from a page that uses the Corporate Site stylesheet, which styles the displayed products appropriately).