|
|

Creating the Media page |

|

|

|

|
|
Creating the Media page |
|
|

|
|
|
|
Creating the Media page |
|
|
|
|
|
Creating the Media page |
|
|
|
|
|
|
||
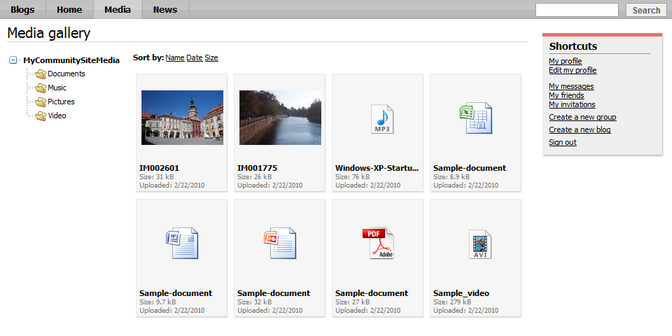
The Media page will display content of the site's global media library created in this chapter. As you will see, the page is very easy to create as all the required functionality will be achieved using the Media gallery web part.
Further information can be found in the Module Media libraries chapter of Kentico CMS Developer's Guide.
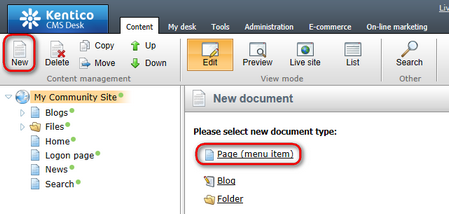
1. Go to CMS Desk, select the root of the content tree and click New. Choose the Page (menu item) document type.
2. Enter Media into the Page name field. Select the My Community Site templates -> _StarterTemplate page template and click Save.

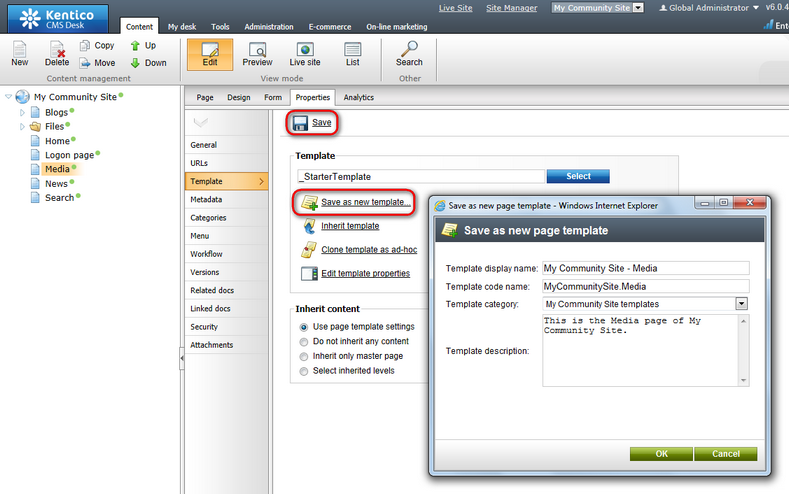
3. Now we will save the page as a new page template so that the changes made to the page would not be reflected to the _StarterTemplate. Select the Media page from the content tree, switch to the Properties -> Template tab and the Save as new template link. Enter the following details into the pop-up dialog:
•Template display name: My Community Site - Media
•Template code name: MyCommunitySite.Media
•Template category: My Community Site templates
•Template description: enter some text describing the page template
Click OK.
4. The only web part that we need to add is the Media gallery web part. Obviously, it will be placed in the zoneCenter web part zone. Click the Add web part (![]() ) icon of the zoneCenter web part zone and choose the Media library -> Media gallery web part. Set the following properties of the web part, leave the rest of them as they are:
) icon of the zoneCenter web part zone and choose the Media library -> Media gallery web part. Set the following properties of the web part, leave the rest of them as they are:
•Media library: My Community Site Media
•Show subfolders content: enabled
•Use secure links: disabled
•Page size: 8
•Group size: 8
•No record found text: There are no files in the library.
Click OK.
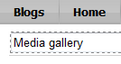
5. The last step is to change the header text. Switch to the Page tab and enter Media gallery into the Editable text web part's text field. Click Save.
6. And that's the Media page finished. If you switch to the live site now, you should see the page displaying content of the previously created sample media library.