|
|

Deployment to the cloud |

|

|

|

|
|
Deployment to the cloud |
|
|

|
|
|
|
Deployment to the cloud |
|
|
|
|
|
Deployment to the cloud |
|
|
|
|
|
|
||
When you are ready to deploy your website to Windows Azure, you can do so from Visual Studio using the Windows Azure Tools. Right-click the CMSAzure project in the Solution Explorer and select either the Package or Publish option.
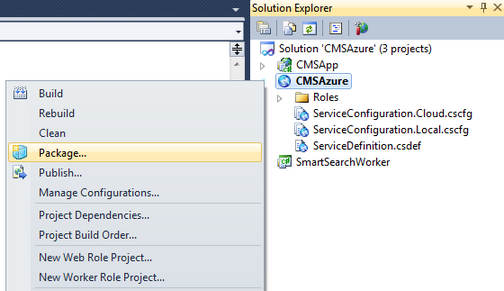
Packaging creates a pair of deployment files representing the application and its configuration, which you can upload manually through the Azure Management Portal. The Publish option allows you to directly upload the application as a hosted service deployment. With this approach, you will need to enter the credentials for your Windows Azure subscription into Visual Studio, so that it can authenticate itself when deploying the application.
You can find additional information about publishing options in the Publishing the Windows Azure Application using the Windows Azure Tools MSDN article.
Before you perform the deployment, please make sure that your application is configured correctly as described in the Application structure and configuration topic. Also, make sure that the correct service configuration intended for cloud deployment is selected in the publishing options.
If you choose the Package option, Visual Studio will build the solution and create two files: CMSAzure.cspkg and ServiceConfiguration.cscfg. The packaging process may take some time, so please be patient. When complete, the directory containing the files will automatically be opened (by default, the target folder is ~/app.publish). You can then upload the service package via the Azure Management Portal (https://windows.azure.com/).
Navigate to Hosted services, Storage Accounts & CDN and select Hosted Services. If you do not yet have a hosted service for the website, click New Hosted Service to create one and configure it as necessary. Select the appropriate service and click New Production Deployment or New Staging Deployment in the top ribbon menu. The choice between these two determines under which address the application will be available. The production deployment uses a URL in format <hosted service URL prefix>.cloudapp.net, while staging deployments are available at <Deployment ID>.cloudapp.net. The Deployment ID of a staging deployment is generated automatically upon creation. Staging deployments are meant for development or testing purposes and the production deployment for running the live version of your application.
Once you select one of the options, a form will be displayed where you can specify the service package (.cspkg) and configuration (.cscfg) files that were published on your local machine. When done, click OK to begin uploading the application to the hosted service.
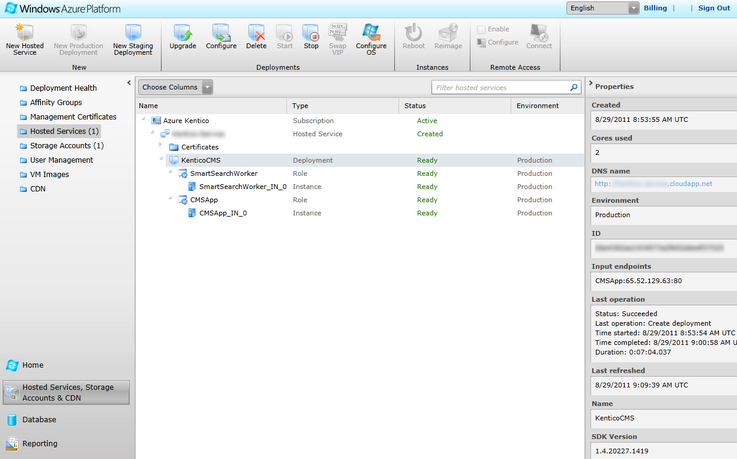
When your deployment is ready, press Start to run the application (if the hosted service is not automatically started after a successful deployment).
The website will now be available under the URL displayed in the DNS name property of the deployment. If you open the site in a new tab of your browser, the application's database installer will start up. Please continue in the Database setup topic
|
Domain names of Windows Azure websites
In most cases, you will probably want to use a different domain name than the default one set for the production deployment. To achieve this, use your domain name registrar to create a CNAME record that maps a custom domain name to the DNS name of your application on Windows Azure.
The same applies if you are running multiple sites on your Kentico CMS instance. Define a CNAME record for each site's domain name and map it to your production deployment's DNS name. The appropriate site will be loaded automatically. |
|
Licenses for internal IPs
If you're running your application in multiple instances, a web farm server is automatically created for each of the running instances. However, you will need to manually enter a license for each of the automatically created servers, or more precisely, the servers' IP addresses. You can generate the licenses on the Kentico Client Portal (http://client.kentico.com).
|
When you want to promote your already deployed application from staging environment to production environment or vice-versa, you need to perform a VIP swap. On an application that runs in multiple instances, this action will cause IP addresses of all web farm servers to change. Because of this, you will need to manually regenerate licenses for the servers.

