|
Remote server |

|

|

|

|
|
Remote server |
|
|
|
|
If you need to install Kentico CMS on a remote web server where you cannot run the setup directly (e.g. a shared hosting server), you need to choose the I want to install Kentico CMS on a remote (production or testing) server option in Step 2 of the Web installer.
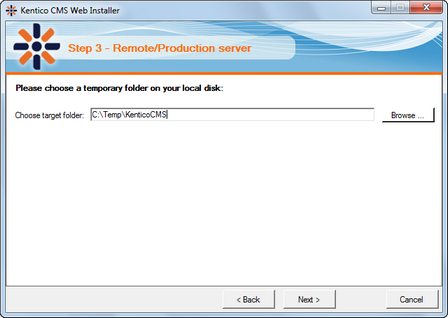
1. In Step 3, you will need to specify a temporary folder on your local disk where the web project will be created. Proceed through the rest of the wizard.
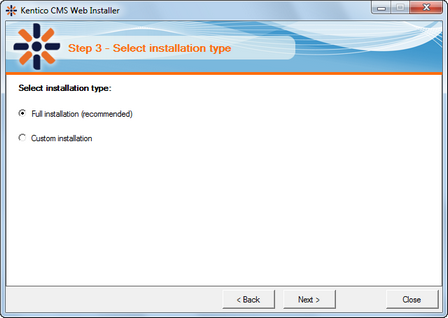
2. Still in Step 3, you need to decide between the following two options:
| • | Full installation - performs full installation using all optional components |
| • | Custom installation - lets you choose which components will be installed |
3. When you reach Step 5, the web project is created on your disk and a confirmation message is displayed:

4. You need to copy the website to your server (e.g. over FTP). If your web project isn't placed in the root of the remote website, you may need to create a virtual directory as described in Creating a virtual directory.
|
Application pool settings
By default, the web.config file of the created web project is configured to use an application pool with Classic managed pipeline mode. If you know that the remote server uses Integrated pipeline mode, replace the default web.config file as described in Troubleshooting installation issues -> Internal server error when using Integrated pipeline mode.
|
5. Now you can continue to Database setup wizard.
Page url: http://devnet.kentico.com/docs/5_5r2/devguide/index.html?web_installer_remote_server.htm


