|
Settings |

|

|

|

|
|
Settings |
|
|
|
|
First of all, you need to find the ~/Bin/DotNetOpenAuth.dll.rename file and rename it to DotNetOpenAuth.dll. The library is renamed in the default installation because it doesn't support medium-trust environment. Then you need to configure OpenID settings in the administration interface of the CMS.
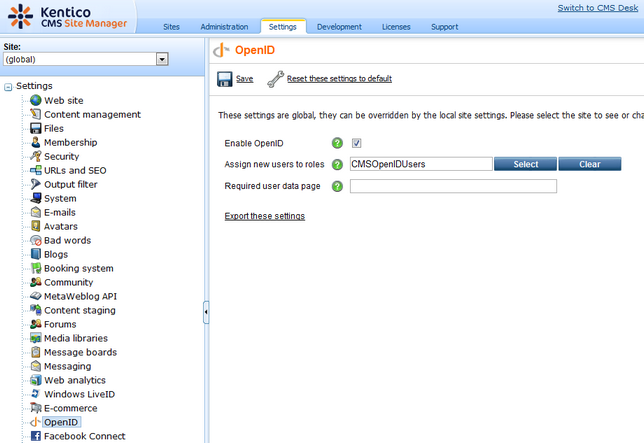
OpenID authentication settings are located in Site Manager -> Settings -> OpenID. Before you start making the settings, make sure you have the right site selected using the Site drop-down list at the top left part of the page.
| • | Enable OpenID - indicates if OpenID authentication is enabled |
| • | Assign new users to roles - new users registered via OpenID will be assigned to these roles |
| • | Required user data page - URL of the page where the OpenID required data web part resides; if entered, then when a new OpenID user logs in to the site for the first time, their user account is not created automatically, but they are redirected to this page and required to enter some additional data (or merge with an existing account) using the web part |
Page url: http://devnet.kentico.com/docs/5_5r2/devguide/index.html?openid_settings.htm

