|
Event handling overview |

|

|

|

|
|
Event handling overview |
|
|
|
|
Global events allow you to execute custom actions when some CMS event occurs. For example, if a document is created in the CMS system, you can handle the corresponding event, get information about the new document and send its content by e-mail or use a third-party component to generate a PDF version of the document.
Events that can be handled
| • | Data updates - insert/update/delete actions for all data items. |
| • | Security events - authentication and authorization. |
| • | Document events - TreeNode insert/update/delete operations. |
| • | Workflow events - document approval/rejection/publishing/archiving operations. |
Similar topics: Writing custom search engine provider
|
Enabling custom event handling
If you want to use custom event handlers, make sure the <appSettings> node of your web project's web.config file contains the following key:
|
|
Default event handler library
The default custom event handler library is CMS.CustomEventHandler. Its name can be changed by means of a parameter in the <appSettings> node of your project's web.config file.
If the following line is inserted in the <appSettings> node, the library name will be changed to CMS.CustomEventHandlerVB:
If you wanted to use this library in the following series of examples, it would require you to write the code in VB instead of C#.
|
How to write your own event handler
1. Copy the CustomEventHandler project from Kentico CMS installation (typically C:\ProgramFiles\KenticoCMS\<version_number>\
CodeSamples\CustomEventHandler) to any custom folder that is not under the root of your web project (e.g. C:\customhandler).
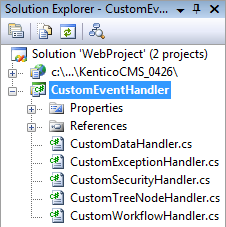
2. Open the CMS web project using the WebProject.sln file. Click File -> Add -> Existing Project and select the CustomEventHandler.csproj file located in the folder where you copied the CustomEventHandler project. Your Solution Explorer window should look like this:
3. Unfold the References section under the CustomEventHandler project and remove all invalid references (marked with the yellow exclamation icon).
4. Now you need to update the references. Unfold the bin folder in the Kentico CMS web project and delete the standard CMS.CustomEventHandler.dll library.
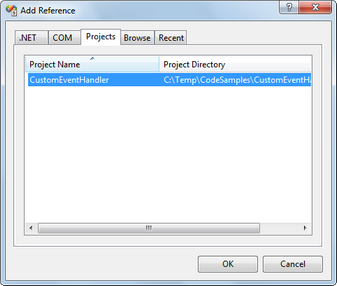
5. Right-click the bin folder and choose Add Reference. Choose the Projects tab and click OK to add a reference to the CustomEventHandler project:
6. Now right-click the CustomEventHandler project and choose Add Reference. Choose the Browse tab and locate the bin folder of your CMS web project on the disk. Choose to add a reference to the following libraries:
| • | CMS.GlobalEventHelper.dll |
| • | CMS.TreeEngine.dll |
| • | CMS.GlobalHelper.dll |
| • | CMS.SiteProvider.dll |
| • | CMS.CMSHelper.dll |
| • | CMS.SettingsProvider.dll |
| • | CMS.Staging.dll |
| • | CMS.DataEngine.dll |
| • | CMS.EmailEngine.dll |
| • | CMS.WorkflowEngine.dll |
You can also navigate to the bin folder on the Browse tab and copy&paste the following string into the Add Reference dialog to add all the libraries.
"CMS.GlobalEventHelper.dll" "CMS.TreeEngine.dll" "CMS.GlobalHelper.dll" "CMS.SiteProvider.dll" "CMS.CMSHelper.dll" "CMS.SettingsProvider.dll" "CMS.Staging.dll" "CMS.DataEngine.dll" "CMS.EmailEngine.dll" "CMS.WorkflowEngine.dll" |
If you needed to use another library in your custom handlers, please add a reference to it the same way as described in this step.
7. Click Build -> Rebuild solution.
Now you can modify the libraries under the CustomEventHandler project and add your own code to handle the appropriate events. The places where you should place the code are marked with upper-case comments.
You can find more details on particular events in the following chapters.
Page url: http://devnet.kentico.com/docs/5_5r2/devguide/index.html?event_handling_overview.htm


