|
Displaying personalized content |

|

|

|

|
|
Displaying personalized content |
|
|
|
|
Kentico CMS allows you to personalize the displayed content based on the current user.
|
Personalization in short
1. If you want to customize content displayed to the users, you need to grant or deny the READ permission to these users and turn on the Check permissions attribute of the appropriate web parts.
2. When the user is not authenticated, the system uses a special user Public anonymous User (public). |
Example: Personalizing the Products menu
In this example, you will learn how to display the Products section only to members of the Customers and Partners roles and how to display the PDAs category only to the members of the Partners role.
1. Sign in to CMS Desk as administrator.
2. Go to Administration -> Roles and create new roles Customers and Partners.
3. Go to Administration -> Users and create a new user Customer1 with following values:
| • | User name: Customer1 |
| • | Full name: Testing Customer |
| • | Enabled: true |
| • | Is editor: no |
Click OK. Go to the Sites tab and assign the user to Corporate Site. Go to the Roles tab and add the user to the Customers role.
4. Create another user Partner1 with following values:
| • | User name: Partner1 |
| • | Full name: Testing Partner |
| • | Enabled: true |
| • | Is editor: no |
Click OK. Go to the Sites tab and assign the user to Corporate Site. Go to the Roles tab and add the user to the Partners role.
5. Switch to CMS Desk -> Content and click the root of the content tree. Switch to Properties -> Security.
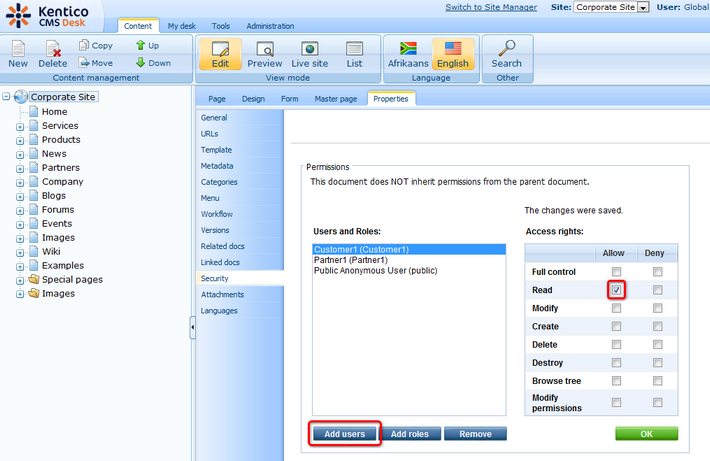
First, we need to grant the Read permission for the whole website to the Public anonymous user (public), Customers and Partners roles.
Click Add users, select these the three users and click OK. When the users are added, grant the Read permissions to them using the check-box (![]() ), as you can see in the screenshot below. You need to click OK in order to save the settings.
), as you can see in the screenshot below. You need to click OK in order to save the settings.
6. Now we will hide the product categories from public users. In the content tree, click /Products/Cell Phones and switch to the Properties -> Security tab.
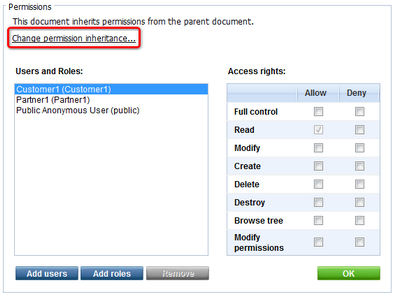
The permissions that you configured for the root of the content tree are inherited by this document. We need to break the inheritance. Click the Change permission inheritance link. In the following dialog, choose Break inheritance and copy parent permissions.
7. Now select the Public Anonymous User (public) and deny the Read permission.
8. Repeat the last two steps for categories Laptops and PDAs. Deny the PDAs category also for the Customers role.
9. The permissions are not checked by web parts by default, so we need to configure the web parts so that they check the Read permission of the current user.
Choose the root in the content tree and click the Design tab. Configure the cmsmenu web part and set its property Check permissions to true (![]() ). Click OK. Repeat the same for the LeftTreeMenu and ProductDataList web parts on the /Products page.
). Click OK. Repeat the same for the LeftTreeMenu and ProductDataList web parts on the /Products page.
10. Sign out. If you mouse-over the Products menu item, you will see that the sub-categories are no longer displayed.
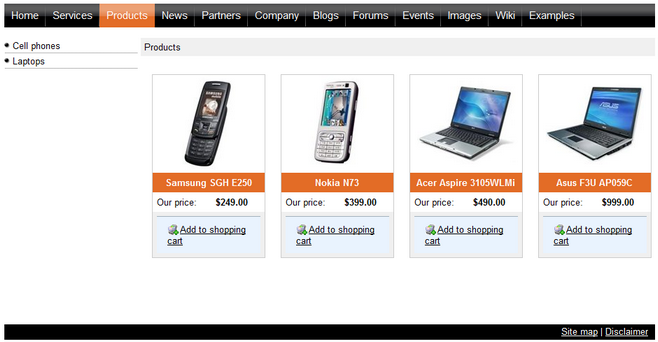
11. Sign in as user Customer1 (use the My account link at the top right part of the page) and click Products in the main menu. You will see a page like the one below. As you can see, the PDAs section and PDA products are not displayed to this user.
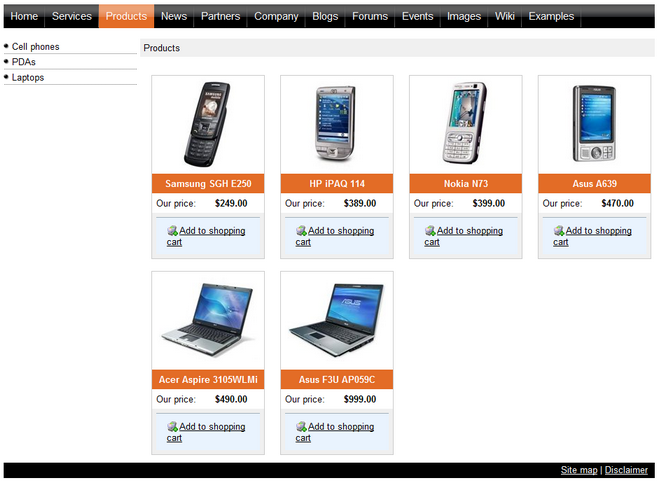
Now sign out and sign in again as user Partner1.You will all categories and products:
You have learned how to personalize the content displayed to users based on their permissions.
Page url: http://devnet.kentico.com/docs/5_5r2/devguide/index.html?displaying_personalized_content.htm


