|
Creating the Search page |

|

|

|

|
|
Creating the Search page |
|
|
|
|
In the previous chapter, you have defined the master page. In the ninth step, you placed the Smart search box web part next to the main menu and set its Search results page URL property to ~/Search.aspx. This is where the user will be redirected after submitting the search request and where the search results will be displayed. On this page, users will also be able to perform full-text search with extended options using the Smart search dialog with results web part.
Further information on Kentico CMS Search Engine can be found in Kentico CMS Developer's Guide -> Modules -> Smart search -> Overview.
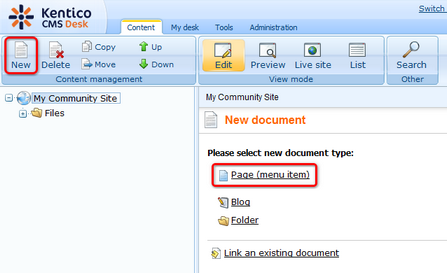
1. Go to CMS Desk, select the root of the content tree and click New. Choose the Page (menu item) document type.
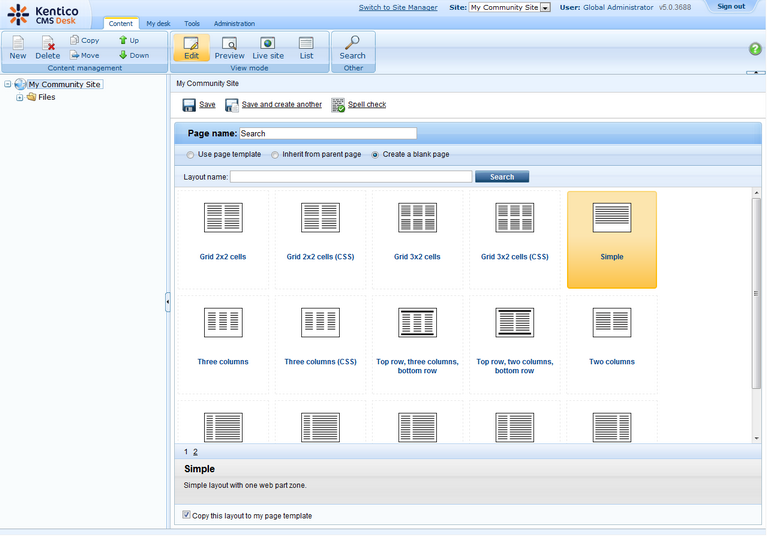
2. Choose to Create a blank page using the Simple layout. For Page name, enter Search and click Save.
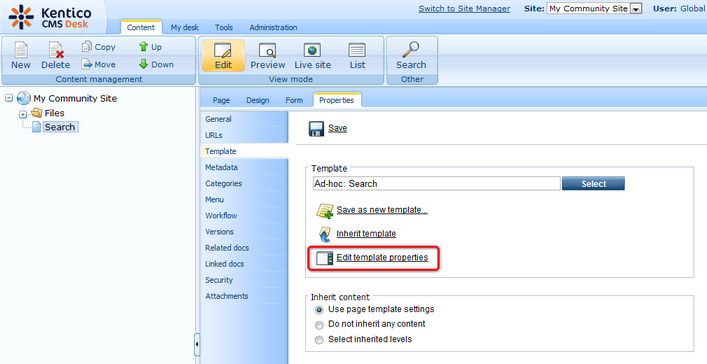
3. Switch to the Properties -> Template tab and click the Edit template properties link.
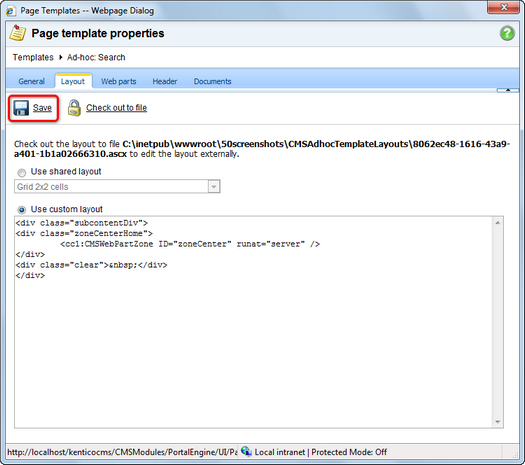
4. In the pop-up Page template properties window, switch to the Layout tab and replace the original layout with the following code:
<div class="subcontentDiv"> <div class="zoneCenterHome"> <cc1:CMSWebPartZone ID="zoneCenter" runat="server" /> </div> <div class="clear"> </div> </div> |
Click Save.
5. Switch to the Design tab. You should see one web part zone named zoneCenter on the page, just as you defined by the layout above. Let's add some heading text first. Click the Add web part (![]() ) icon of this web part zone and choose the Text -> Static text web part. In the web part properties window, set the following values. The rest of the properties can be left at the default values:
) icon of this web part zone and choose the Text -> Static text web part. In the web part properties window, set the following values. The rest of the properties can be left at the default values:
| • | Text: <h1 class="header">Search results</h1> |
Click OK.

6. Displaying search results and the search function itself will be achieved using the Smart search dialog with results web part. Click the Add web part (![]() ) icon again and choose the Full-text search -> Smart search dialog with results web part. In the web part properties window, enter the following values. The rest of the properties can be left at their default values:
) icon again and choose the Full-text search -> Smart search dialog with results web part. In the web part properties window, enter the following values. The rest of the properties can be left at their default values:
| • | Indexes: My Community Site (created here) |
| • | Paging mode: Postback |
| • | Web part container: Content padding |
| • | Content after: <br/> |
Click OK.
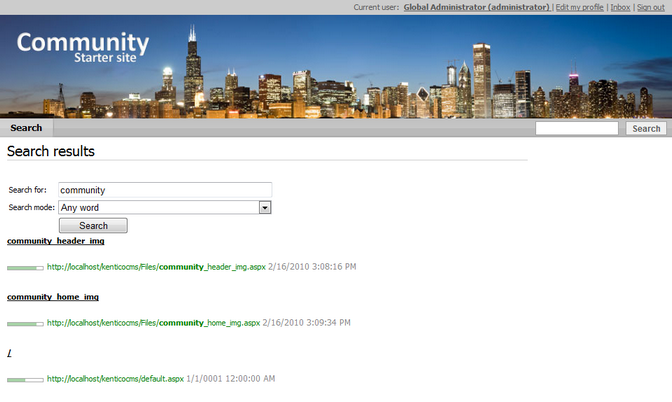
From this moment on, if you switch to the Live site, the page should be fully functional. Try searching both using the Search box next to the main menu and the Smart search dialog with results web part. Use e.g. community as the keyword, since this word is included in two previously uploaded images' names and the master page's name. You will get the results as in the following screenshot.
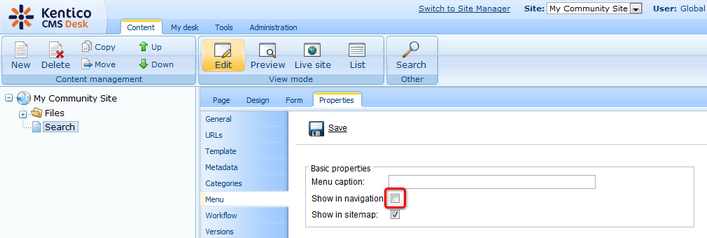
7. We don't want the Search page to be displayed in the main menu. To prevent this, select the page in CMS Desk and switch to the Properties -> Menu tab. Disable the Show in navigation check-box and click Save.
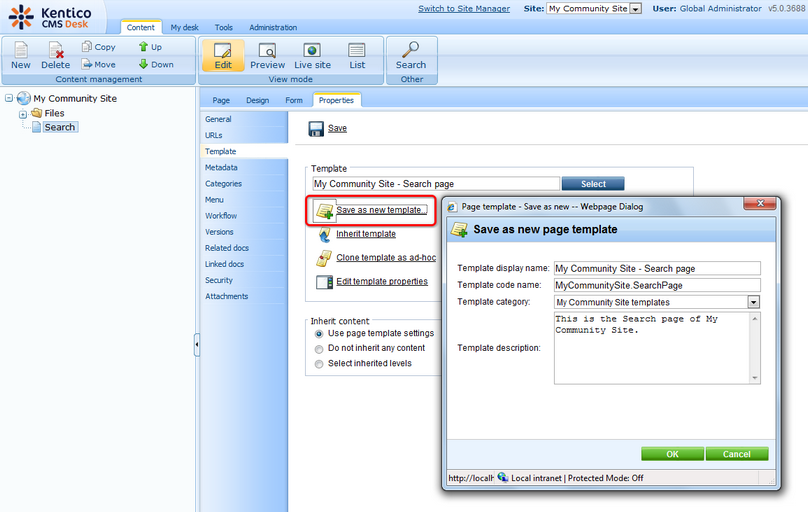
8. Finally, we will save the page as a page template so that it can be reused in the future. This is a good practice to avoid repeating laborious task. Switch to the Edit mode and go to the Properties -> Template tab. Click the Save as new template link and enter the following details:
| • | Template display name: My Community Site - Search page |
| • | Template code name: MyCommunitySite.SearchPage |
| • | Template category: My Community Site templates |
| • | Template description: some text describing the page template |
Click OK. The page is now saved as a new page template and can be reused when creating new pages with similar layout or content.
Page url: http://devnet.kentico.com/docs/5_5r2/communitysiteguide/index.html?creating_the_search_page.htm

