|
Adding the sign in button |

|

|

|

|
After registering your website at msm.live.com and making the necessary settings, you only need to place the Membership -> Windows LiveID web part to your site. This web part works fine without any additional settings and can be placed on any page of your website.
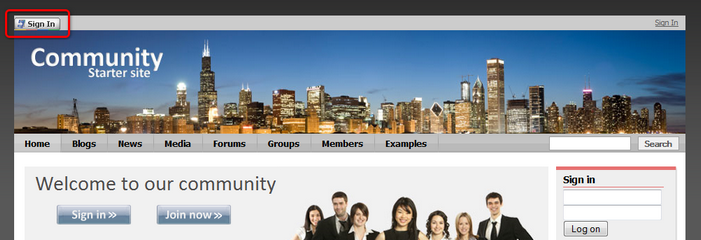
In the following example, you will learn how to add the Windows LiveID web part to the sample Community Starter site. We will add the web part to the zoneTopMembership web part zone of the master page, next to the sign-in link. Like this, the LiveID sign-in button will always be displayed, no matter which particular page is currently displayed.
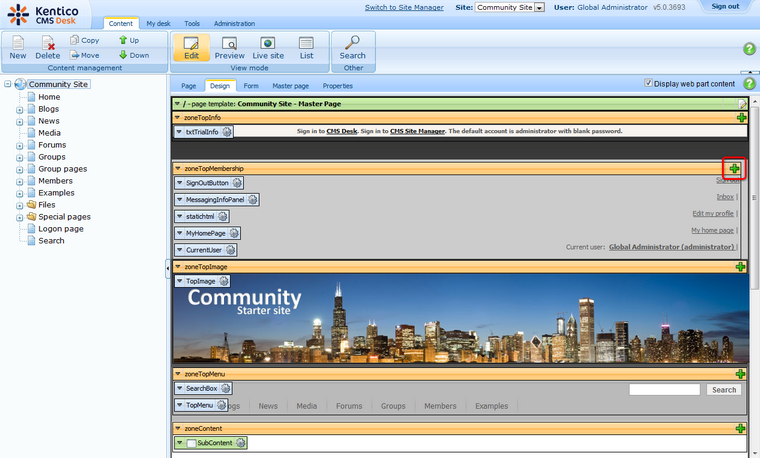
1. Sign in to CMS Desk (login administrator with blank password by default). Select the master page (the root of the content tree) and switch to the Design tab.
2. Click the Add web part (![]() ) icon of the zoneTopMembership web part zone.
) icon of the zoneTopMembership web part zone.

3. In the Web part selection dialog which pops-up, choose Membership -> Windows LiveID and click OK. The web part properties dialog pops-up. As mentioned above, no properties need to be set, so just click OK.
4. The web part is now placed on the master page. The web part itself is not visible now, but it is represented by the blue rectangle labeled WindowsLiveID. If you log-off now, you should see the web part on the page and it should be fully functional.

Further steps: You have learned how to add the Windows LiveID sign-in functionality to your website. In some cases, you may want the users to provide some additional details on registration via Windows LiveID. In this case, you would use the LiveID required data web part. A detailed description of this web part and the way it can be used can be found in Kentico CMS Developer's Guide -> Membership and User registration -> Windows LiveID -> Available web parts.
Page url: http://devnet.kentico.com/docs/5_5r2/communitysiteguide/index.html?adding_the_sign_in_button.htm