|
Changing header and menu (master page) |

|

|

|

|
|
Changing header and menu (master page) |
|
|
|
|
Changing a logo in the header
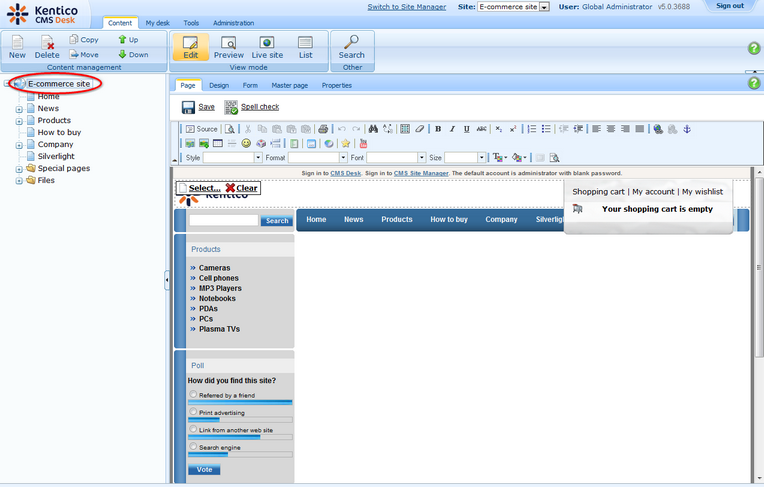
1. Go to CMS Desk -> Content -> Ecommerce site.
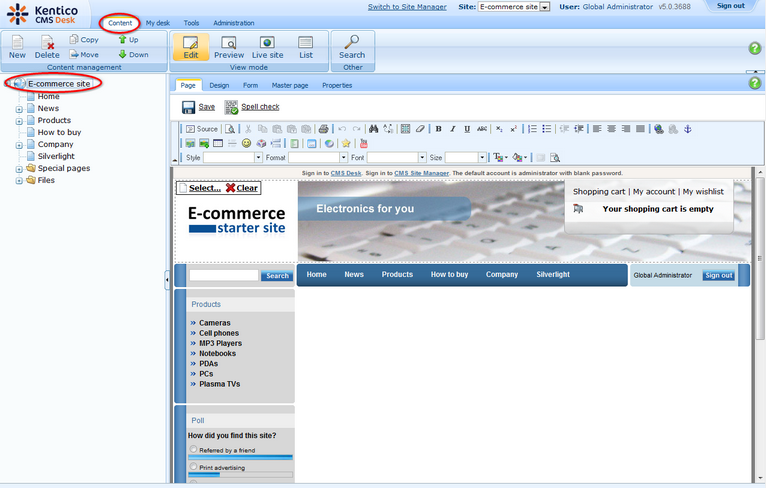
2. Click Select ... above the logo.

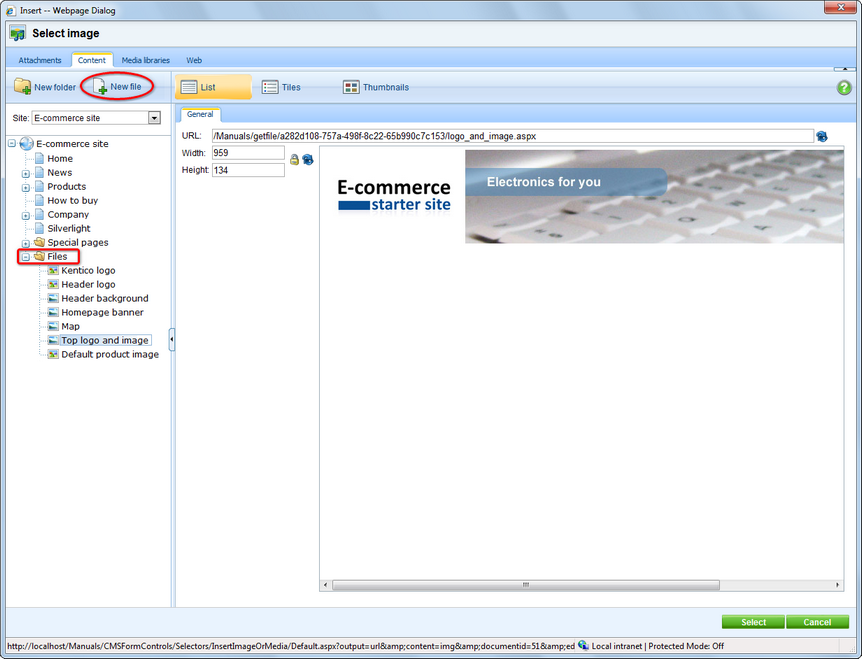
3. In the web page dialog, select Files in the content tree and click the New file button at the top-left.
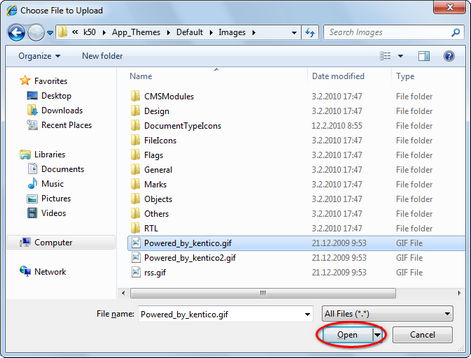
4. Find the image you want to upload and click Open.
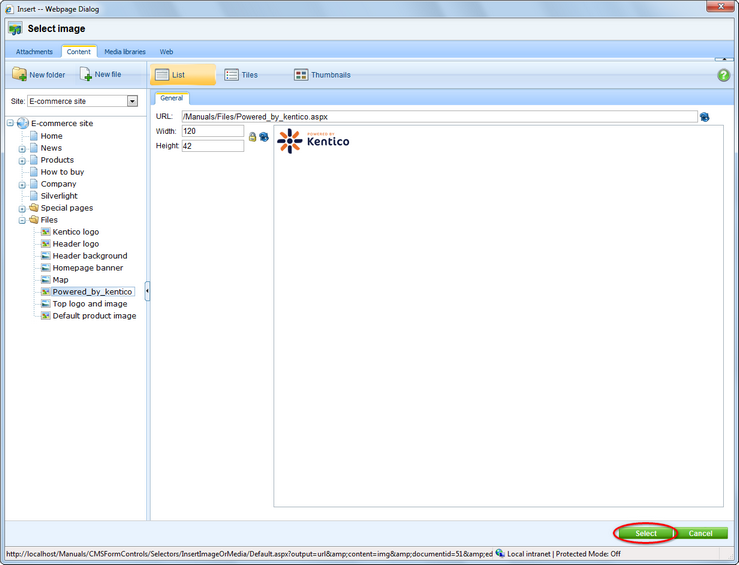
5. Click Select.
6. Now click Save.
You've just publish a new logo on your website.
Removing the log-on bar
1. Go to CMS Desk -> Content -> Ecommerce site and switch to the Design tab.
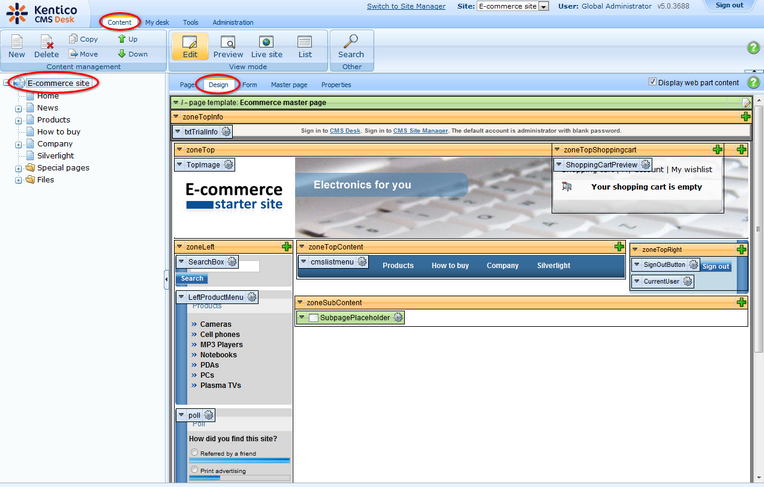
2. Right-clicked the txtTrialInfo webpart at the top-left and choose Remove.
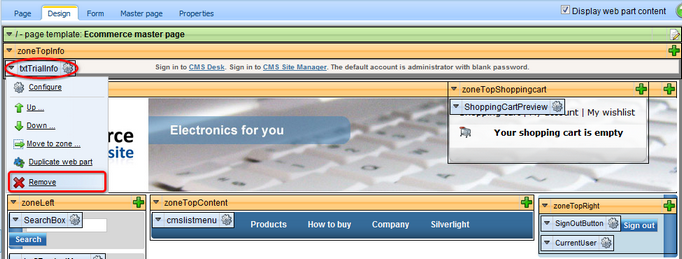
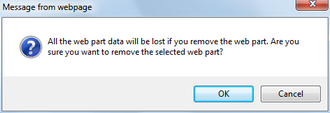
3. Click OK to remove the bar from your website.
That's how you remove the signing-in bar from your website.
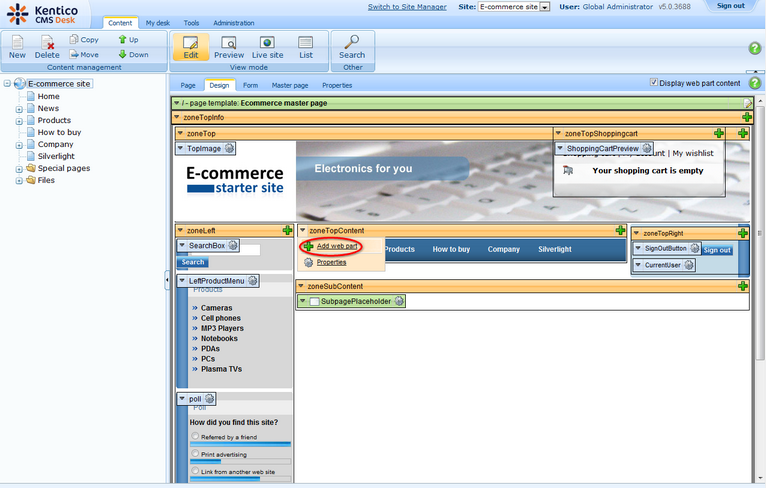
Changing content of the menu
1. Go to CMS Desk -> Content -> Ecommerce site and switch to the Design tab.
2. Click the Add web part button from the drop-down menu in zoneTopContent.
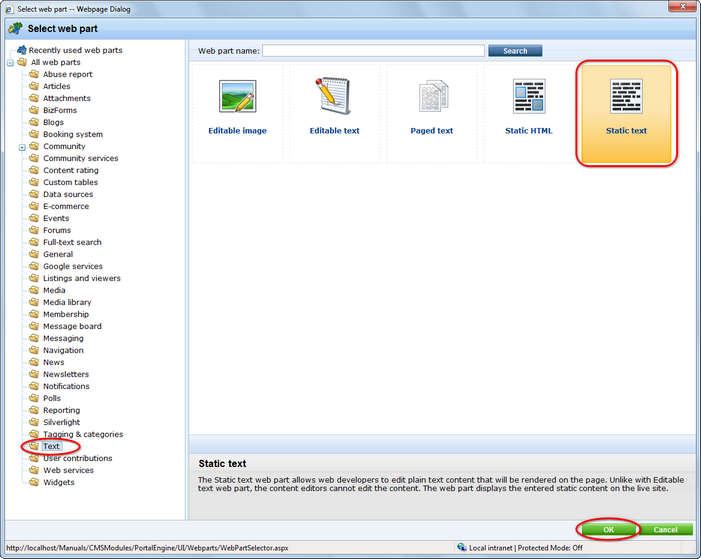
3. In the web page dialog, choose Text -> Static text and click OK.
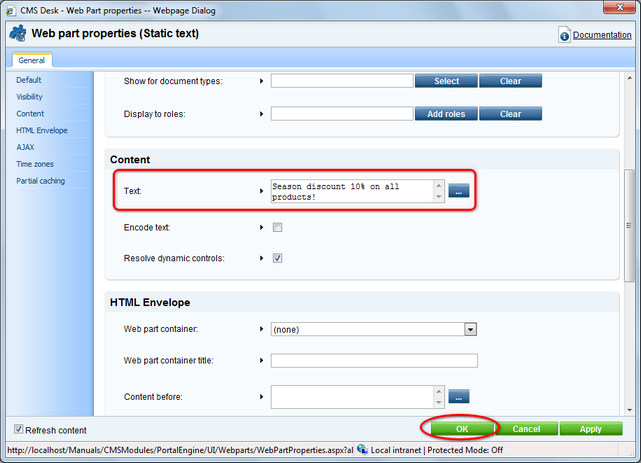
4. Enter Season discount 10% on all products! as Text and click OK.
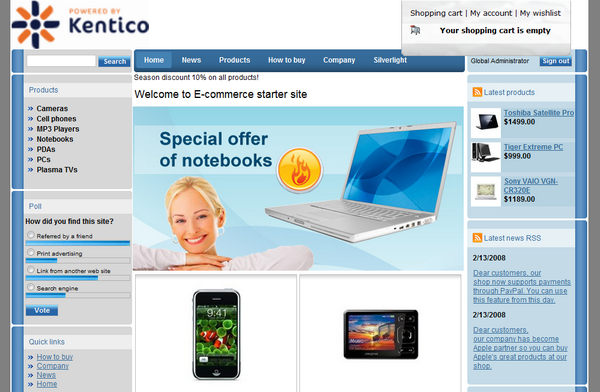
5. Now switch to the Live site viewing mode. You can see the new text bellow the main menu.
|
More information
Should you need more information about customizing your website design, please refer to Kentico CMS Developer's Guide.
|
Page url: http://devnet.kentico.com/docs/ecommerceguide/index.html?how_to_change_the_header_and_menu.htm


