|
Customizing web part layout |

|

|

|

|
|
Customizing web part layout |
|
|
|
|
Kentico CMS comes with many built-in web parts. The concept of web part layouts allows you to customize the look of the web part by defining a custom HTML layout. So the web part layout is basically a custom skin for the web part.
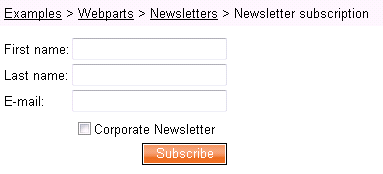
Example: Customizing Newsletter subscription dialog
In this example, we will customize the newsletter subscription dialog layout. The standard layout looks like this:
Go to CMS Desk -> Content and navigate to the Examples -> Web parts -> Newsletters -> Newsletter subscription page (if you're using the sample Corporate Site).
Switch to the Design tab and configure the Newsletter subscription web part. Click the Layout tab and choose (New) from the drop-down list. Enter the following values:
| • | Display name: Narrow layout |
| • | Code name: NarrowLayout |
Enter the following HTML code:
<%@ Control Language="C#" AutoEventWireup="true" CodeFile="~/CMSWebParts/Newsletters/NewsletterSubscriptionWebPart.ascx.cs" Inherits="CMSWebParts_Newsletters_NewsletterSubscriptionWebPart" %>
<%@ Register Assembly="CMS.ExtendedControls" Namespace="CMS.ExtendedControls" TagPrefix="cc1" %>
<asp:Panel ID="pnlSubscription" runat="server" DefaultButton="btnSubmit" CssClass="Subscription"> <asp:Label runat="server" ID="lblInfo" CssClass="InfoMessage" EnableViewState="false" Visible="false" /> <asp:Label runat="server" ID="lblError" CssClass="ErrorMessage" EnableViewState="false" Visible="false" /> <table> <tr> <td> <cc1:LocalizedLabel ID="lblFirstName" runat="server" AssociatedControlID="txtFirstName" /><br /> <asp:TextBox ID="txtFirstName" runat="server" CssClass="SubscriptionTextbox"></asp:TextBox> </td> </tr> <tr> <td> <cc1:LocalizedLabel ID="lblLastName" runat="server" AssociatedControlID="txtLastName" /><br /> <asp:TextBox ID="txtLastName" runat="server" CssClass="SubscriptionTextbox"></asp:TextBox> </td> </tr> <tr> <td> <cc1:LocalizedLabel ID="lblEmail" runat="server" AssociatedControlID="txtEmail" /><br /> <asp:TextBox ID="txtEmail" runat="server" CssClass="SubscriptionTextbox"></asp:TextBox> </td> </tr> <tr> <td> <asp:CheckBoxList runat="server" CssClass="NewsletterList" ID="chklNewsletters"></asp:CheckBoxList> </td> </tr> <tr> <td align="right"> <cc1:LocalizedButton ID="btnSubmit" runat="server" OnClick="btnSubmit_Click" CssClass="SubscriptionButton" /> </td> </tr> </table> </asp:Panel> |
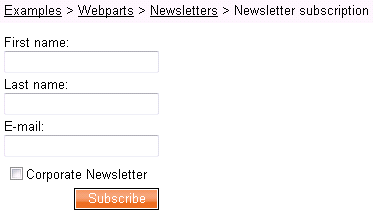
Click OK. When you look at the page now, you will see a dialog like this:
|
Do not remove any controls from the layout
It's important to keep all the controls in the layout. If you need to hide some of them, you can add Visible="False" attribute to the control, but the control must stay in the layout so that the web part keeps working.
This issue may also cause problems when upgrading to a new Kentico CMS version - if some of the built-in web parts uses a new control an you use your web part layout created in the previous version, the web part may stop working. Please be sure to test your website after an upgrade carefully if you're using web part layouts. |
Page url: http://devnet.kentico.com/docs/devguide/index.html?customizing_web_part_layout.htm


