|
Creating a dynamic newsletter |

|

|

|

|
|
Creating a dynamic newsletter |
|
|
|
|
Dynamic newsletters contain content of the given page and they are sent out automatically on a regular basis, using the built-in scheduling system.
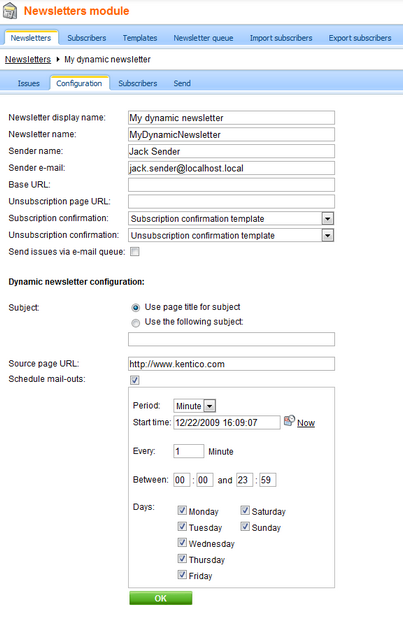
Go to CMS Desk -> Tools -> Newsletter and click New newsletter. Enter the following details:
| • | Newsletter display name: My dynamic newsletter |
| • | Newsletter name: MyDynamicNewsletter |
| • | Subscription confirmation: Subscription confirmation template |
| • | Unsubscription confirmation: Unsubscription confirmation template |
| • | Sender name: enter your full name |
| • | Sender e-mail: enter your e-mail address |
| • | Base URL: the base URL of your website used to convert relative links to absolute; It's necessary to set this property in order for the unsubscription links to work properly. It's also useful if you encounter any issues with links in newsletter e-mails - e.g. if you're using a different URL for your editing environment than for the live website. Example: https://www.example.com |
| • | choose Dynamic newsletter and enter the following details: - Source page URL: http://www.google.com - Schedule mail-outs: - Period: Minute - Start time: use the date-time picker to select the current date and time (Now) - Every: 1 minute - Between: 00:00 and 23:59 - Days: check all days |
Click OK.
Go to the Subscribers tab for this newsletter and add the previously created subscriber to this newsletter.
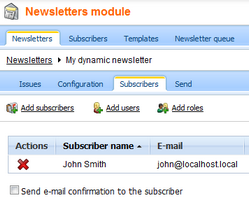
To do this, click the Add subscriber link, the following window appears:
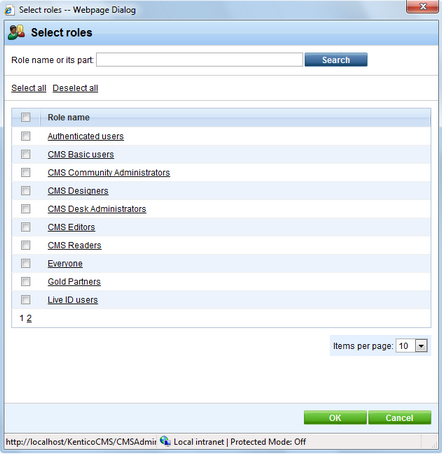
The three radio buttons at the top of the window are used for selecting the searched category. You can search among subscribers of all newsletters, users of the website or among user roles. Make the selection, enter the text you are searching for into the text field and click the Search button.
The searched text can be an e-mail address, a name or its part. If no search text is entered, a list of all entries in the selected category will be displayed. Select the subscribers you want to add and click the Add subscriber button. If you do this with the Send e-mail confirmation to the subscriber check-box checked, a notification e-mail will be sent to the selected users, informing them about the changes in their subscriptions.
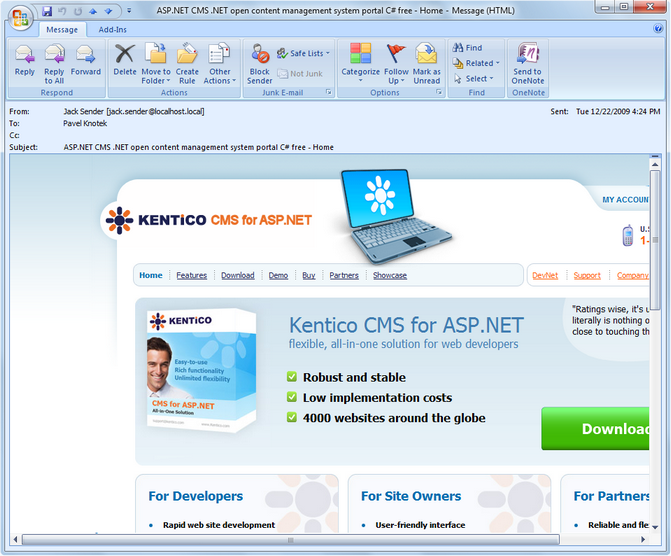
Go to the Issues tab. Here, you will see the list of sent issues. You may need to wait up to 2 minutes until the first issue is sent out. You can refresh the page by clicking the Issues tab again.

Check your mail box, you should receive the content of the given page by e-mail:
In this way, you can send out any page from your website. You can create a new page only for the newsletter purposes that will display e.g. new articles added to your website during the last month.
Blocking dynamic newsletter mail-out
If you want to block the mail-out of the page (e.g. if there are no new articles), set the page title to ##DONOTSEND## and the newsletter will not be sent.
Page url: http://devnet.kentico.com/docs/devguide/index.html?creating_a_dynamic_newsletter.htm

