|
Example: Adding a new main tab to CMS Desk |

|

|

|

|
In this example, you will see how to add another tab next to the Content, My desk, Tools and Administration tabs in CMS Desk. This procedure can be used to add your custom UI elements to any other personalizable part of the CMS. You can also integrate your custom modules into the UI this way as described here.
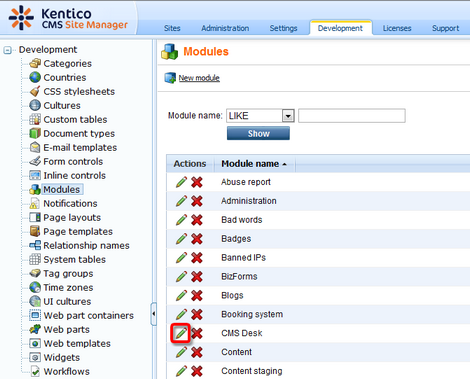
1. We know from this chapter that the main tabs belong to the CMS Desk module. Go to Site Manager -> Development -> Modules and Edit (![]() ) the CMS Desk module.
) the CMS Desk module.
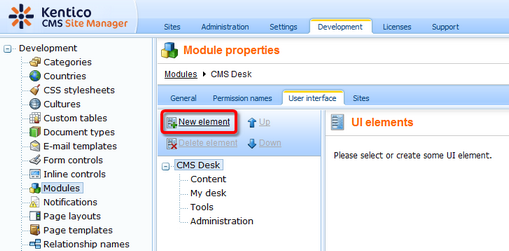
2. In the module's administration interface, switch to the User interface tab. You can see the four UI elements representing the tabs in the tree on the left. Select the root of the tree and click the New element (![]() ) button.
) button.
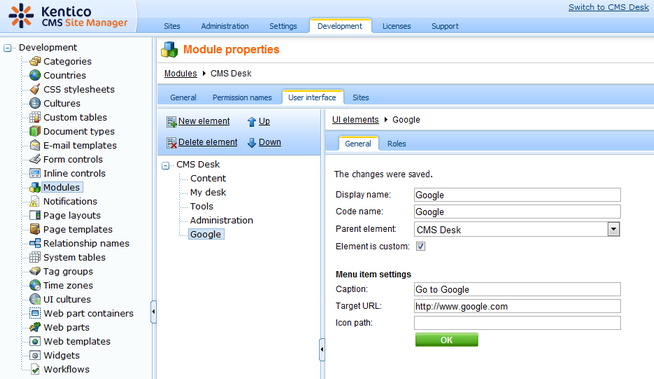
3. In the New element dialog, enter the following details:
| • | Display name: Google |
| • | Code name: Google |
| • | Element is custom: true |
| • | Caption: Go to Google |
| • | Target URL: http://www.google.com |
| • | Icon path: leave blank (icons can be used only for left menu items, not for tabs) |
and click OK. The new UI element will be added to the tree as in the screenshot below.
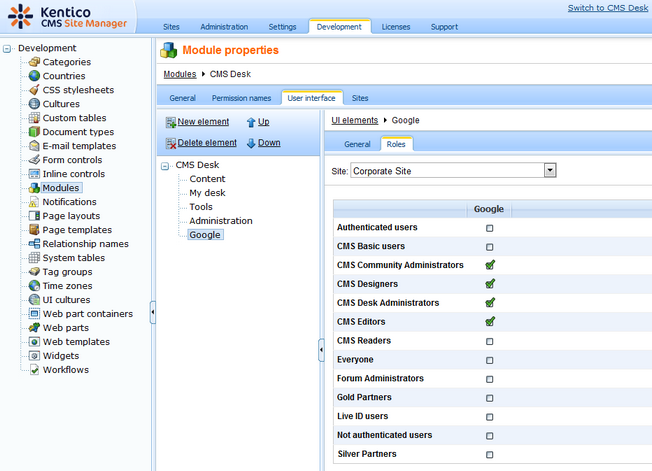
4. Switch to the Roles tab and enable the UI element for the desired roles.
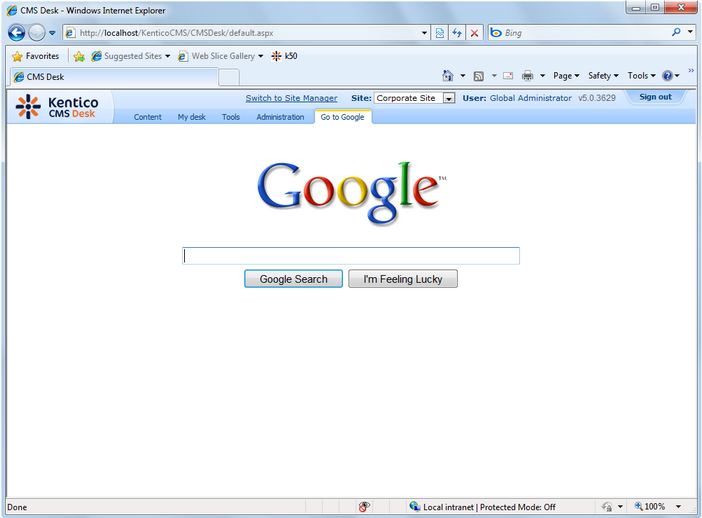
5. Now switch to CMS Desk logged in as a member of one of the roles enabled in the previous step. You will see our new Go to Google tab present next to the original four tabs as you can see below. By clicking it, you get the Google title page displayed within the CMS UI.
Page url: http://devnet.kentico.com/docs/devguide/index.html?ui_personalization_example_new_tab.htm