|
Example: Displaying offices on the map |

|

|

|

|
|
Example: Displaying offices on the map |
|
|
|
|
This example will show you how to display a list of offices and their location on the map.
Step 1 - Creating a new page with offices
Sign in as administrator to Kentico CMS Desk -> Content and click the root. Click New and choose to create a new Page. Enter the page name Offices and choose to create a blank page using the Simple layout. Click Save.
Now we need to add a list of offices. Switch to the Design tab and add the Repeater web part. Set the following properties:
| • | Path: /{0}/% |
| • | Document types: cms.office |
| • | Transformation: cms.office.simple |
| • | Item separator: <br /> |
Click OK.
Step 2 - Geocoding your information
Now we will create two documents of type Office. Click the Offices page and click New. Choose to create a new Office and enter the following values:
Office 1:
| • | Office name: Northwest Transport - New York |
| • | Address line 1: 1290 Avenue of the Americas |
| • | City: New York |
| • | ZIP code: 10104 |
| • | State: NY |
| • | Country: USA |
| • | Phone: 123456789 |
| • | E-mail: ny@north.com |
| • | Latitude: 40.76 |
| • | Longitude: -73.98 |
Click Save and another.
Office 2:
| • | Office name: Northwest Transport - San Francisco |
| • | Address line 1: 835 Market Street |
| • | City: San Francisco |
| • | ZIP code: 94103 |
| • | State: CA |
| • | Country: USA |
| • | Phone: 123456789 |
| • | E-mail: sf@north.com |
| • | Latitude: 37.78 |
| • | Longitude: -122.41 |
Click Save.
Please note: The Office document type already contains the Latitude and Longitude fields. If you're using a custom document type, you will need to define them. They must be of type Decimal number. You can call them as you need.
Step 3 - Displaying the content on the map
When you see the page now, it displays only a list of offices. Switch to the Design tab and add the Google services/Google Maps web part.
First, we will configure which documents should be displayed on the map. Set the following properties:
| • | Path: /{0}/% |
| • | Document types: cms.office |
It ensures that all offices in the current site section will be shown. Now we specify the transformation used for the text displayed in the balloon:
| • | Transformation: cms.office.preview |
Now we set the following values that specify how the map is displayed:
| • | Google maps key: leave this value empty if you're running the web site at http://localhost or http://127.0.0.1. If you use some particular domain name, you need to get a key at http://code.google.com/apis/maps/signup.html. |
| • | Large view scale: 7 (the default zoom) |
| • | Detailed view scale: 10 (the zoom used when viewing the selected document) |
| • | Width: 600 (in pixels) |
| • | Height: 400 (in pixels) |
| • | Default latitude: 39.27 (latitude of the map center when the overview map is displayed) |
| • | Default longitude: -98.20 (longitude of the map center when the overview map is displayed) |
| • | Latitude field: OfficeLatitude (the field containing the latitude information of the document) |
| • | Longitude field: OfficeLongitude (the field containing the longitude information of the document) |
| • | Tooltip field: OfficeName (the field displayed when you mouse-over a balloon representing the object on the map. |
Click OK.
Sign out and see the page. It will look like this:
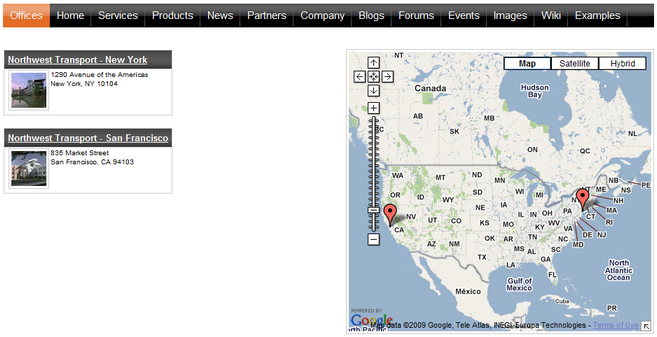
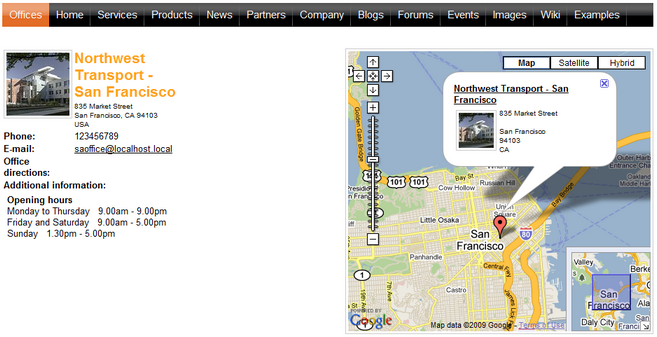
The is the overview map with balloons. When you mouse-over a balloon, you will see the office name. When you click a balloon or an office link in the list, you will see the detailed view:
Page url: http://devnet.kentico.com/docs/devguide/index.html?example_displaying_offices_on_the_map.htm

