Kentico CMS allows you to create secured site sections that can be accessed only by users who have a valid user name and password. We will create a simple page for partners that can be accessed only by registered users.
Go to CMS Desk -> Content, click root and click New. Choose to create a new Page. Enter page name Partners and choose to use the page template My web site/Left menu with right text. Click Save. Click the Down arrow in the main toolbar until you move the Partners page at the end of the list.
Click Page and enter the following text: This is a secured page for partners. Click Save.
Click Properties -> Security. In the Access section of the dialog, click Yes and click OK. This will ensure that the page can be accessed only by authenticated users.
Now we need to create the logon page. Go to Visual Studio and choose to create a new ASPX page in folder CMSTemplates\MySite. Call the page LogonPage.aspx and check the box Select master page. Choose the CMSTemplates\MySite\MyMaster.master page on the next dialog.
Add the following HTML code inside the <asp:content> element:
<table border="0" width="100%"> <tr valign="top"> <td style="width:50%"> </td> <td style="width:50%"> </td> </tr> </table> |
Switch to the Design tab and drag and drop the user control CMSWebParts/Membership/LogonForm.ascx inside the left column and the CMSWebParts/Membership/RegistrationForm.ascx user control into the right column. Set their properties:
LogonForm1
| • | AllowPasswordRetrieval: true |
| • | SendEmailFrom: <your e-mail address> |
RegistrationForm1
| • | AssignRoles: CMSPublicUsers |
| • | EnableUserAfterRegistration: true |
Switch to the code behind and add reference to the CMS.UIControls namespace:
[C#]
using CMS.UIControls; |
[VB.NET]
Imports CMS.UIControls |
You also need to change the class definition so that it inherits from the TemplatePage class:
[C#]
public partial class CMSTemplates_MySite_LogonPage : TemplatePage |
[VB.NET]
Partial Class CMSTemplates_MySite_LogonPage Inherits TemplatePage |
Save the changes. Now we need to register the logon page. Go to Site Manager -> Development -> Page templates, choose category My web site and register a new page template with following values:
| • | Template display name: Logon page |
| • | Template code name: LogonPage |
| • | Template type: ASPX page |
| • | File name: ~/CMSTemplates/MySite/logonpage.aspx |
Save the changes, switch to the Sites tab and assign the template to My web site. Now go to CMS Desk -> Content, click Root, click New and choose to create a new folder. Call the folder Special pages. Create a new page under the Special pages folder, call it Logon and choose the page template My web site -> Logon page. Click Save.
Configuring the logon page
We will need to configure the system so that it uses our new logon page. Go to Site Manager -> Settings, choose My web site in the drop-down list, click Security and set the value Secured areas logon page to ~/Special-pages/Logon.aspx, which is the relative URL of our logon page (from the web application root). Click Save.

Adding the Sign out button
Now we will add the "current user name" and "sign out" controls to our master page. Open the master page MyMaster.master in Design mode in Visual Studio and drag and drop the CMSWebParts\Membership\CurrentUser.ascx and SignOutButton.ascx controls just under the CMSMenu control:
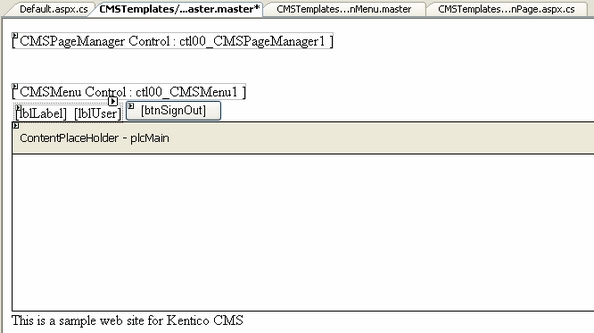
Set the following property values of these controls:
CurrentUser1
| • | ShowOnlyWhenAuthenticated: true |
| • | CssClass: CurrentUser |
SignOutButton1
| • | ShowOnlyWhenAuthenticated: true |
Now go to Site Manager -> Development -> CSS Stylesheets and add the following code to the end of the stylesheet used by your site:
.CurrentUser { color: black; } |
Save the changes.
Sign out. Click Partners in the main menu. You are redirected to the logon page:

Now you need either to sign in as administrator or sign up and create a new account. After you sign in successfully, you will see the Partners page content together with Sign out button:

You have learned how to secure part of the web site so that it's only accessible for registered users.
|
Displaying personalized content based on user's permissions
Kentico CMS also allows you to display a personalized content based on user's read permissions. You can e.g. grant gold partners with Read permission for the Gold partners section and then only the gold partners will see the menu item and page content.
You can find more details on personalized content in Developer's Guide -> Security, permissions and personalization -> Displaying personalized content. |

You have just finished the sample web site.