The purchase process can be enhanced with your custom steps or you can remove some steps. This can be done at CMS Desk -> Tools -> E-commerce -> Configuration -> Store settings -> Checkout process.
For each step, you can specify the following values:
Caption |
The step caption in the checkout process. |
Code name |
The name of the site used in the code. |
Image file name |
Name of the file used in the checkout process header. The image must be stored in folder ~\App_Themes\<stylesheet name>\Images\ShoppingCart. |
Control path |
Virtual path to the ASCX control representing the dialog in the given step. Example:
~/CMSEcommerce/ShoppingCart/ShoppingCartOrderAddresses.ascx |
Show on the live site |
Indicates if this step should be used in the checkout process on the live site. (see below) |
Show in Customer section |
Indicates if this step should be used in the checkout process when creating a new order for the given customer. (see below) |
Show in Order section |
Indicates if this step should be used in the checkout process for a new order created from the administration interface. (see below) |
Show in Order items section |
Indicates if this step should be used in the checkout process when editing items of an existing order. (see below) |
See chapter Developing custom dialogs for the checkout process for more details on development of custom steps.
Types of the checkout process
There are four different types of checkout process:
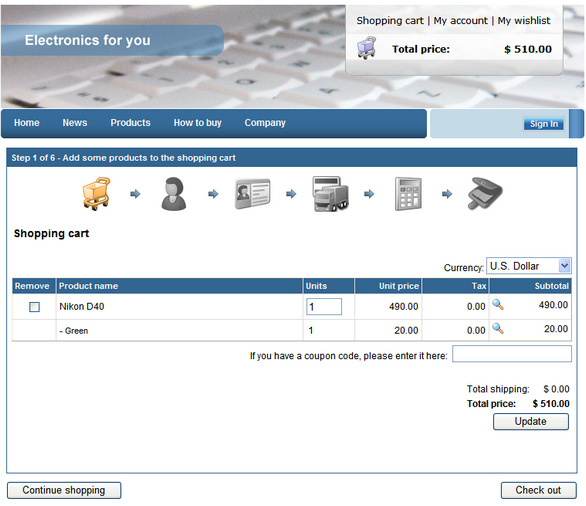
| • | Checkout process 1 - New order on the live site |
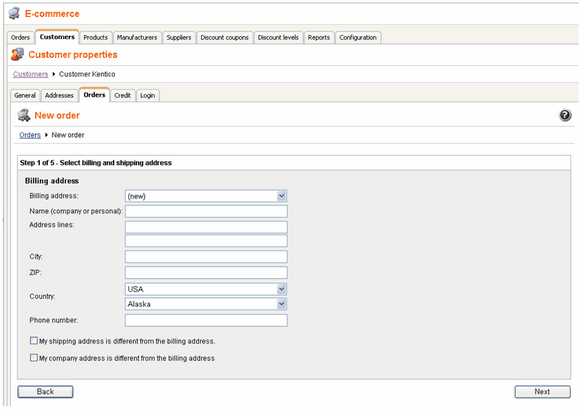
| • | Checkout process 2 - New order from section CMSDesk -> Tools -> E-commerce -> Customers/(some customer) -> Orders. |
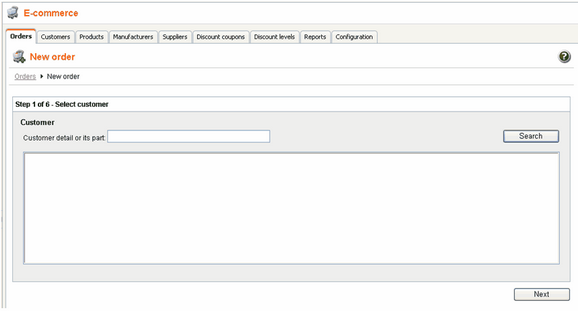
| • | Checkout process 3 - New order from section CMSDesk -> Tools -> E-commerce -> Orders. |
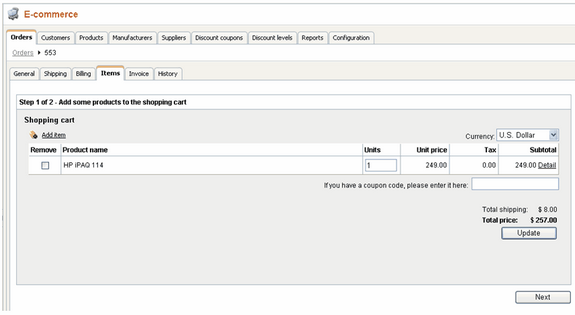
| • | Checkout process 4 – Editing existing order from section CMSDesk -> Tools -> E-commerce -> Orders -> (some order) -> Items. |
Below, you can find the screenshots of these types:
Checkout process 1 – New order on the live site
Checkout process 2 - New order from section CMSDesk -> Tools -> E-commerce -> Customers -> (some customer) -> Orders
Checkout process 3 - New order from section CMSDesk -> Orders
Checkout process 4 - Editing existing order from section CMSDesk -> Tools -> E-commerce -> Orders -> (some order) -> Items.