Marketing automation with discount coupons
Have you ever wondered how to automatically send a discount promotion to your contacts? This new addition to the Email Marketing coupons module solves just that problem. With it, you can automate coupon generation using Kentico’s powerful Marketing Automation feature.
With just a few clicks, and the Email Marketing Coupons Module 1.1.0, you can define an automated process for distributing discount coupons. Let’s take a look at a quick example using our sample E-commerce Site.
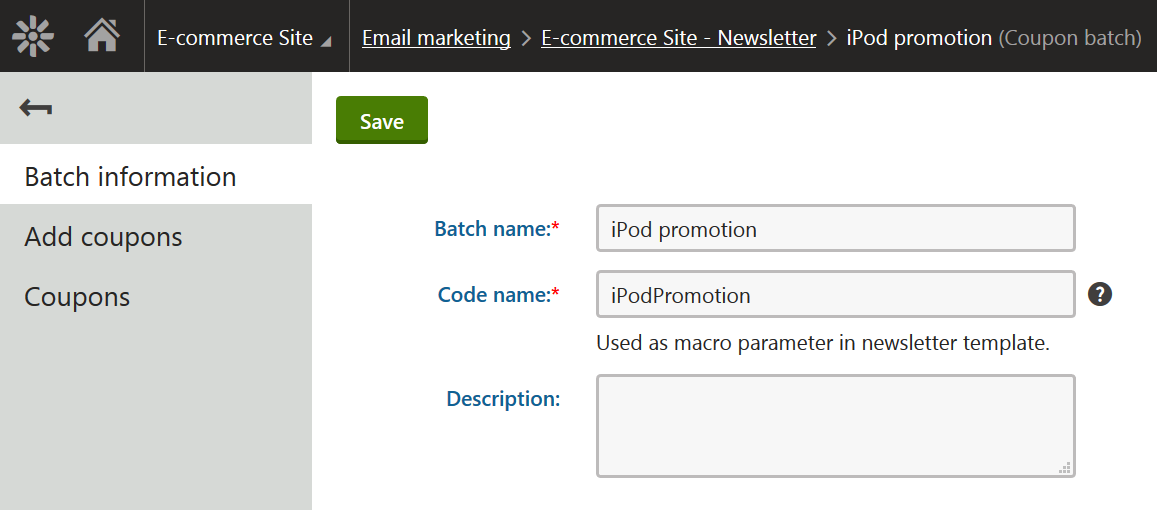
After you have successfully installed the Email Marketing coupons module, head over to the Email Marketing application and edit the store newsletter. In its properties, you will see a new tab called “Coupons”. Open it, and create a new discount batch. Make sure to copy the code name! You will need it in just a second:
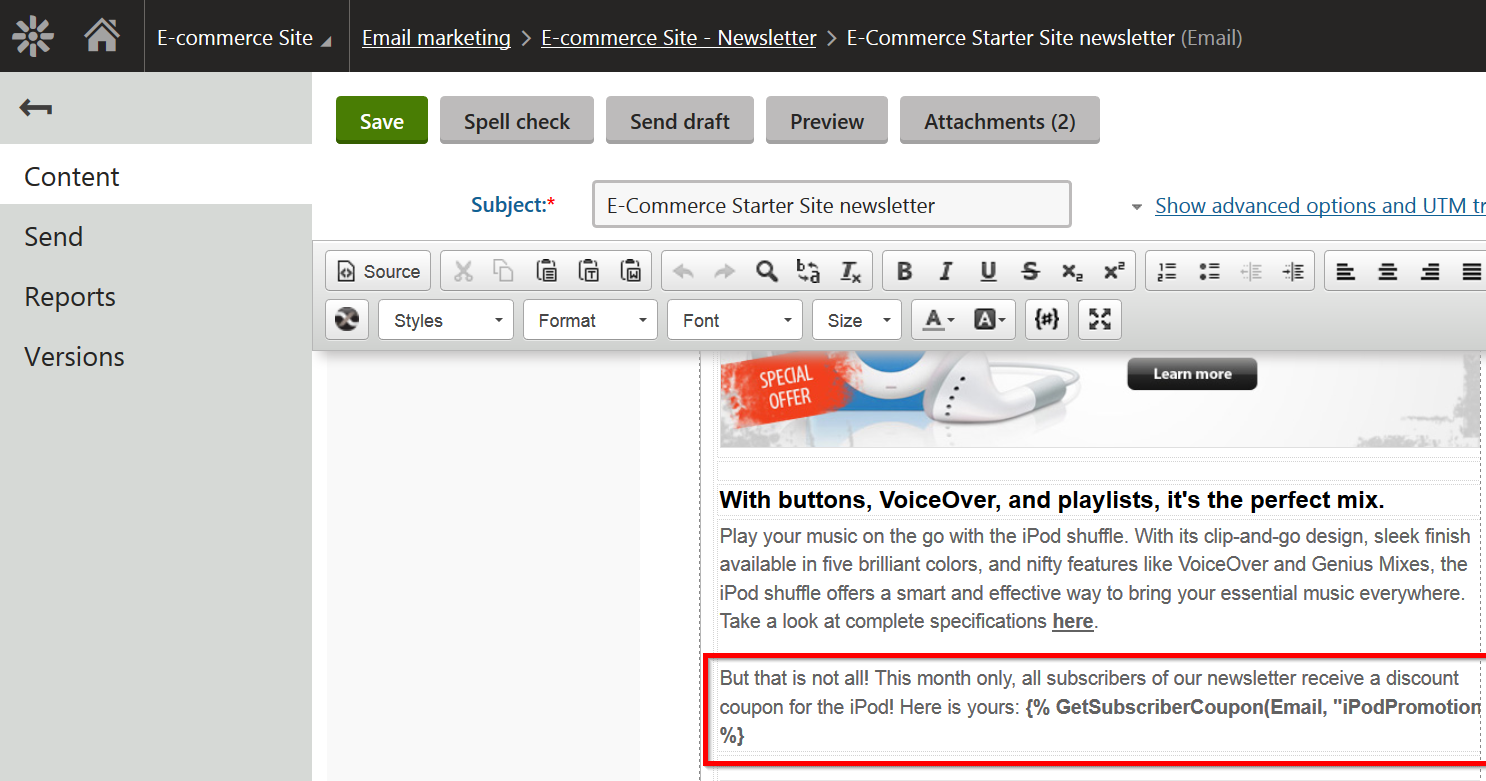
Afterwards, head back to the email campaign details, and edit the campaign email. Using the batch code name, enter this macro anywhere in the body of the email in format {% GetSubscriberCoupon(Email, "iPodPromotion") %}, like this:
When the email is sent out, Kentico will run the macro and look up a coupon assigned to the subscriber based on their email address. Now we need to ensure that the subscriber has a coupon assigned to them.
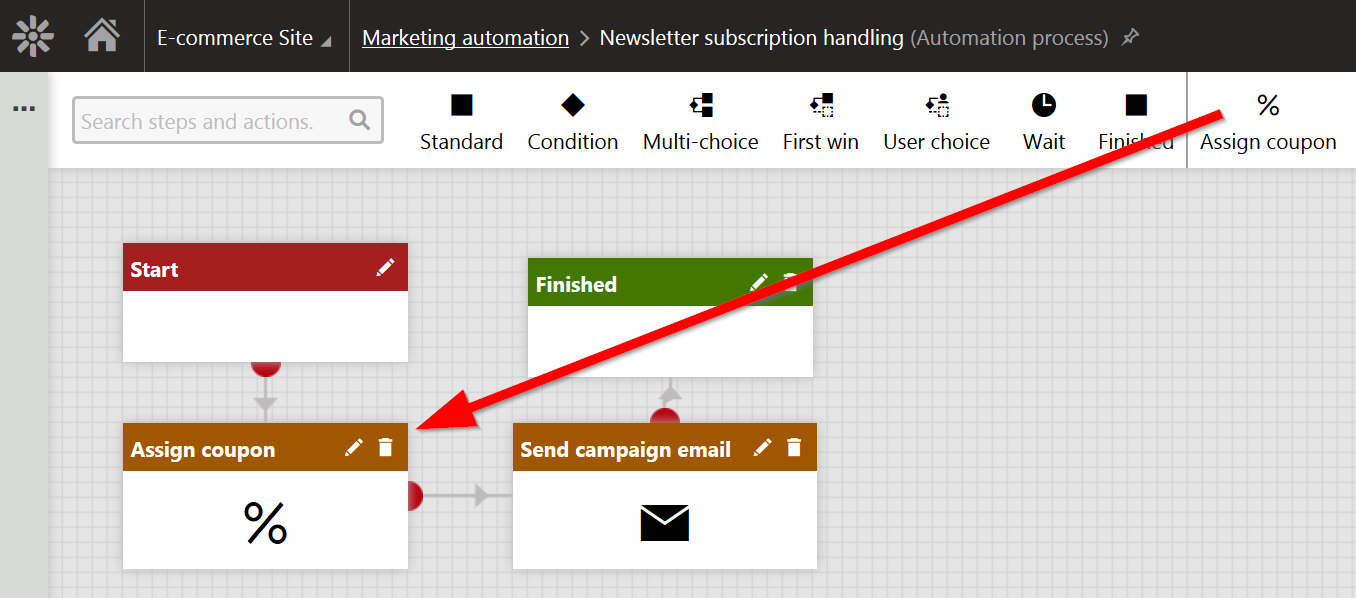
You can already see how to manually assign coupons in my previous article. In this example, we will use the new marketing automation step. If you are familiar with the Marketing Automation module already, there are no surprises here. Create a new automation process using the trigger “Contact subscribed to Email campaign,” for example, and add the following steps. As you can see, there is now a new step type available for you to use:
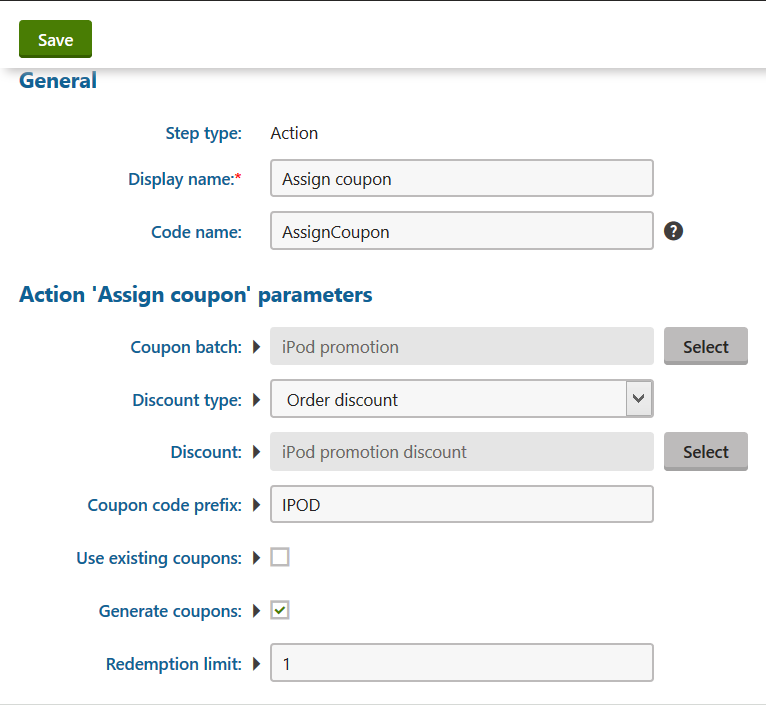
After you’ve placed the step, access its properties to configure it. You can use any site discount already defined on the site, but for our process I have created a new Order Discount in the E-commerce module, and configured it to require coupons.
As you can see, I have configured the step to generate a new single-use coupon for each new subscriber, with prefix “IPOD:”
And that’s it; we are now all set! But before you head out to test the process, make sure that your Email Marketing module is enabled in: Configuration -> Settings -> On-line marketing. Also, ensure that the Email Marketing campaign is set to track activities in: Email marketing -> E-commerce Site – Newsletter -> Log on-line marketing activities. These are disabled by default in the sample E-commerce Site template!
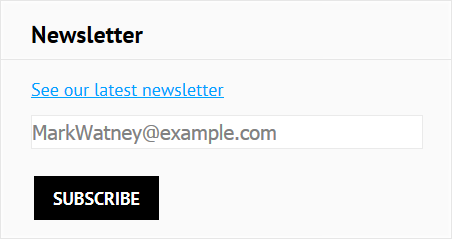
When you’re ready, open a different browser than you’re using now, or use the Private/Incognito browser mode, and head over to the E-commerce Site home page. Find the subscription form and enter any email address:
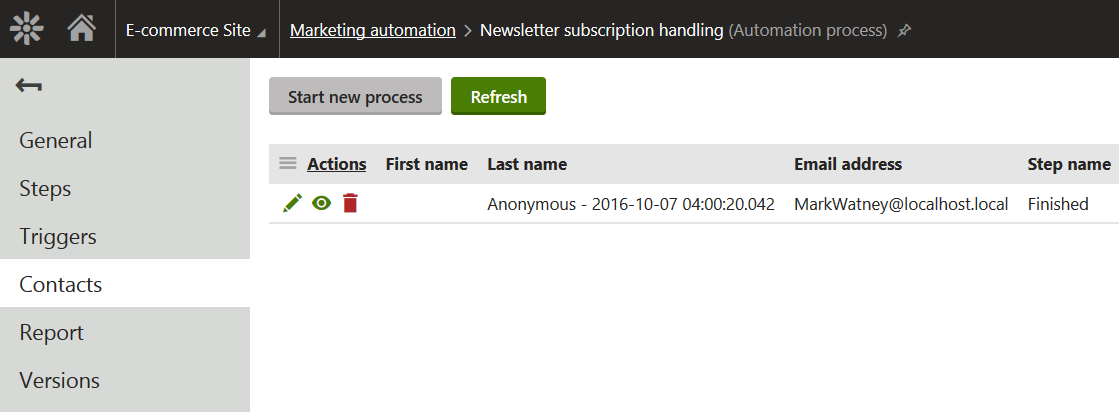
Now, to see the automation in action, switch back to your first browser and head over to the marketing automation process we have defined. Go to the Contacts tab and after a few seconds you will see a new record appear for the subscriber as it enters the process:
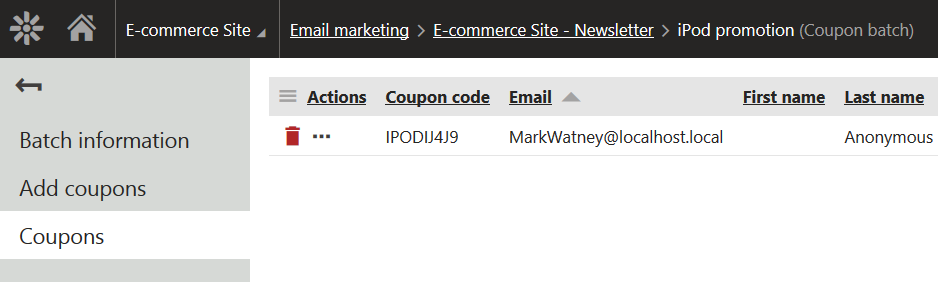
After it has finished, take a look at the discount batch inside the email campaign. It now contains a coupon assignment for the subscriber’s email:
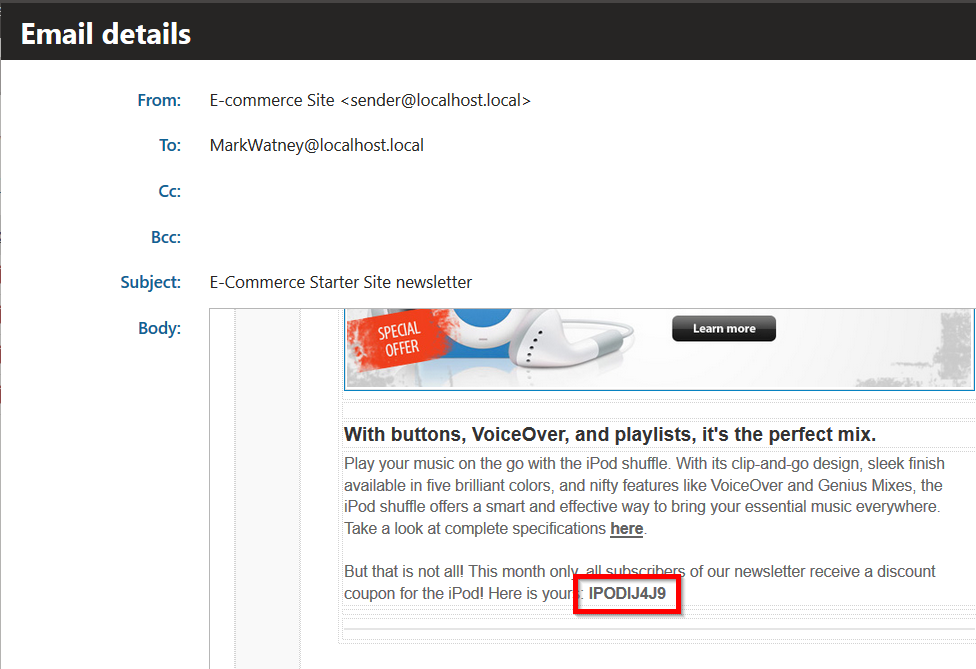
Finally, head over to the Email Queue application. There you will be able to review the final email as it is being sent to the subscriber. Inside the body of the email, the coupon macro has been replaced by the actual coupon code value:
As you can see, thanks to the flexibility of the email marketing module we were able to tap into its functionality for our custom scenario. This was just a simple example automating coupon generation for new subscribers, but the same approach can be used in much more complex scenarios, such as drip campaigns, lead nurturing, or rewards campaigns.
If you are a developer, and would like to know more about how to implement a custom automation step, head over to our documentation and see the examples we have prepared for you.
Full source code of the Email Marketing Coupons module is available on Marketplace, which means that you can also take a look at the internals of the Assign Coupon action shown in this example. Its code is located in the AssignCouponAutomationAction.cs class.
Even though a few things have changed since version 1.0, you can also check out the previous article describing the module functionality in much deeper detail.
I hope you will like this new tool, and please share your ideas with us for awesome Marketing Automation scenarios!