Dynamically Replacing Content in Kentico - Part 1
Nearly every article features keywords and terms that grab the reader’s attention and emphasize the writer’s point. Whether it’s referencing a popular technology or product, wise authors know that using the correct terms and references within their content can greatly improve its readability and SEO. In this blog, I’ll show you how to leverage Custom Tables and the Kentico API to replace terms dynamically with links, ensuring your content is as engaging as possible.
While editable regions are great for allowing editors to input their own content, companies often need to emphasize or highlight specific terms on a regular basis. If your editors are gifted in the ways of HTML, this is an easy process for them. If you content writers are more business-focused, this may be a challenge since an administrator or editor will have to go back into their content to update it with the appropriate links.
In this blog, I’ll show you how to leverage Custom Tables within Kentico, along with the API and global events, to replace content dynamically throughout the site. Additionally, I’ll demonstrate how to leverage macros and transformations within your code to provide an updateable interface for your links moving forward. So let’s get to it!
Create a custom table
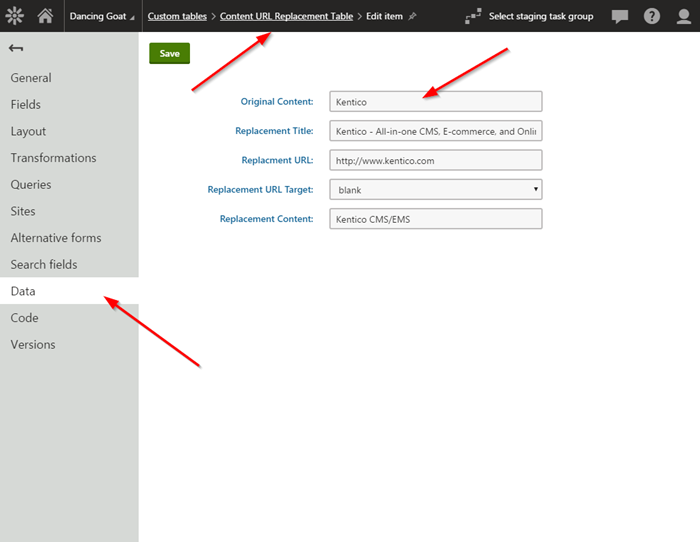
The first step of the process is to create a custom table to hold my data. In my scenario, I wanted to replace certain phrases with links dynamically. Because of these requirements, I created the following fields within my table:
OriginalContent
This is the original text we will be trying to match within our content.
ReplacementTitle
This is the title attribute for the replacement link.
ReplacementURL
This is the URL attribute for the replacement link.
ReplacementURLTarget
This is the target attribute for the replacement link.
ReplacementContent
This is the replacement text. If populated, the OriginalContent text will be replaced with the entered value.
After adding the custom table, I added the following sample record:
Adding a Global Event Handler
The next step is to create a Global Event Handler for the OutFilterContext.CurrentFilter.OnAdterFiltering event. This event will be executed after the output filter has processed the produced content. The idea is that once the output is created, we will replace any of the entered values with links before it is sent to the browser.
            // Creates an output filter instance
            ResponseOutputFilter.EnsureOutputFilter();

            // Assigns a handler to the OutputFilterContext.CurrentFilter.OnAfterFiltering event
            OutputFilterContext.CurrentFilter.OnAfterFiltering += CurrentFilter_OnAfterFiltering;
Adding the OnAfterFiltering Event
Once the Global Event Handler is created, I was ready to add the actual replace code. Because this code will be fired any time the output filter is executed, I wanted to make sure it was as efficient as possible. To achieve this, the following guidelines were created:
It will only execute for the live site.
To ensure we are dealing only with live site request, the following code checks the PortalContext.ViewMode property:
                // Only do this for the Live site
                if (PortalContext.ViewMode == ViewModeEnum.LiveSite){
The code should leverage caching to prevent excessive database calls.
To ensure my code was not making unnecessary calls, I leveraged the CacheHelper API to get and set the replacement values every 60 minutes.
                    // Try to get the data from cache
                    var items = CacheHelper.Cache(() => CustomTableItemProvider.GetItems("Custom.ContentURLReplacementTable").TypedResult,
                      // Cache for 60 minutes with "contenturlreplacementvalues" cache key
                      new CacheSettings(60, "contenturlreplacementvalues")
                      {
                          // Setup the cache dependencies, flush the cache if any of the content replacement values are changed
                          CacheDependency = CacheHelper.GetCacheDependency("customtableitem.custom.contenturlreplacementtable|all")
                      }
                    );
Another important thing to note is the use of cache dependencies. This code allows the cache to be updated in the event that any of the items within the custom table are updated.
The code should leverage a transformation to allow for easy editing of the link layout.
To make the functionality as easy to update as possible, I leveraged a transformation on my custom table to allow updating of the layout.
// Get the transformation text for the replacement content template
TransformationInfo tinfo = TransformationInfoProvider.GetTransformation("custom.contenturlreplacementtable.replacementurl");
                                // Create a new instnace of the resolver
                                var resolver = MacroResolver.GetInstance();

                                // Set the NamedSourceData to the item. We will reference the properties in the transformation by Item.[Property]
                                resolver.SetNamedSourceData("Item", item);

                                // Replace the content
                                finalHtml = finalHtml.Replace(strOriginalContent, " " + resolver.ResolveMacros(tinfo.TransformationCode) + " ");
To use a transformation, I used the MacroResovler.SetNamedSourceData to set the context of the data in my custom table item. Additionally, I used the TransformationInfoProvider to get the transformation code. The transformation is then sent to the MacroResolver, which resolves the found values within the layout code.
Adding the Transformation
The last step of the process is to add the transformation to render the replacement links. Because I set the MacroResovler.SetNamedDataSource value to the custom table item, I can reference the “Item” namespace within the transformation to resolve the values dynamically.
<a title="{%Item.ReplacementTitle#%}" href="{%Item.ReplacementURL#%}" target="{%Item.ReplacementURLTarget#%}">
{%if (Item.ReplacementContent != "") { Item.ReplacementContent} else {Item.OriginalContent} #%}</a>
Because the layout is in a transformation, it can easily be updated in the future if the styling or functionality needs to be adjusted. Additionally, I used conditional logic to determine if the actual text should be replaced along with the link.
Testing
Once all the coding was completed, it was time to test. I updated an editable region with my sample content.
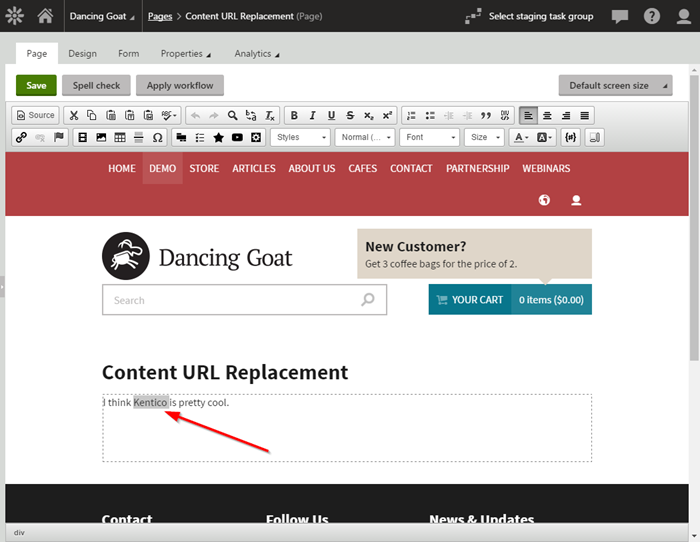
Note that because the above view is in the Content Tree module, the Global Event Handler is not executing because of the ViewMode setting.
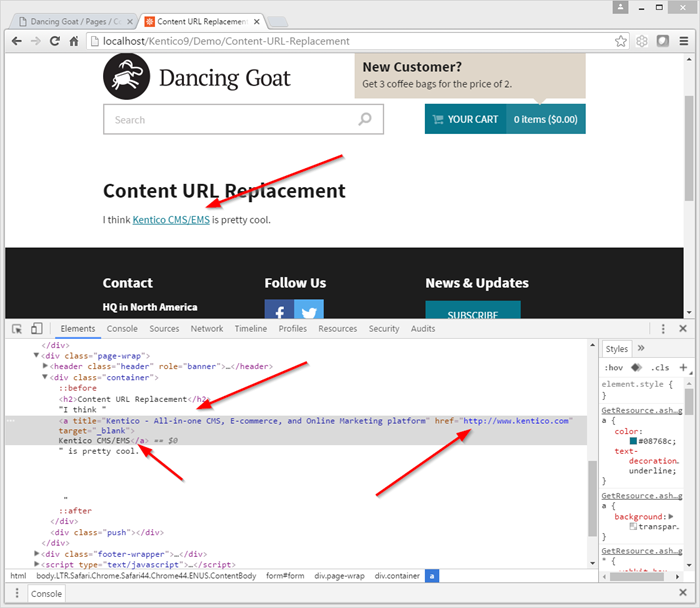
When viewing the live site, the code is replaced with my dynamic values.
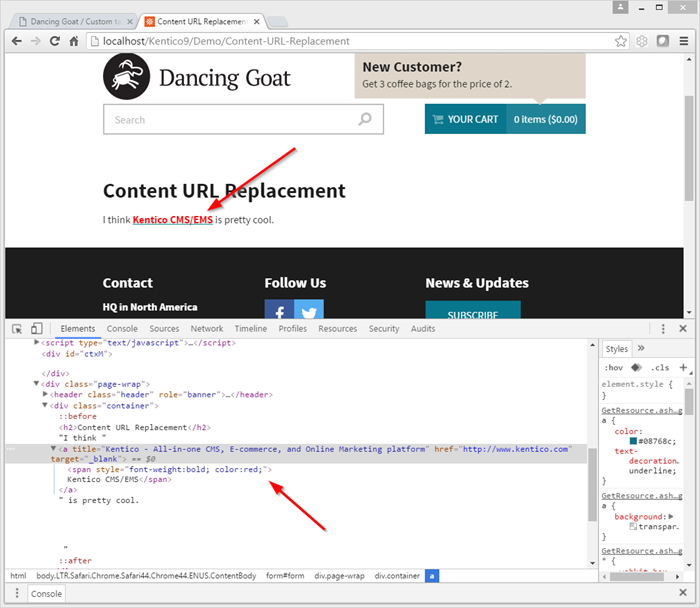
I updated the transformation to confirm the changes were implemented.
Moving Forward
Hopefully, this blog demonstrates how easily you can manipulate your output using Custom Tables and Global Event Handlers. This is a great way to add dynamic functionality with little user interaction. For any important terms or phrases, you can inject custom layouts to achieve your content goals.
Get the code
Exported custom table
This blog is intended for informational purposes only and provides an example of one of the many ways to accomplish the described task. Always consult Kentico Documentation for the best practices and additional examples that may be more effective in your specific situation.