Deploying Kentico to Azure Web Apps – Part 2. Running & Monitoring
Now that you have your application in Azure and everything is awesome (think the Lego Movie), let’s talk about keeping it running well and performing optimally. Any hosting solution can be used for your site, but Azure Web Apps have a lot to offer in terms of monitoring, updating, and maintenance of your site. This blog is focused on those features and on demonstrating how you can leverage them for your deployment.
This blog is Part 2 of my series on Deploying Kentico to Azure Web Apps. Be sure to check out Part 1 if you missed it!
1. Visual Studio Online to Azure Web Apps with a few clicks
OK, this feature isn’t exactly new but it’s one of the most important ones I wanted to highlight in this series. Microsoft has continued to develop the AWA space and as part of those updates connected Visual Studio Online to Azure Web Apps. What this means for developers is that you can go from editing on your machine, to checking into source control, to rolling out a deployment, all within VS. This is a great way to streamline your development and rapidly roll out your changes. Connecting with source control allows you to protect your code and ensure only the proper versions are deployed.
In order to use this feature, you will need to connect your site to Visual Studio Online, GitHub, Dropbox, Bitbuket, CodePlex, or some other repository. In my demo I’m using VS Online but the process is relatively the same for GitHub. You can find all details on connecting your site to VS Online below.
http://azure.microsoft.com/en-us/documentation/articles/cloud-services-continuous-delivery-use-vso/
The basic steps are:
- Sign up for TFS Online
- Create a new team project within VS Online
- In VS, connect to your new VS Online account
- Add your project to VS Online
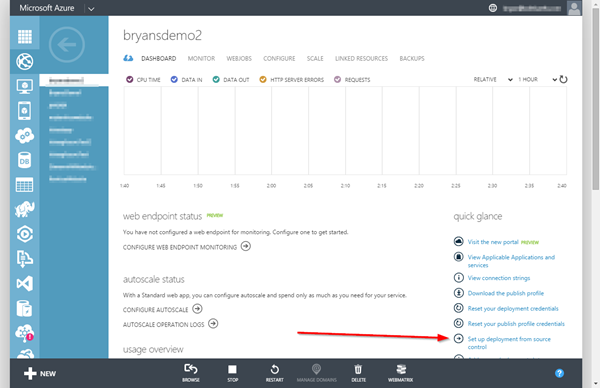
- In the Azure Portal, click Set up deployment from source control and connect it to VS Online
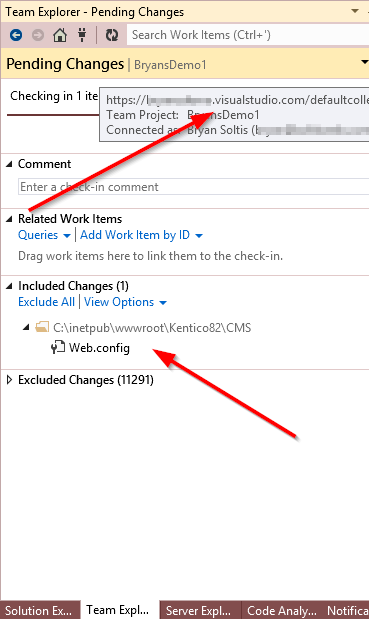
Once you are setup, you can check-in changes right from VS. If you have Continuous Integration set up, this will cause a new build and publish straight to your site (i.e. Continuous Integration).
Note
I will be covering the VS Online to AWA topic a lot more in Part 3 of the series!
2. Edit in Visual Studio Online
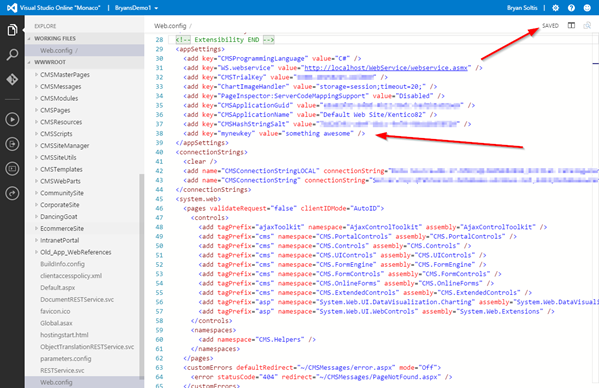
This is another feature that can save you a ton of time. This functionality allows you to open Visual Studio from the web and update your files right within your browser. If you are using the web site project type (and not using some source control for some reason) you can use this feature to update files directly on your site without ever having to open VS. What’s really cool is that you also get syntax highlighting and search capabilities. While I think this will save some developers a lot of time, I do have some mixed feelings on this one. You should be using source control for your site and this goes against that concept.
Note
If you have source control for your web app, any edits made in the online tool will be overwritten during the next deployment!
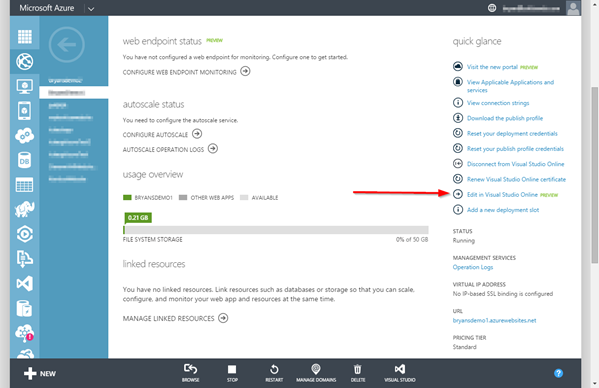
Be sure you have the option enabled for your Web App to access.
3. Monitoring And Diagnostics
Now that your site is in AWA, you’re going to want to make sure it’s up and running at all times. Microsoft has added a couple of great features to Azure to make your life easier, and maybe cut down on some 3rd party systems you might be currently using.
Metrics Page
On the Monitor screen you can view a lot of metrics for you site. There are some default ones to give you the base information about what is happening for the last hour, the last 24 hours, or the last seven days.
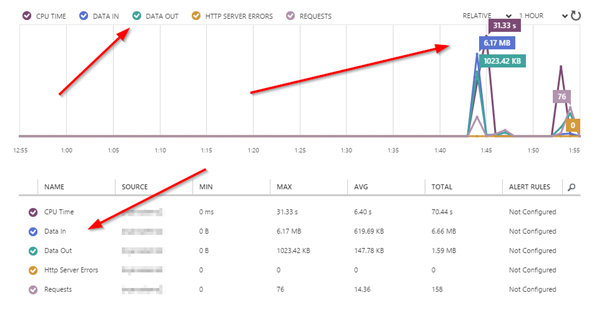
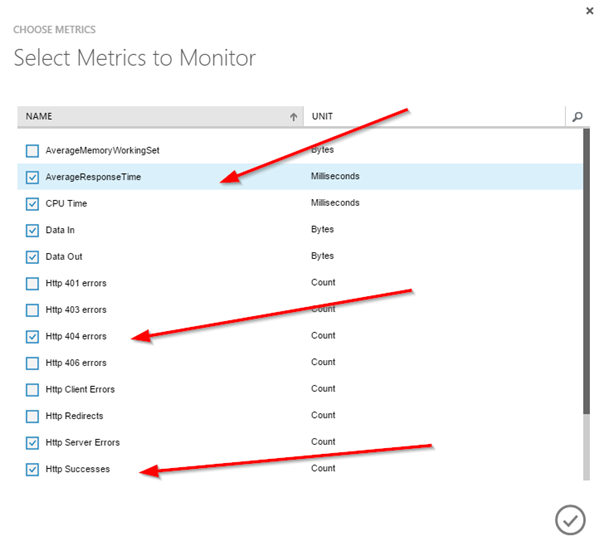
You can add a lot more stats to the page if you need to. Some notable ones are AverageResponseTime, total 404 Errors, and the MemeoryWorkingSet.
Note
It may take a few minutes for metrics to show up in the chart.
Configure Page
One of the best features on the Configure page is the monitoring section (currently in preview). This option allows you to set up two different end point monitoring services that will ping your site and alert you if it’s not reachable. With locations around the world, it’s a great alternative to sites like SiteUptime.com and other monitoring services.
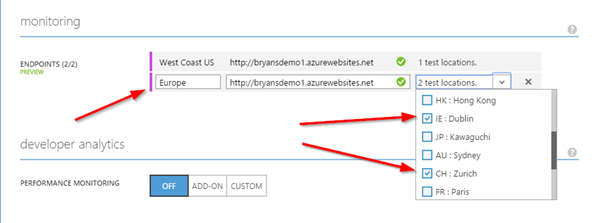
You can assign up to three locations per endpoint, which is great for covering an entire region / location.
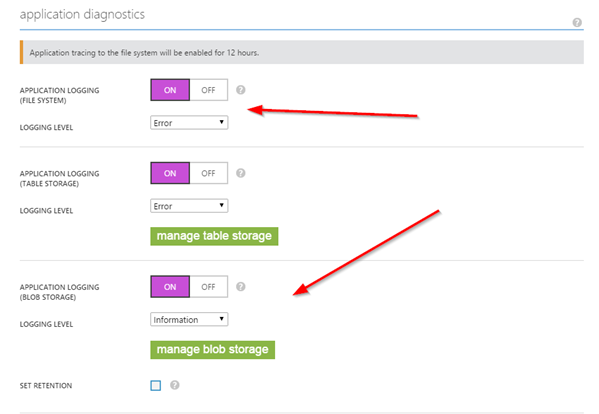
On the Configure page, you can dig a lot deeper into the site and what is happening. In the application diagnostics section you can turn off/on application logging and choose where you want to save the files.
Under site diagnostics you can configure web server logging, failure request tracking, and even remote debugging. You can specify the retention policy and storage location for your logs, as well as the version of VS to debug with.

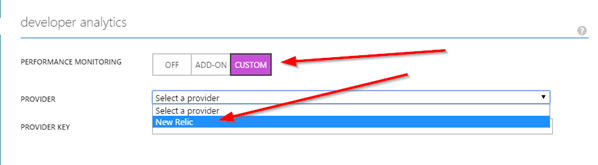
If the default diagnostics don’t meet your needs, in the developer analytics section you can add on a 3rd party tool like New Relic for monitoring your site. You can also develop your own custom tool to use.
These settings are great for viewing the current site activity and, more importantly, finding what is wrong and where it’s happening.
4. Scaling
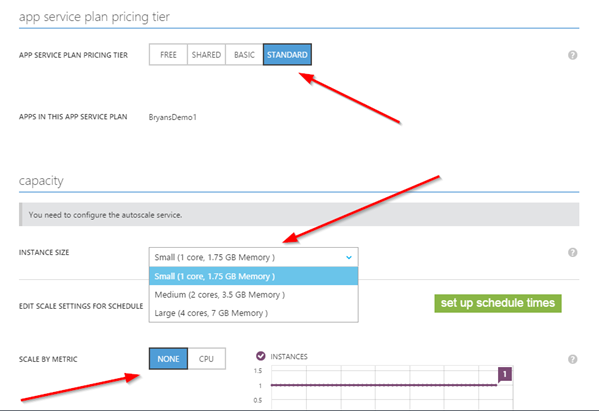
So your site is getting so much traffic that it’s loading like Netflix over dial-up? On the Scale page, you choose just how beefy of a server configuration you want it to run on, the number of servers, and even set it to auto-scale up and down based on the load or at set times. This is a great way to get the horsepower when you need, but scale back down when things get quieter.
Note
Like other areas, the Scaling options are based on the App Service Pricing Plan Tier you are currently using.
Wrapping up
As you can see, Microsoft has continued to add a ton of great features to Web Apps,and we haven’t even covered possibly the best addition, Continuous Integration! In the next blog of the series I will show you how CI and Azure work great together and how you can use VS Online to develop and maintain your application. See you next time!